Introduction
This tutorial demonstrates how to build a simple C++ Casino Number Guessing Game using Jenkins. The game generates a random number depending on the chosen difficulty level, and players win a prize if they guess the correct number.
Requirements
- Docker
- Docker compose
- Git
- VS Code
Fork and clone the sample repository
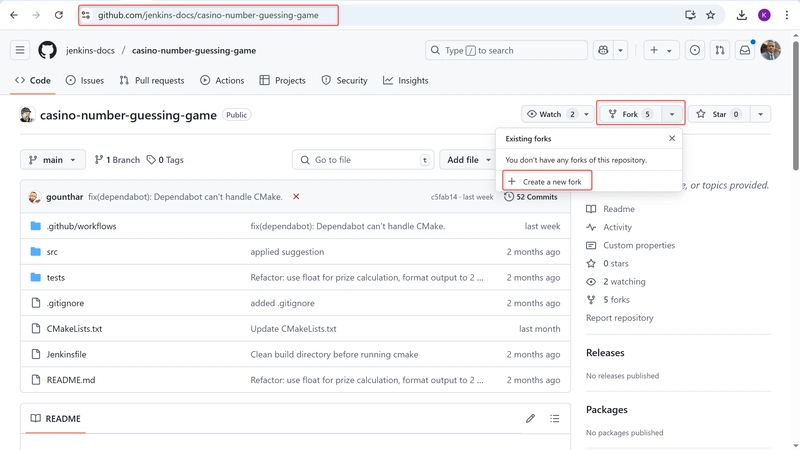
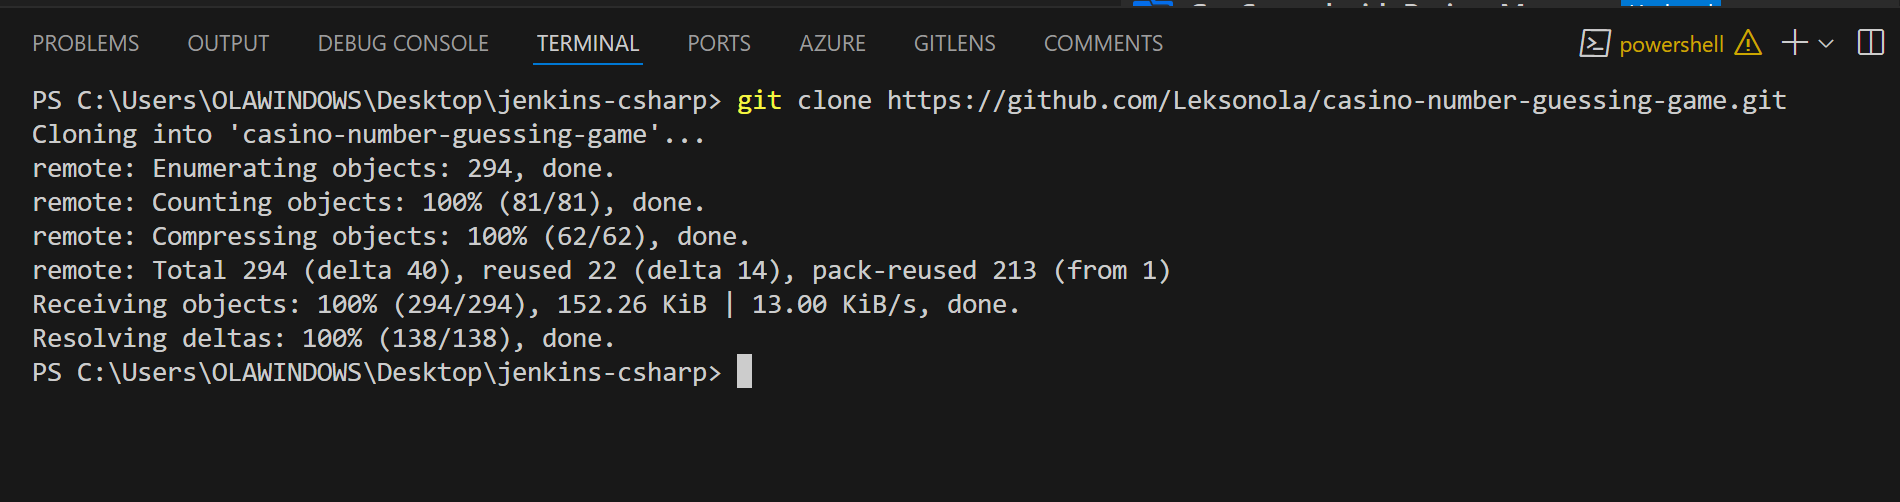
First, fork the sample repository containing the Casino Number Guessing Game’s C++ code to your GitHub account. Then, clone your fork to your local machine.
- Sign into your GitHub account
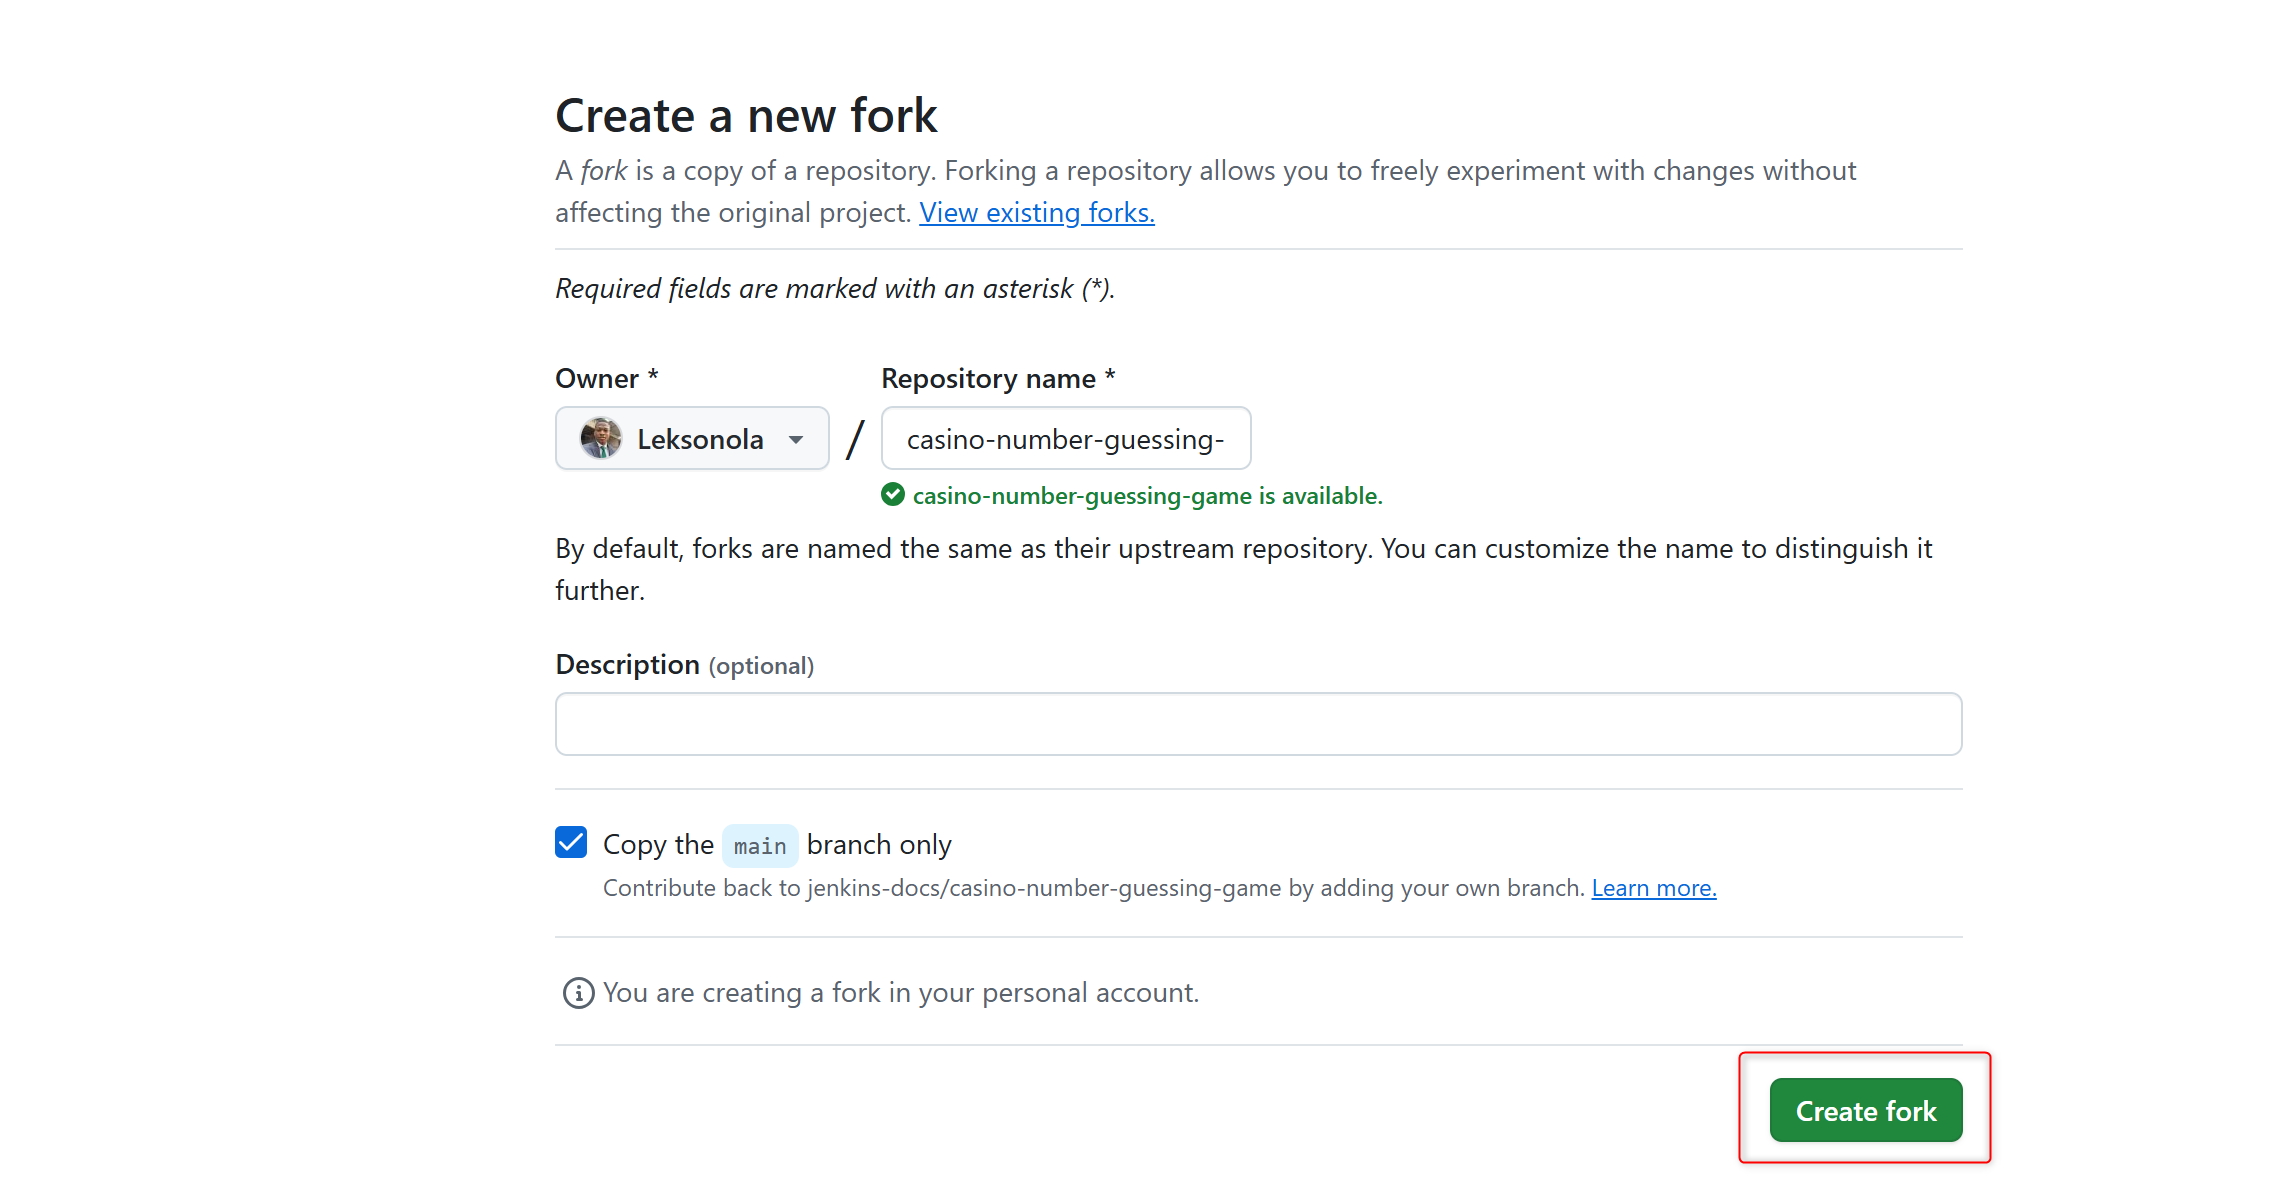
- Fork the casino-number-guessing-game from GitHub into your GitHub account

- Click Create fork
- clone the forked repository using VS Code by running the following command
git clone [repo-URL]
To get repo-URL, click code and copy HTTPS url.
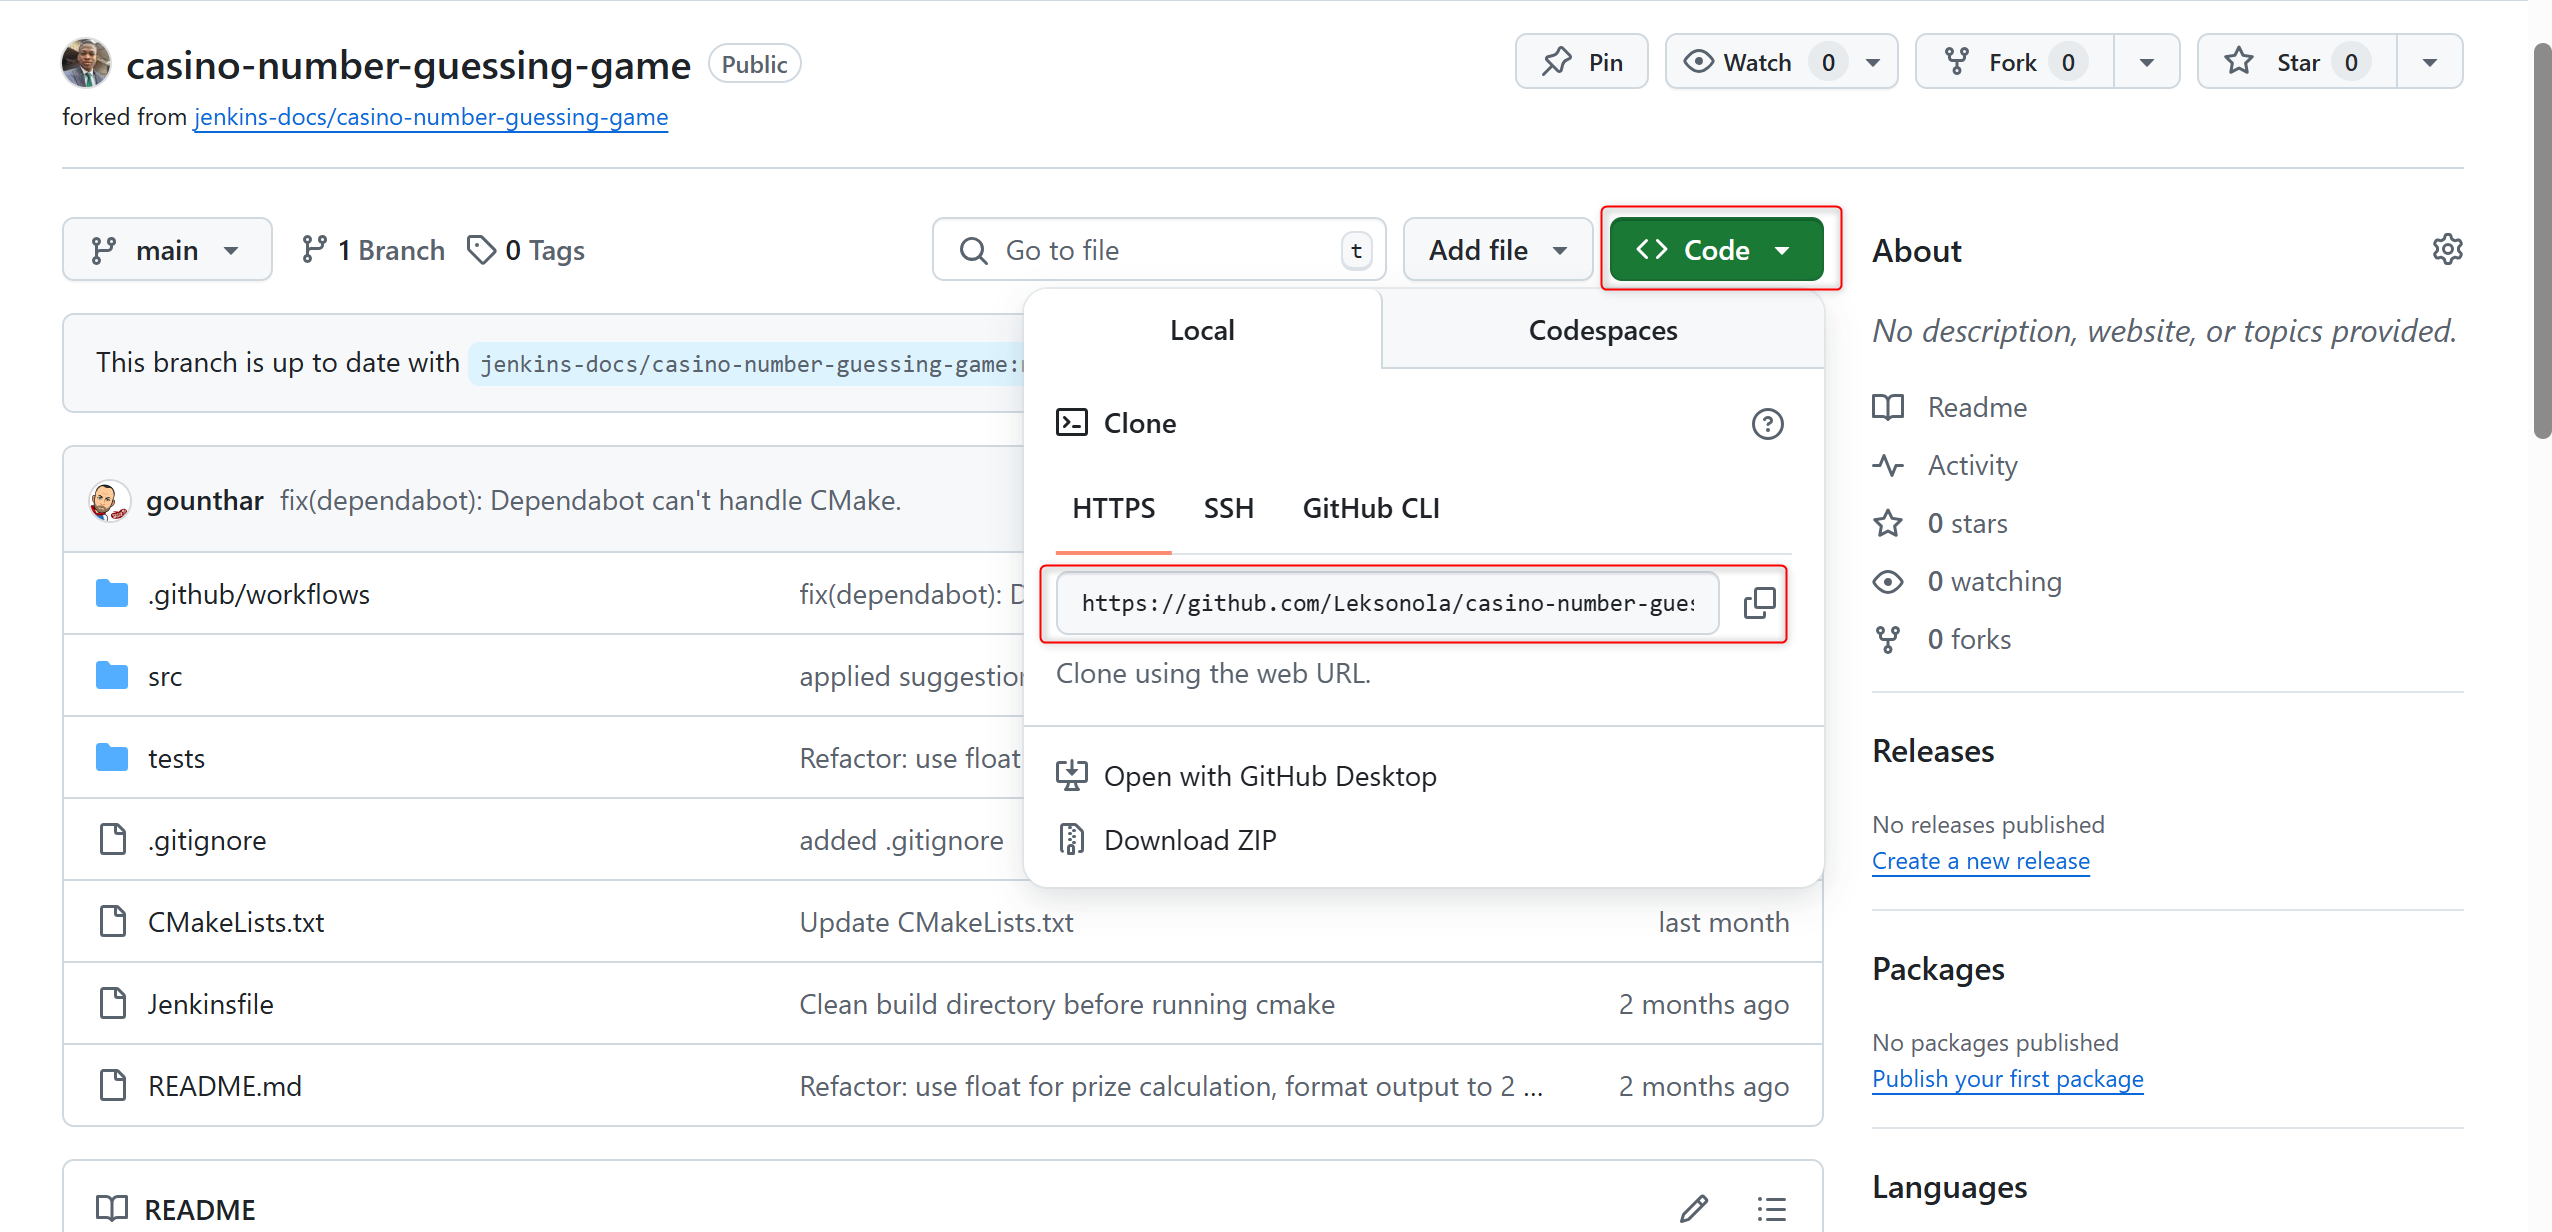
NOTE:Make sure to create a folder before running the command.
Start your Jenkins controller
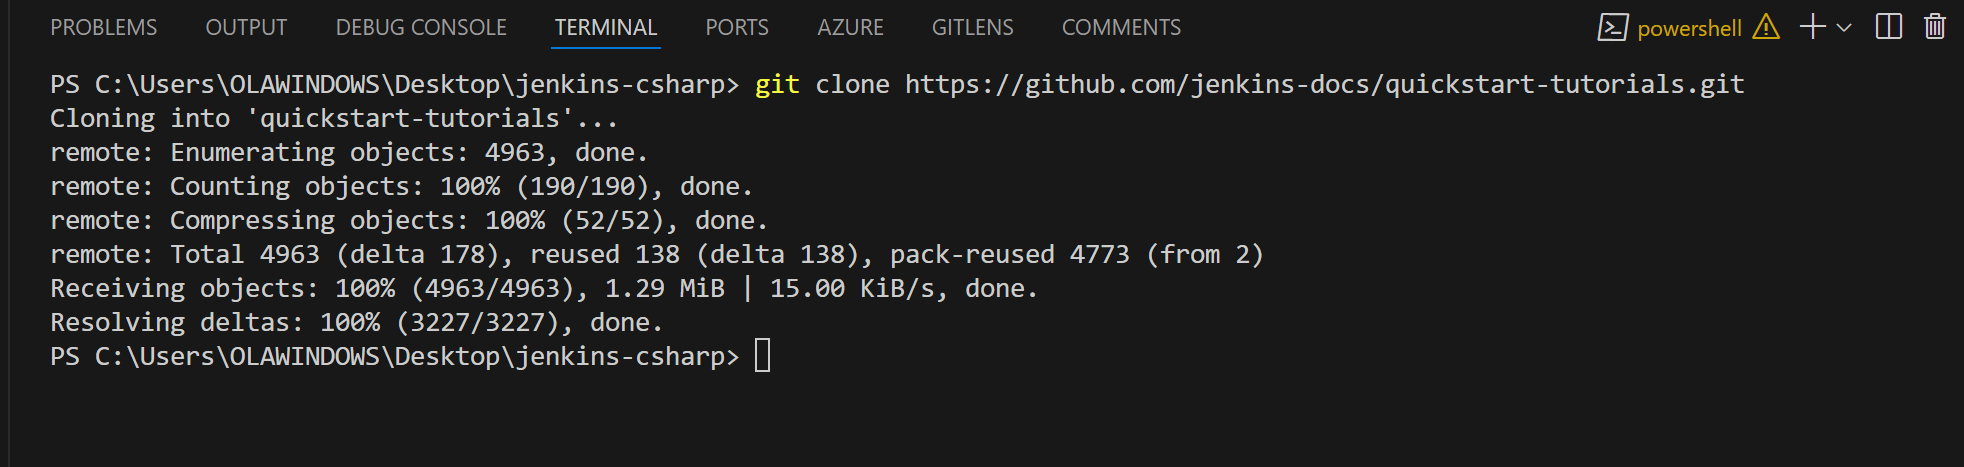
- Clone the quickstart-tutorials repository to get the latest preconfigured Jenkins deployment by running the command
git clone https://github.com/jenkins-docs/quickstart-tutorials.git
- Run the following command after cloning. Make sure to cd into quickstart-tutorials directory before running it.
docker compose --profile cpp up -d
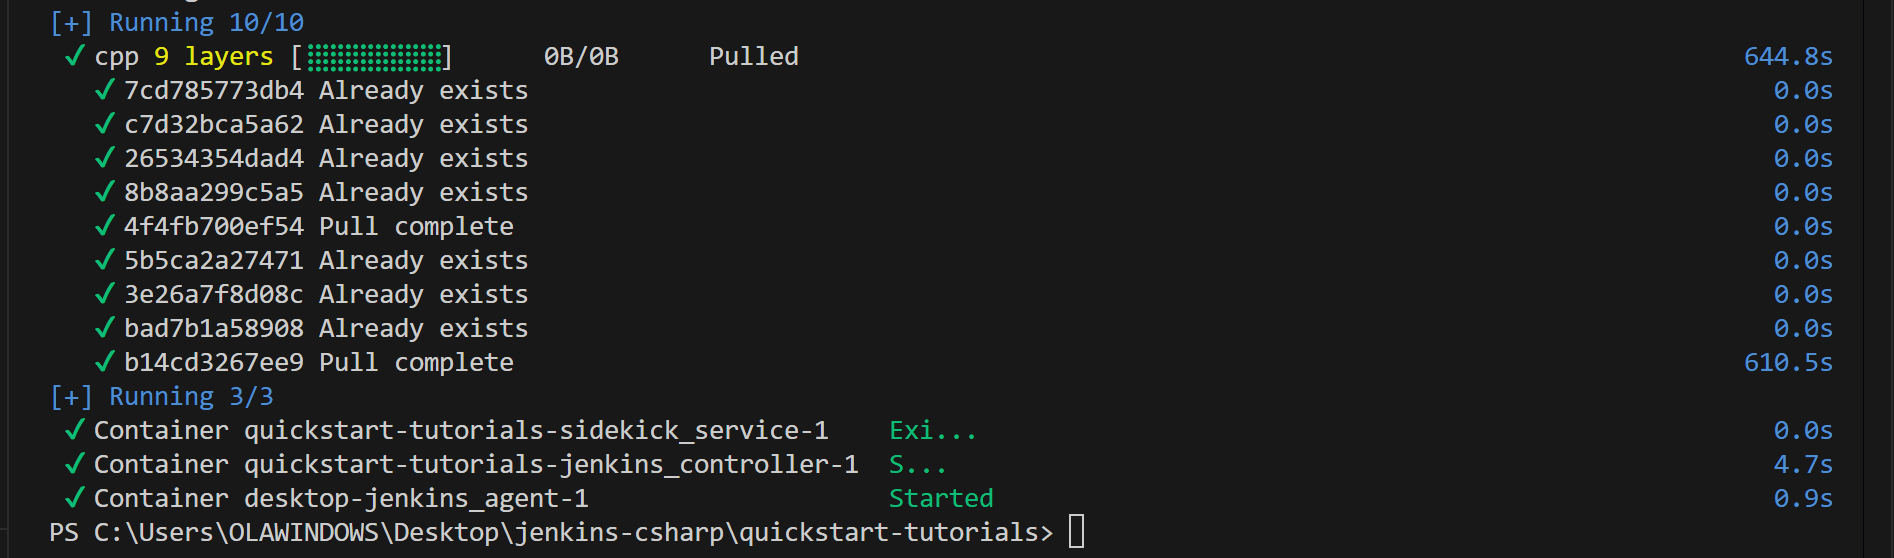
- After confirming the containers are running with docker compose ps, access the controller at http://localhost:8080.
- Log in with admin as username and password.

Create your Pipeline project in Jenkins
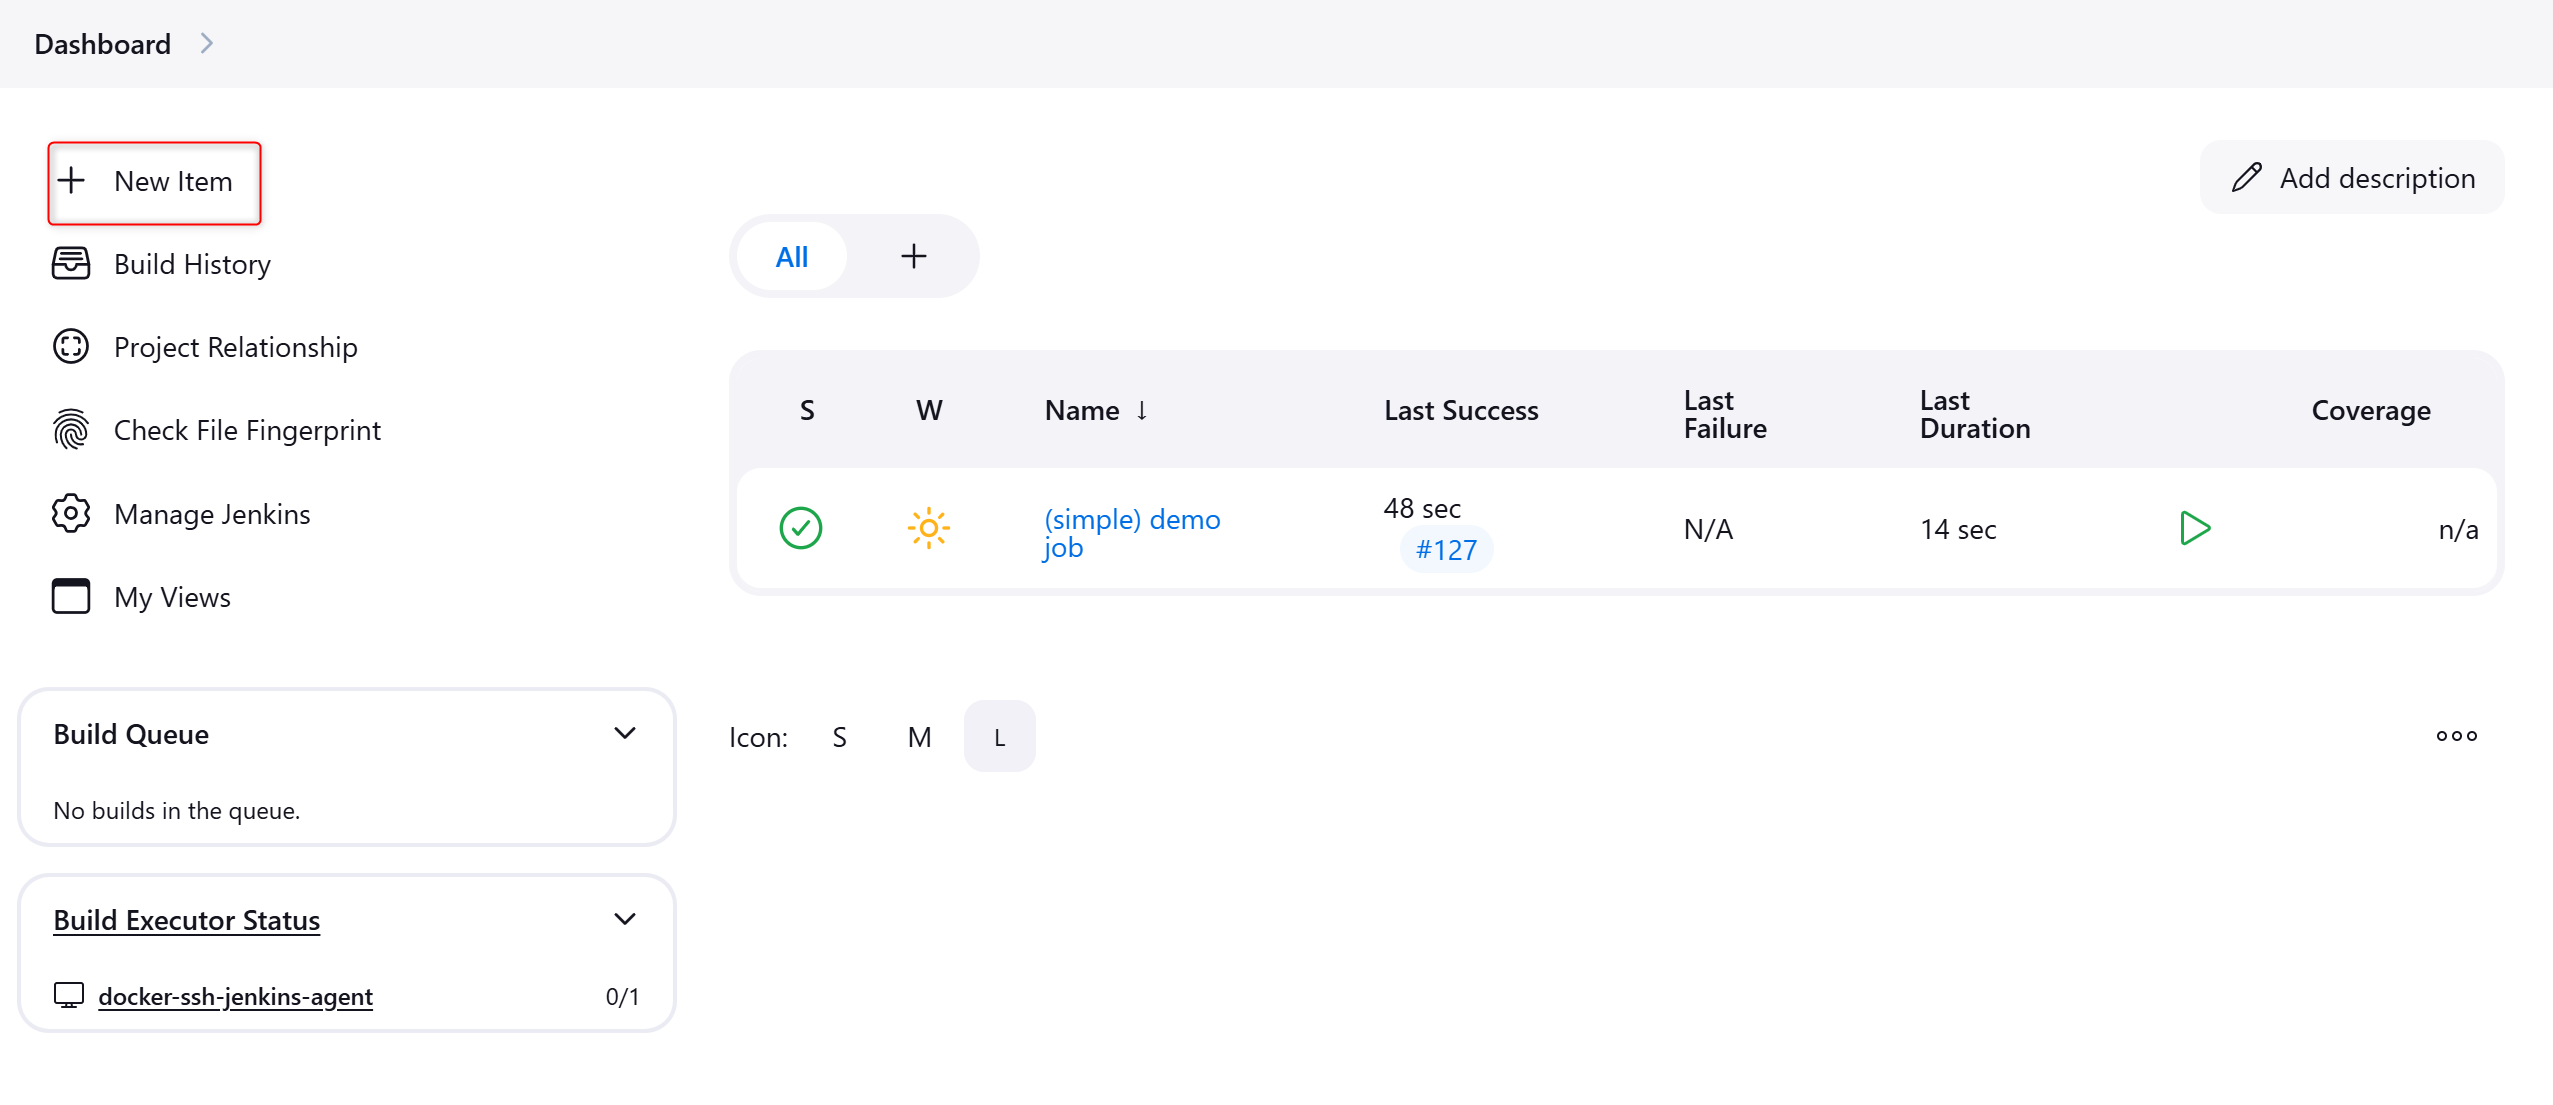
- In Jenkins UI, select New Item under Dashboard.
- Give a name to your Pipeline, select Pipeline under Select an item type section and click OK.
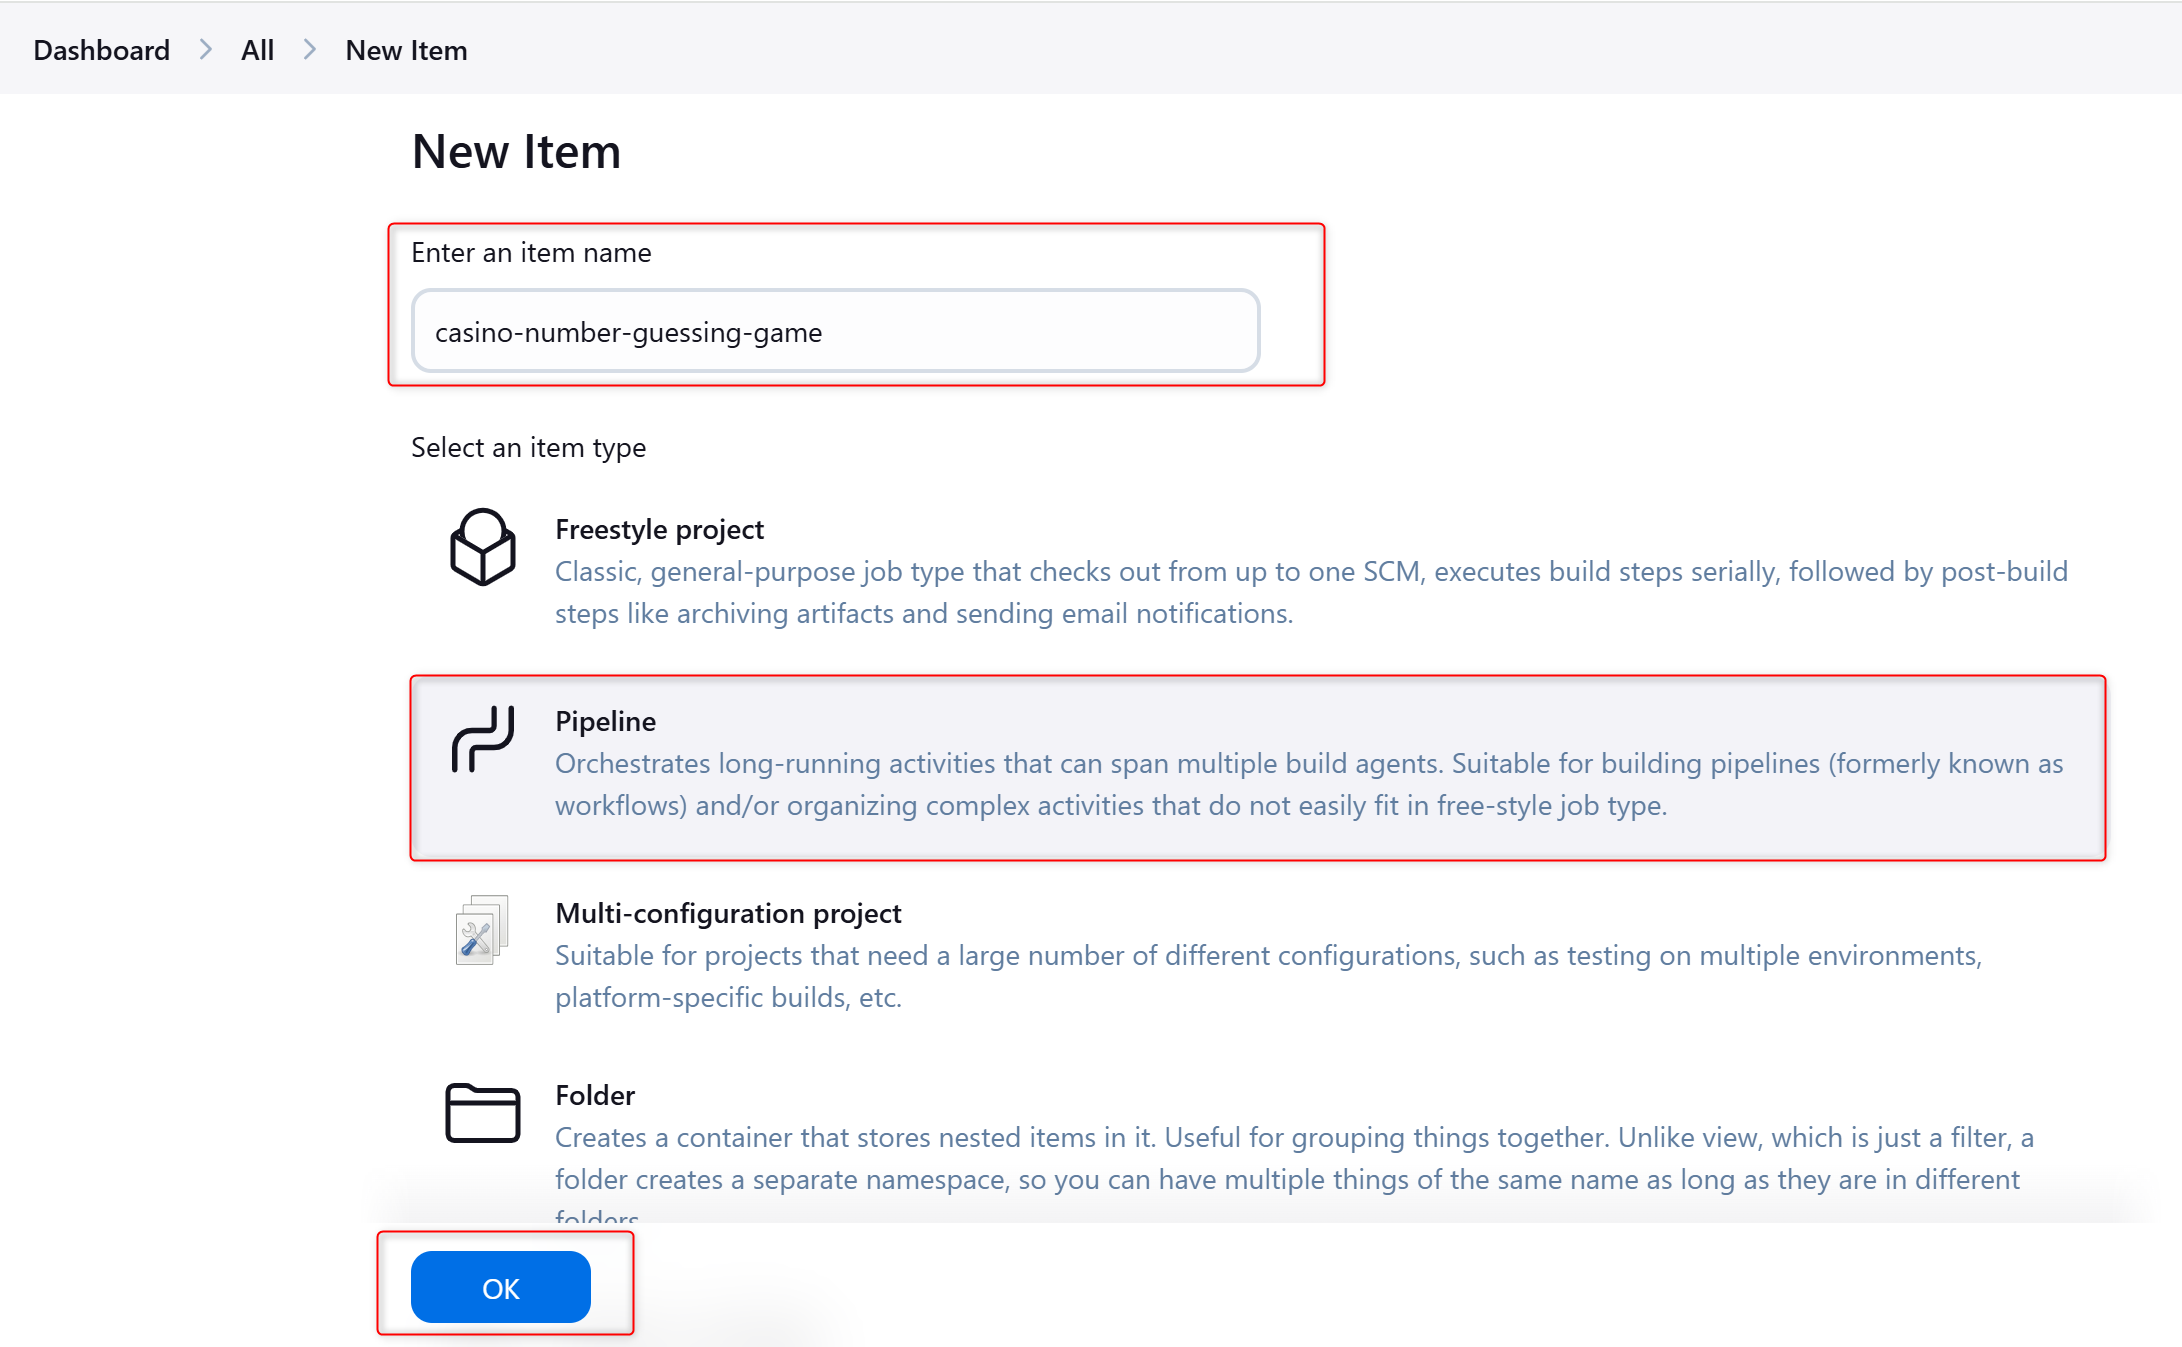
- Enter a Pipeline Description.

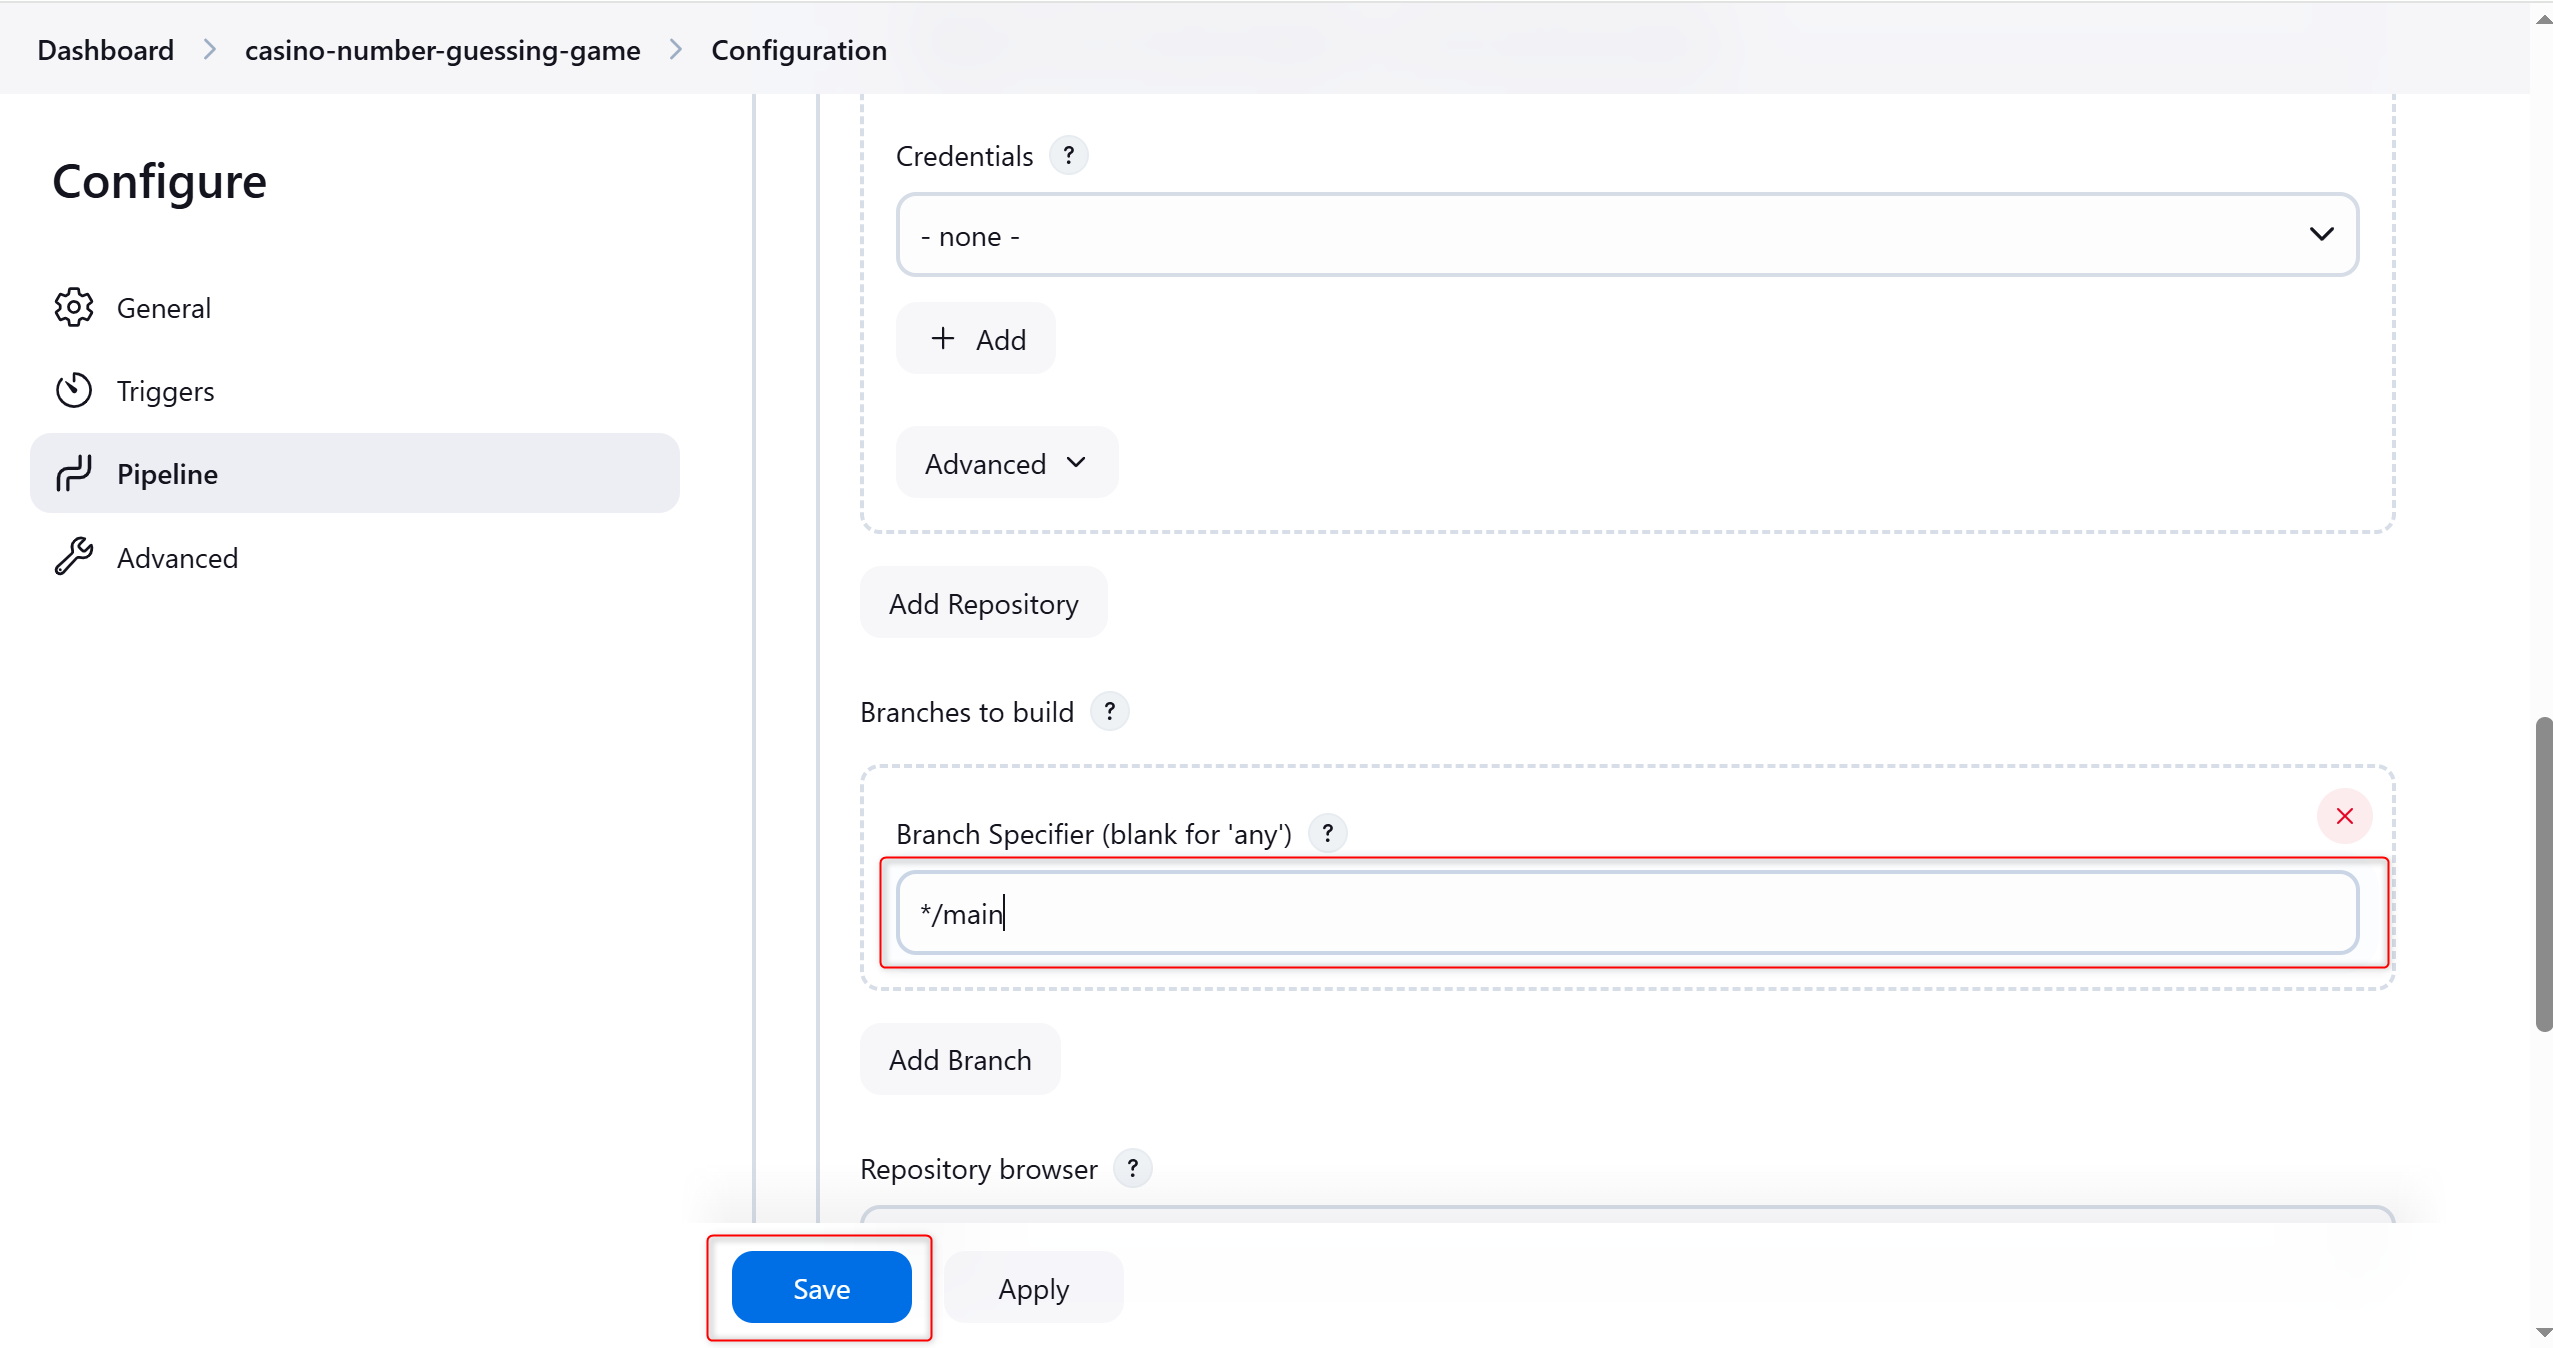
Create your initial Pipeline as a Jenkinsfile
You are now ready to automate your C++ application build by creating a Jenkins Pipeline. This pipeline will be defined in a Jenkinsfile that you will commit to your local Git repository (casino-number-guessing-game).
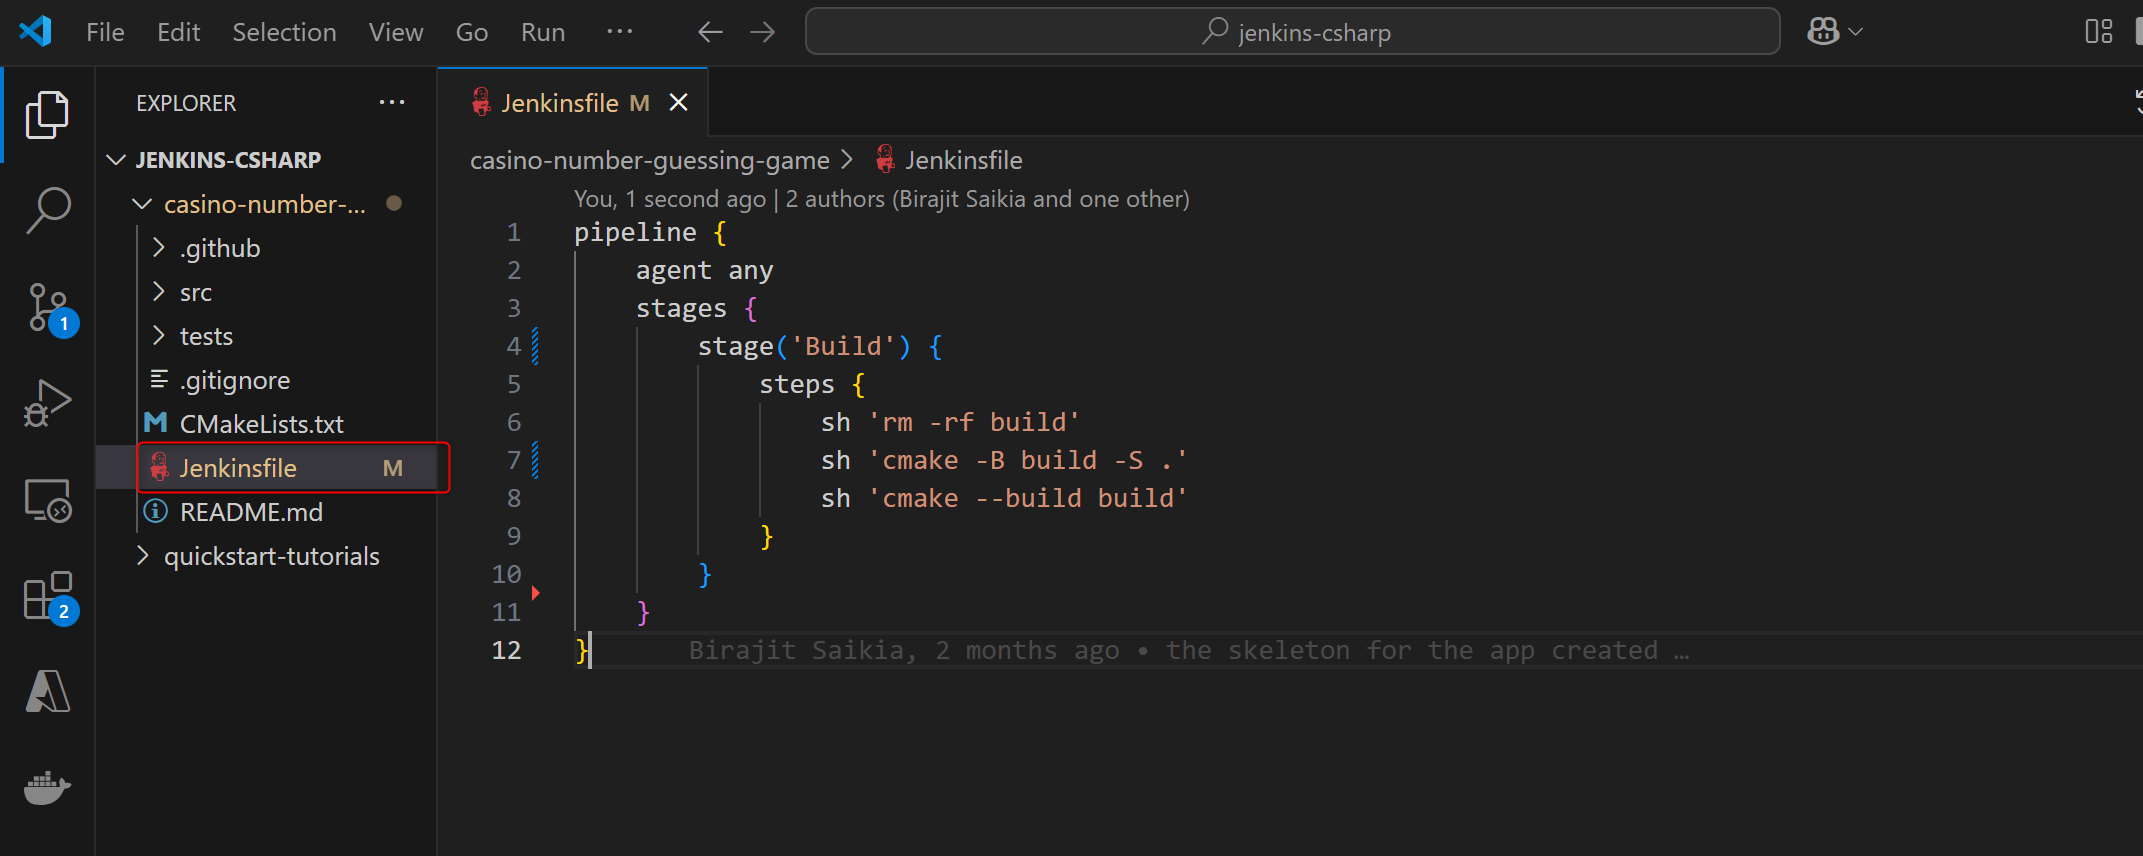
- When you forked our sample repository, you already have an empty Jenkinsfile.
- Copy the Declarative Pipeline code below and paste it into your Jenkinsfile:
pipeline {
    agent any
    stages {
        stage('Build') {
            steps {
                sh 'rm -rf build'
                sh 'cmake -B build -S .'
                sh 'cmake --build build'
            }
        }
    }
}
- Save and commit the edited Jenkinsfile into your local casino-number-guessing-game Git repository. cd into casino-number-guessing-game directory if you have not done so and run the following command:
git  add .

git commit -m "Add initial Jenkinsfile"

git push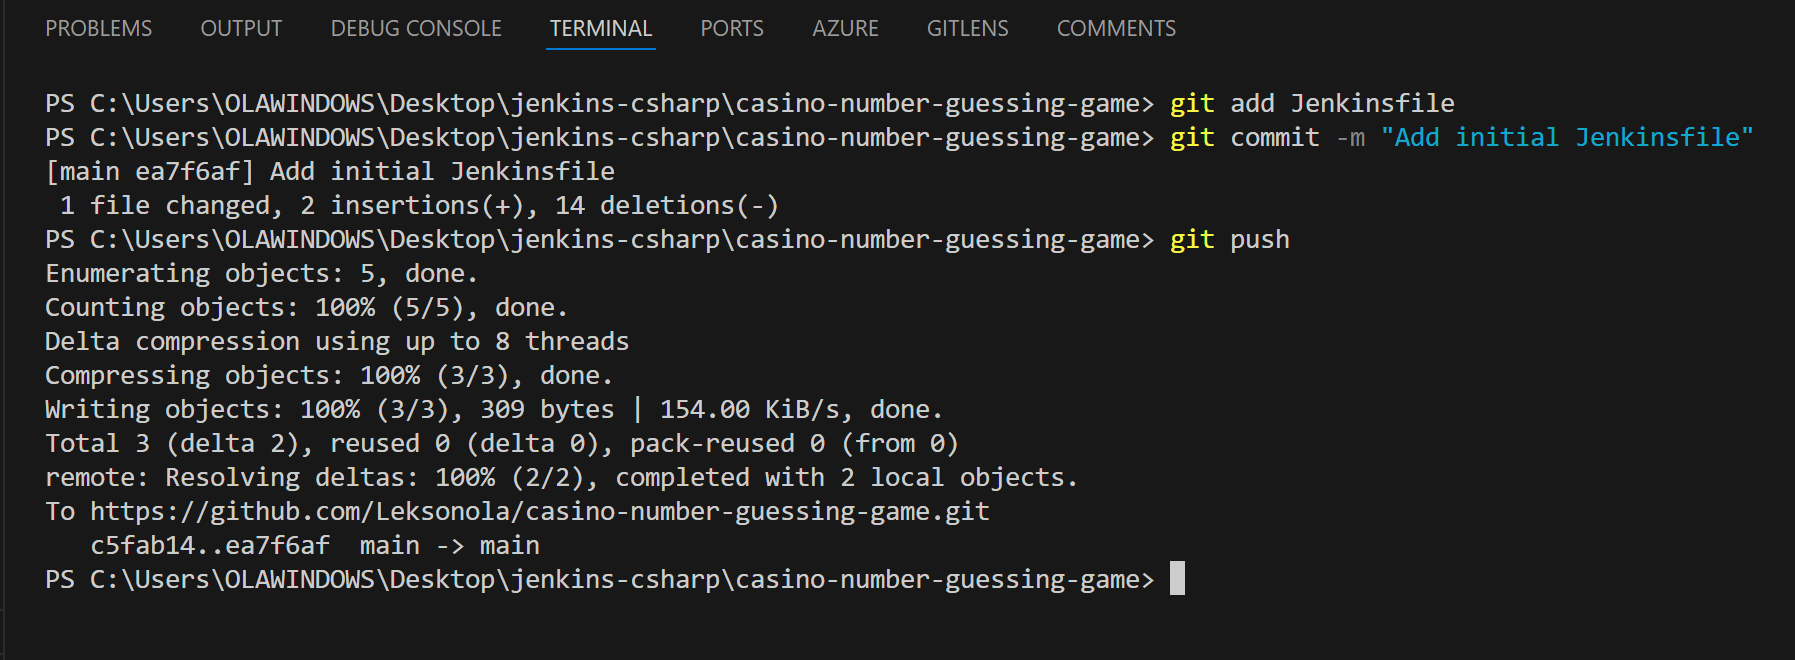
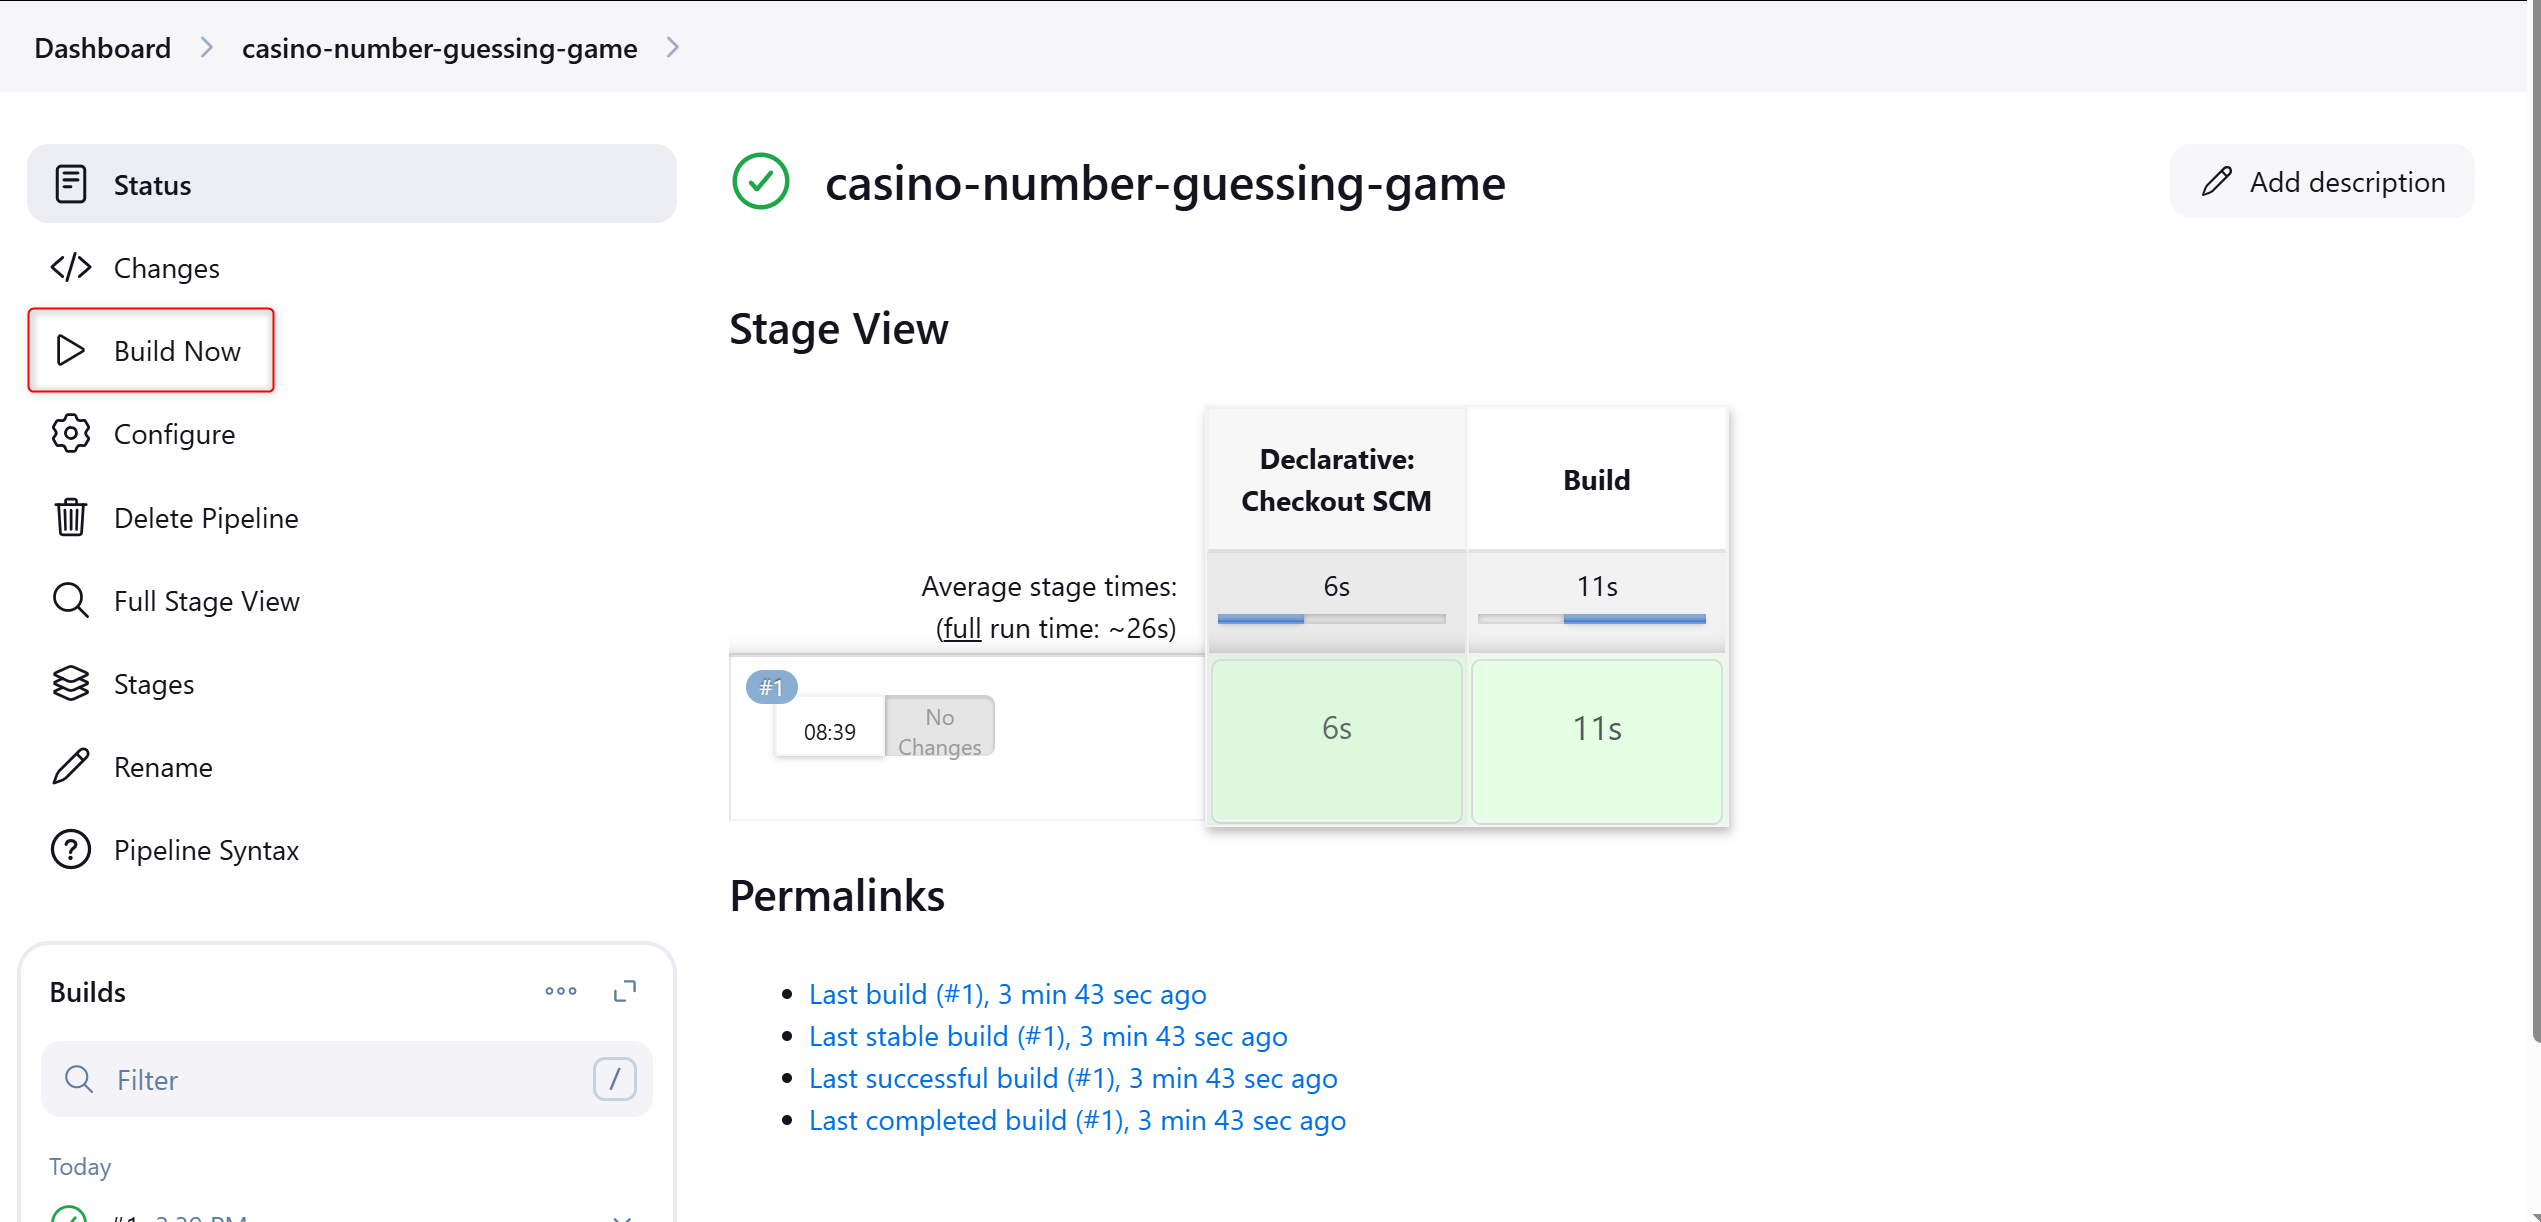
- Back at Jenkins UI, select Build Now
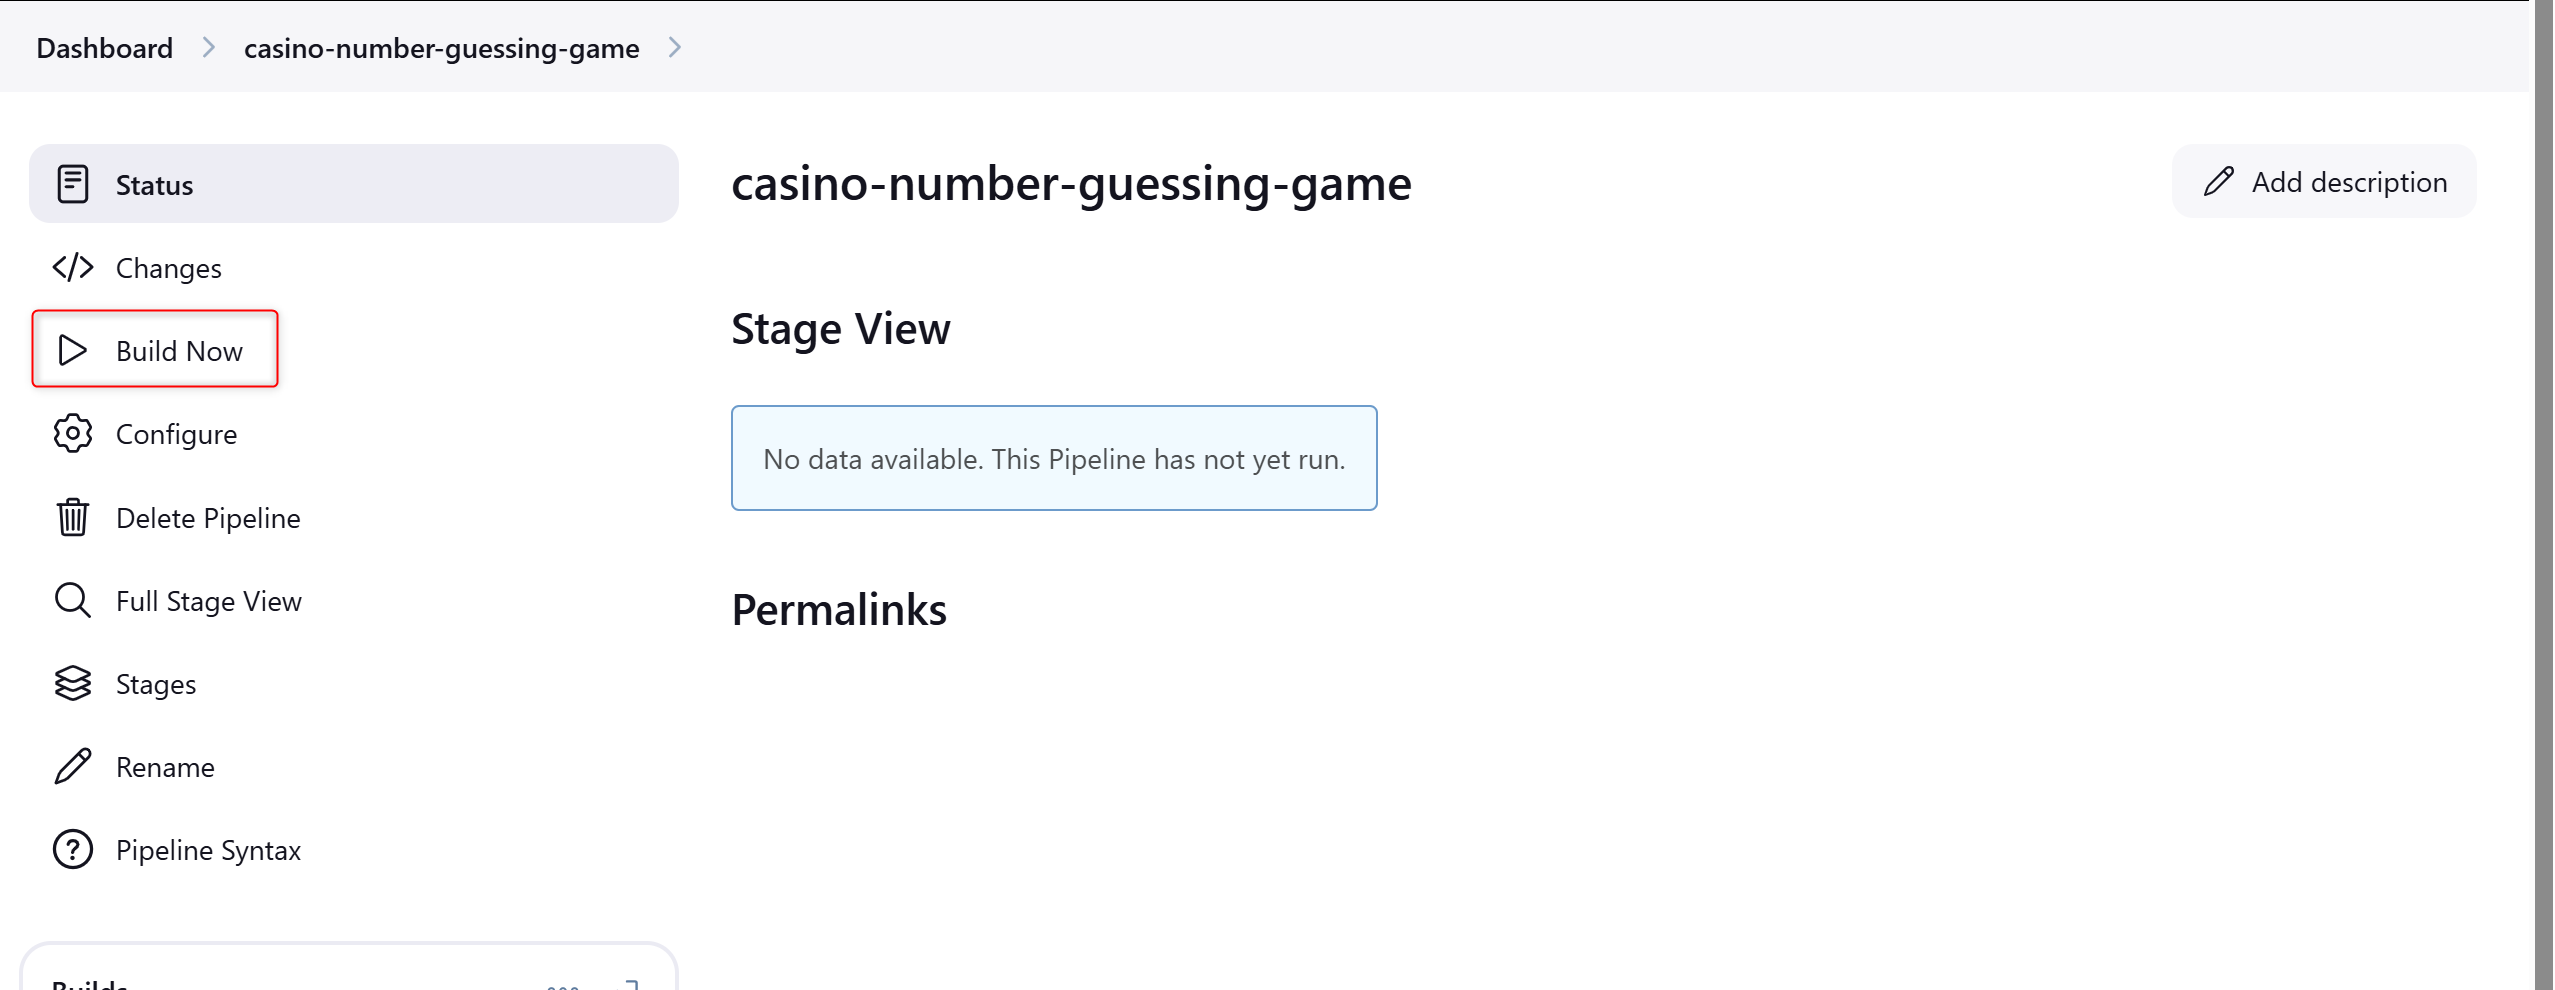
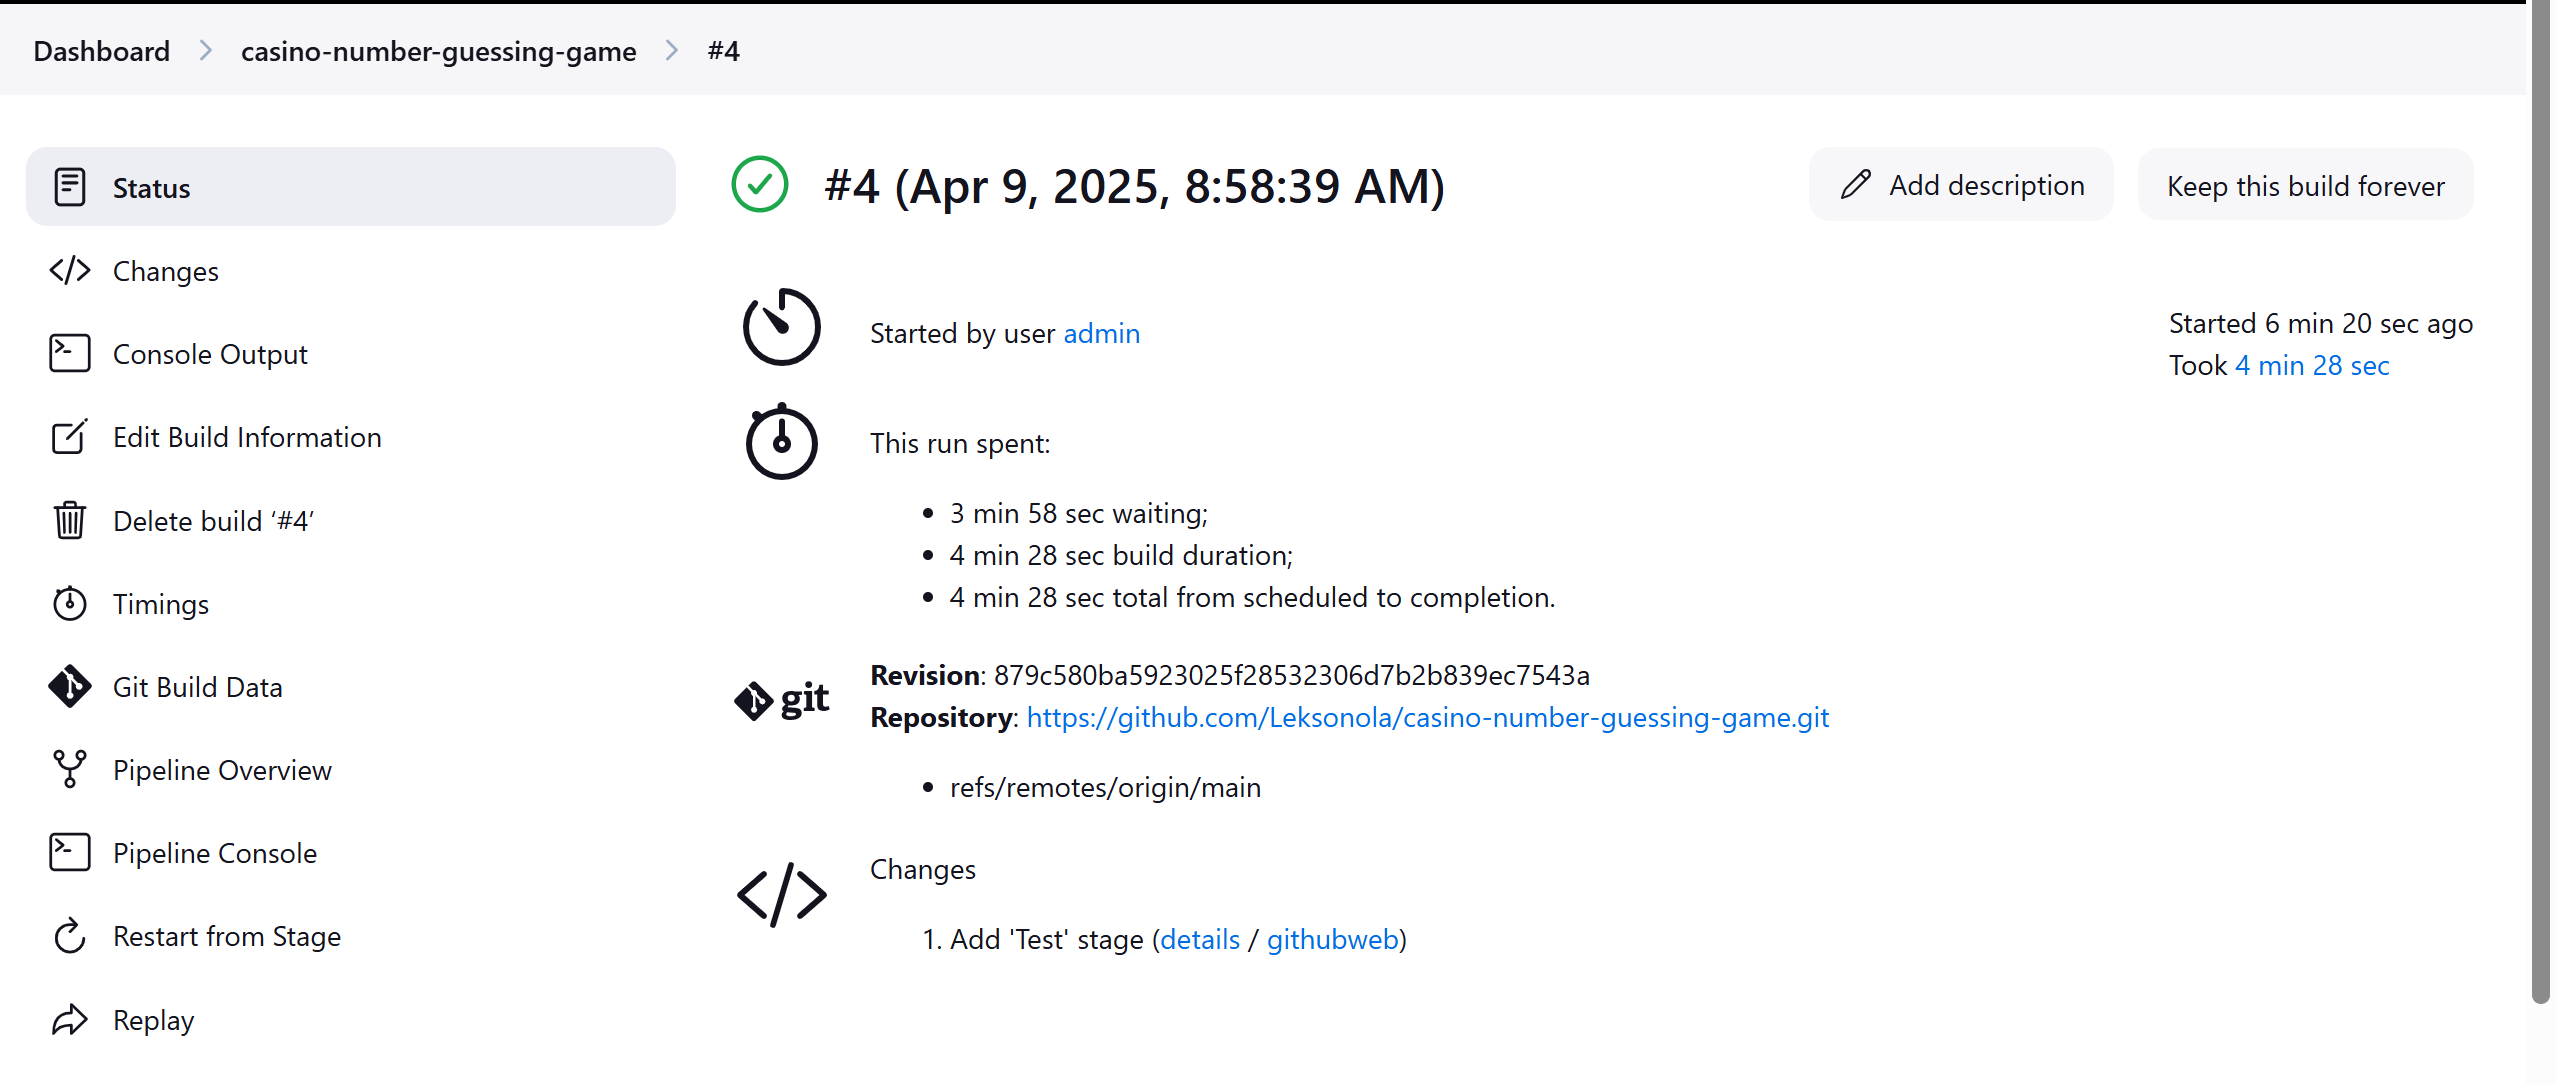
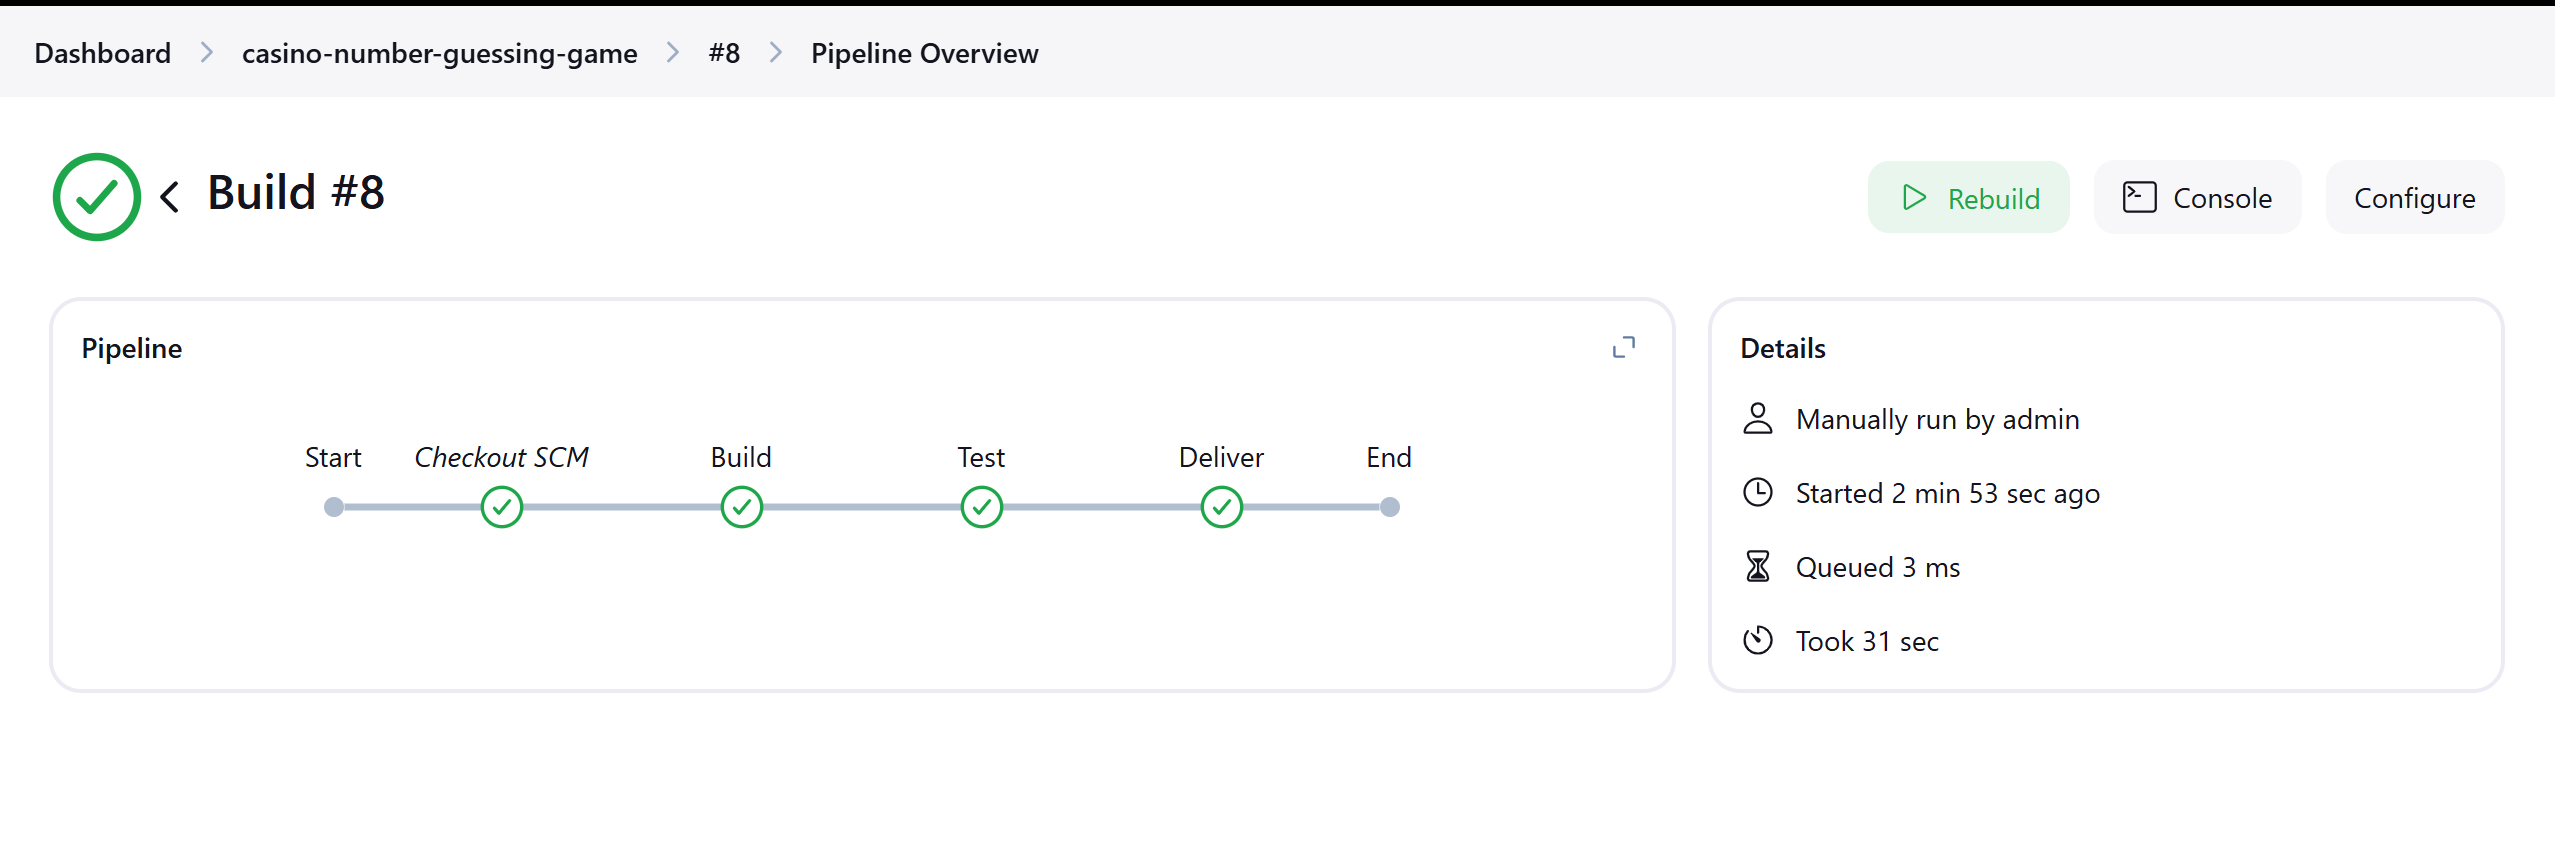
- If your Pipeline run successfully, you will see a green check mark and #1 on the left side and the Build stage completed in the main view.
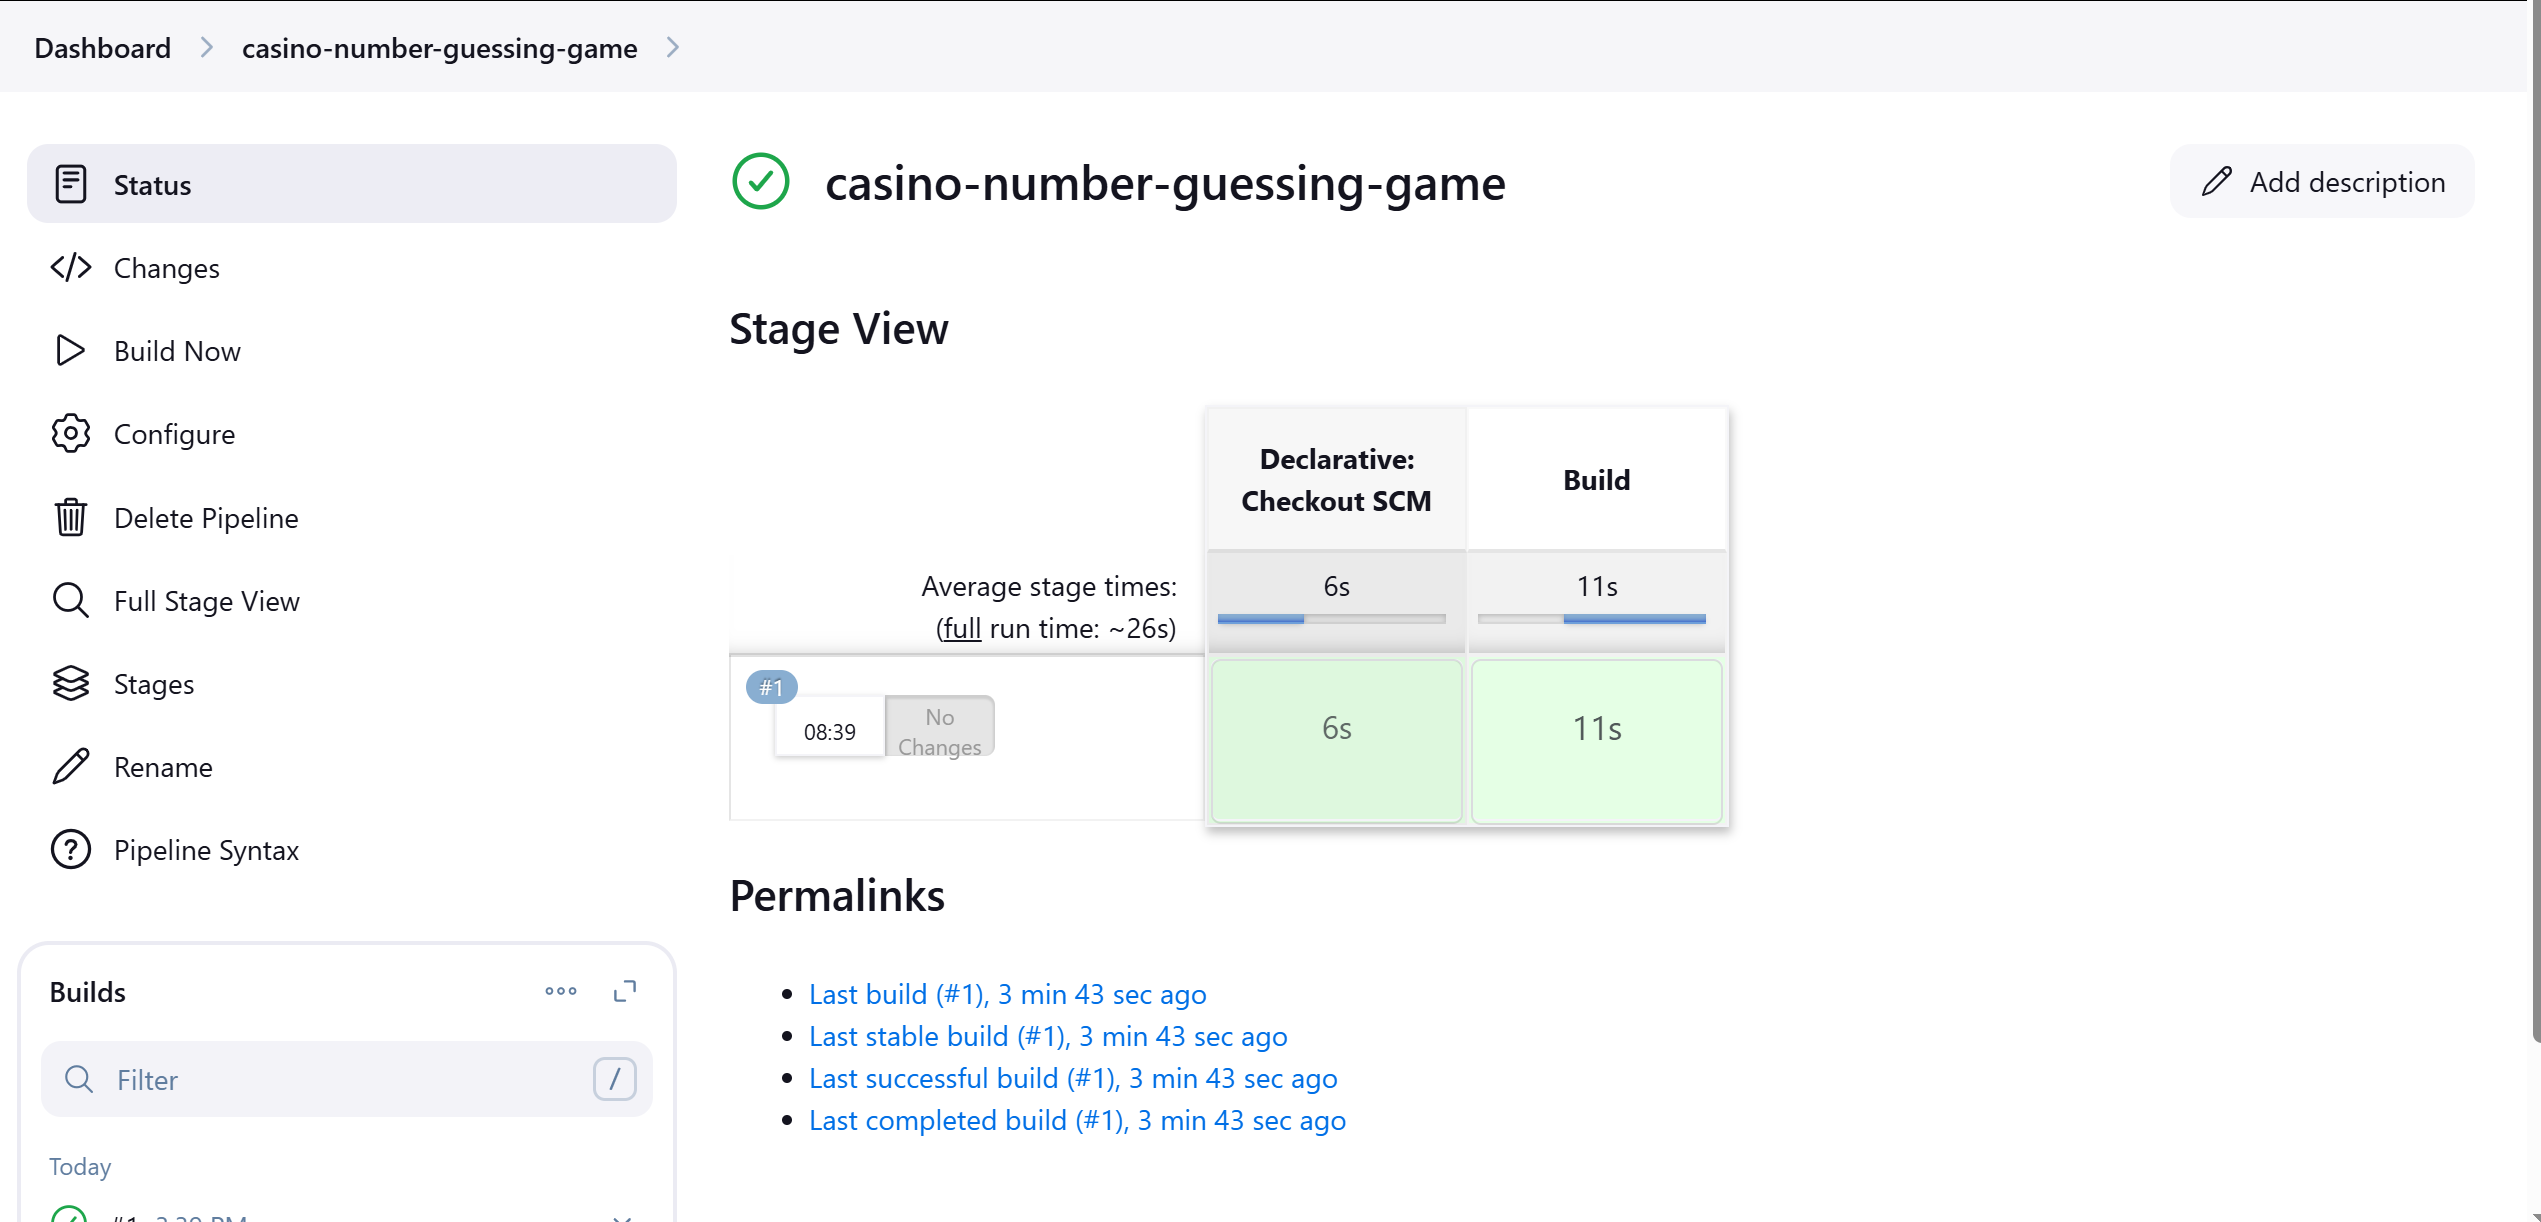
- You can now click on #1 to view the build details, where you'll see both the queue wait time and actual execution time for your build - this helps monitor performance and identify potential delays for future runs.
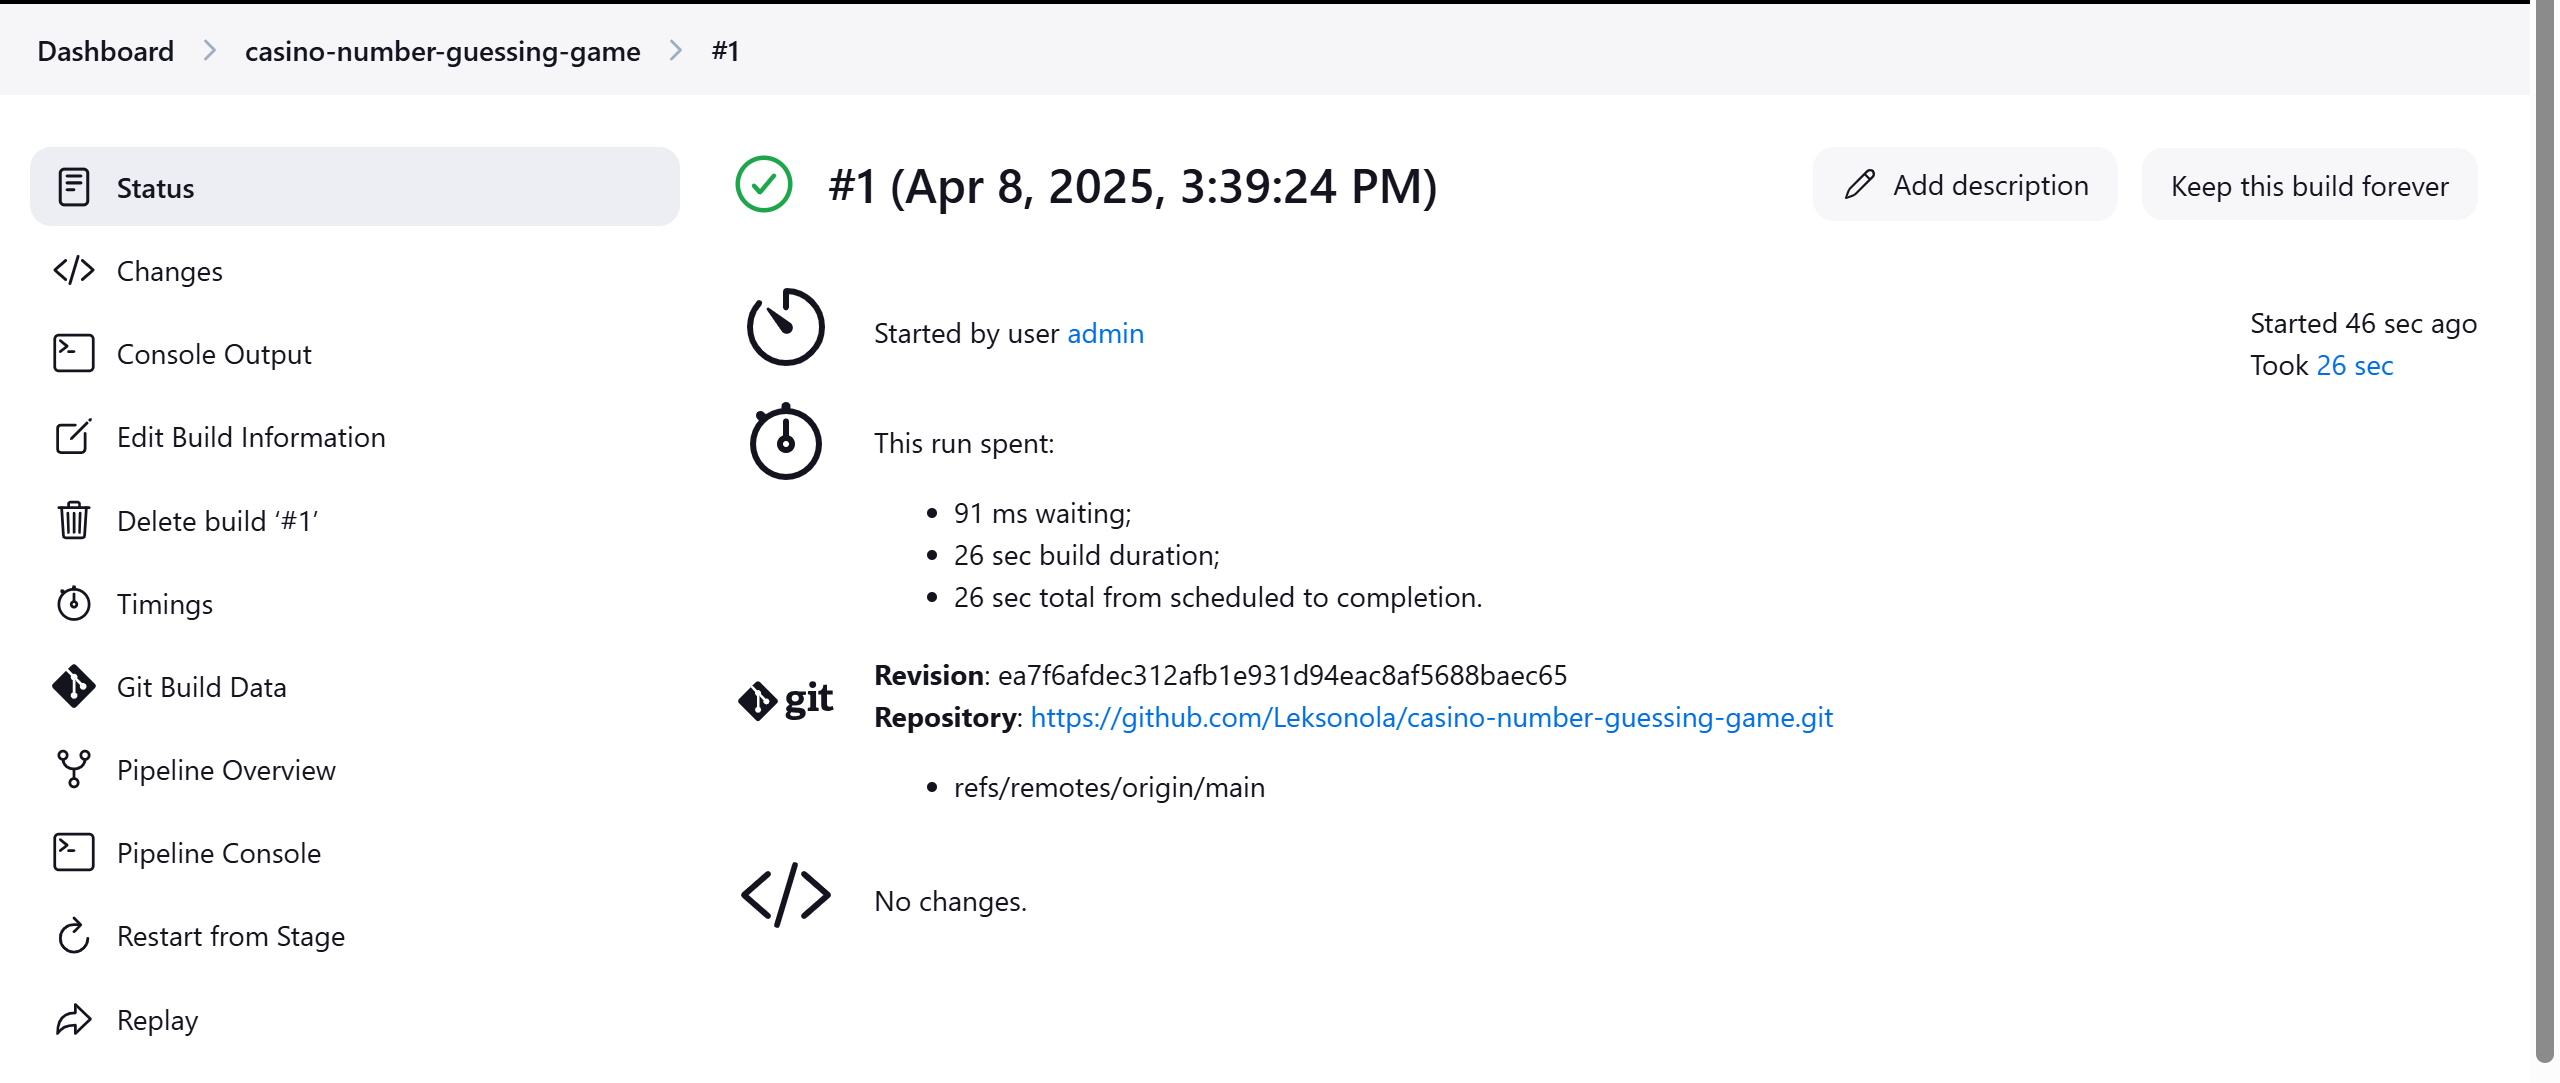
- On the left, you can click on Pipeline Overview to see the stages of the Pipeline.

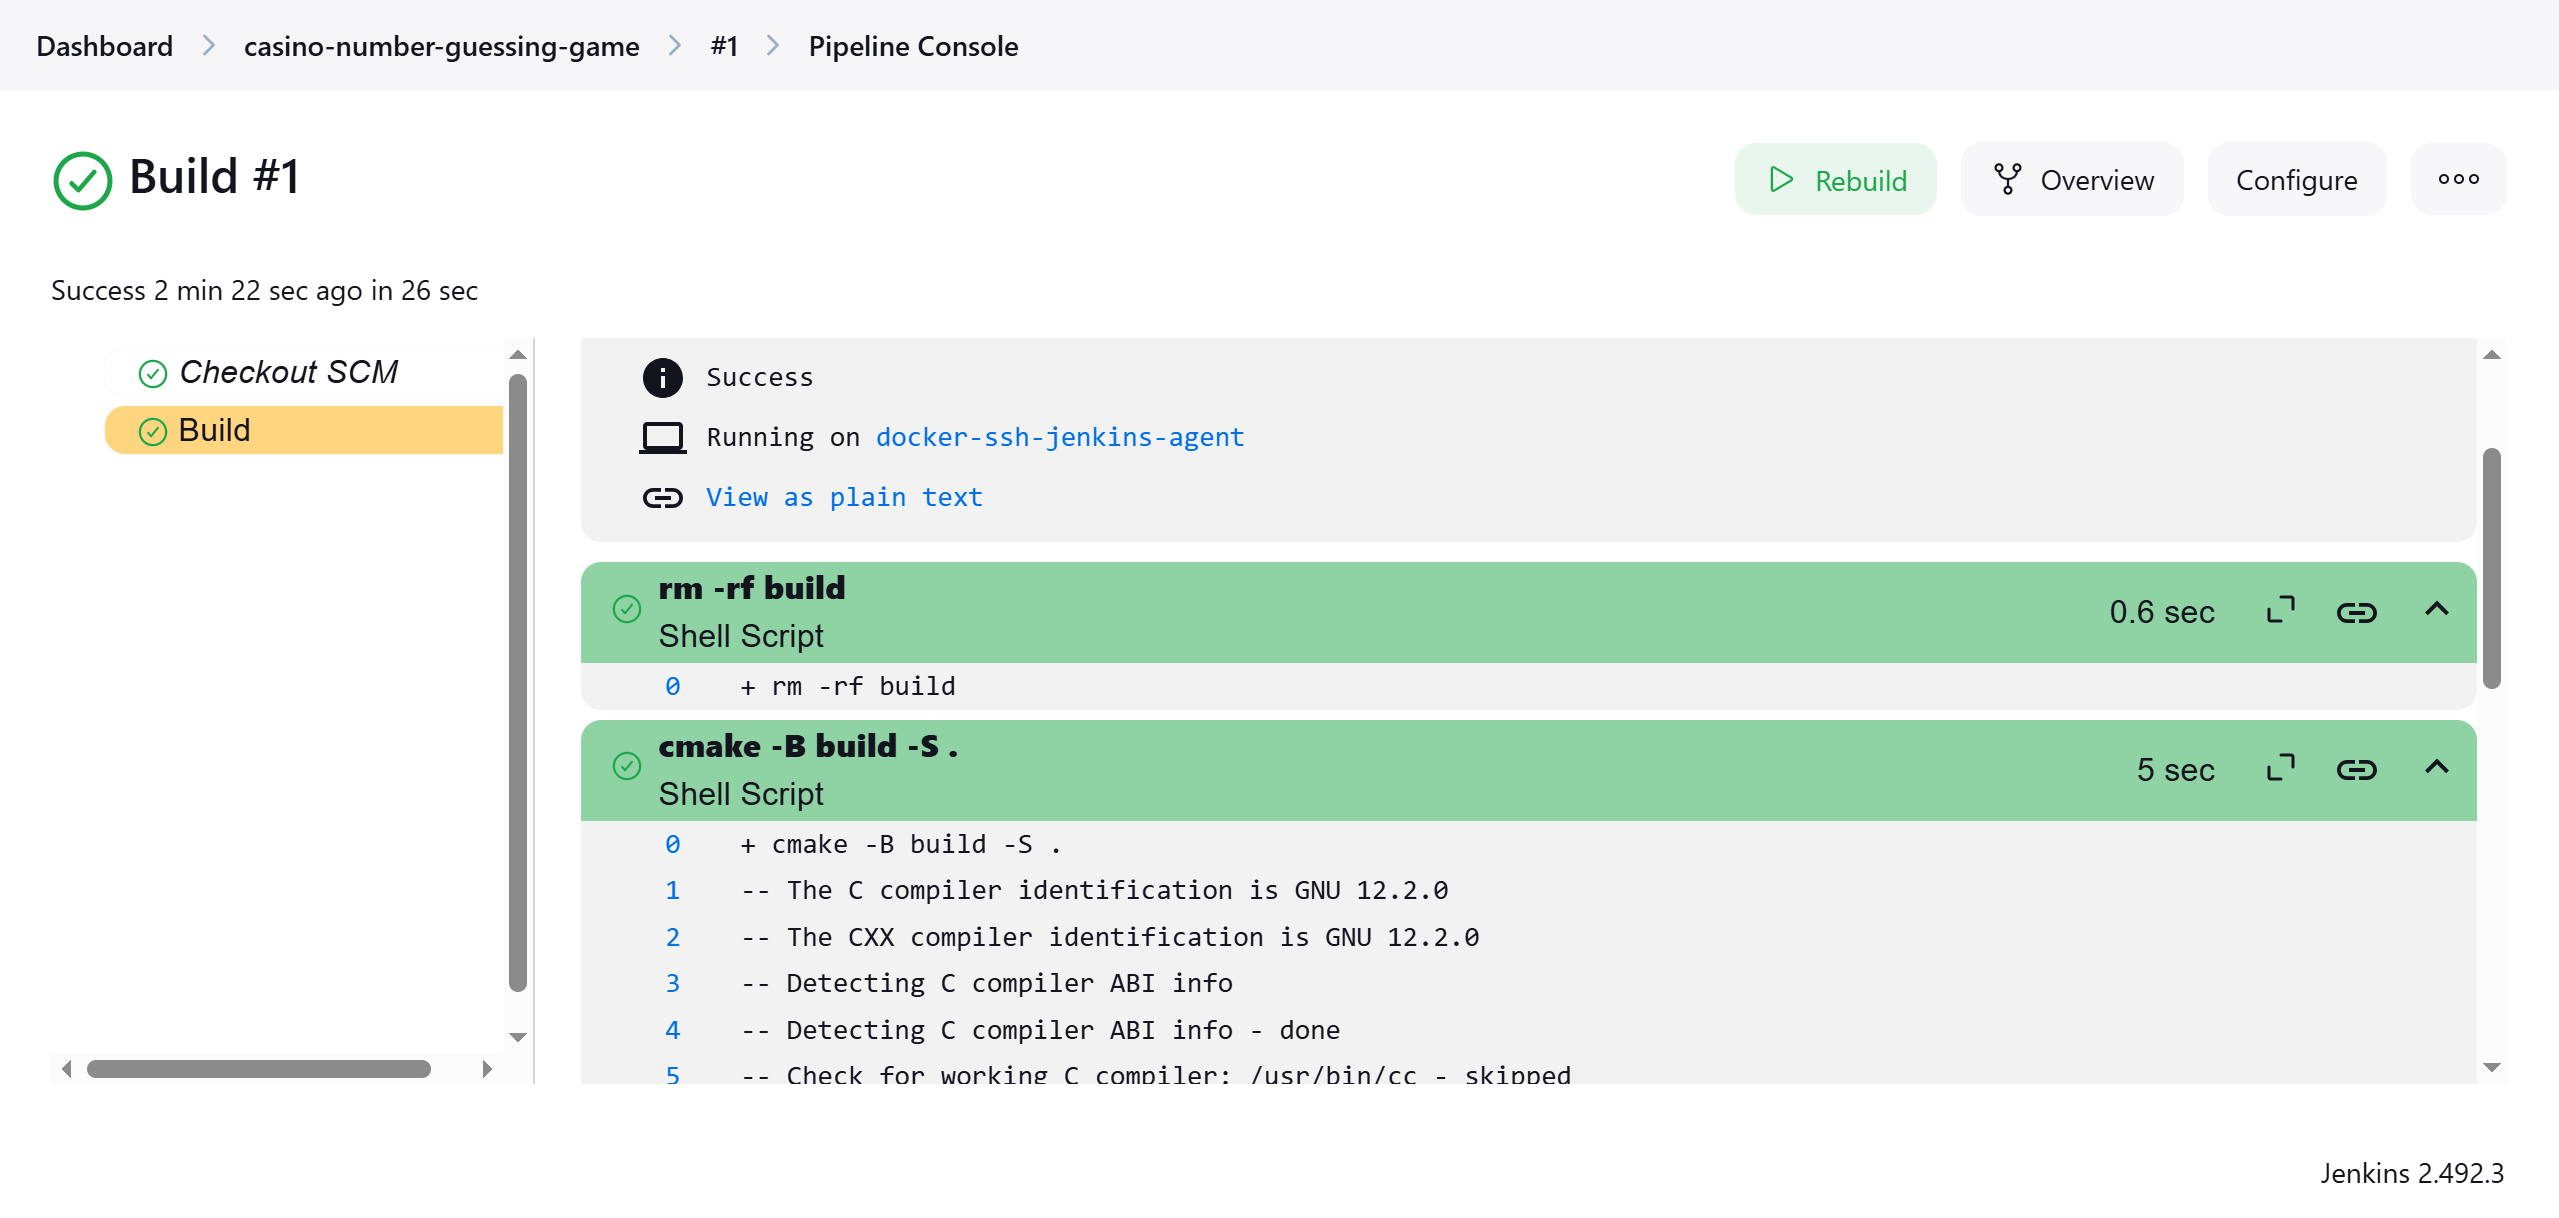
- Click the Build stage to view detailed logs, including the cmake command output (click the green cmake section to expand it). This helps verify your build executed correctly.
- To return to your pipeline's main page, simply select 'casino-number-guessing-game' (or the name you’ve chosen for your pipeline) from the top left.
Add a test stage to your Pipeline
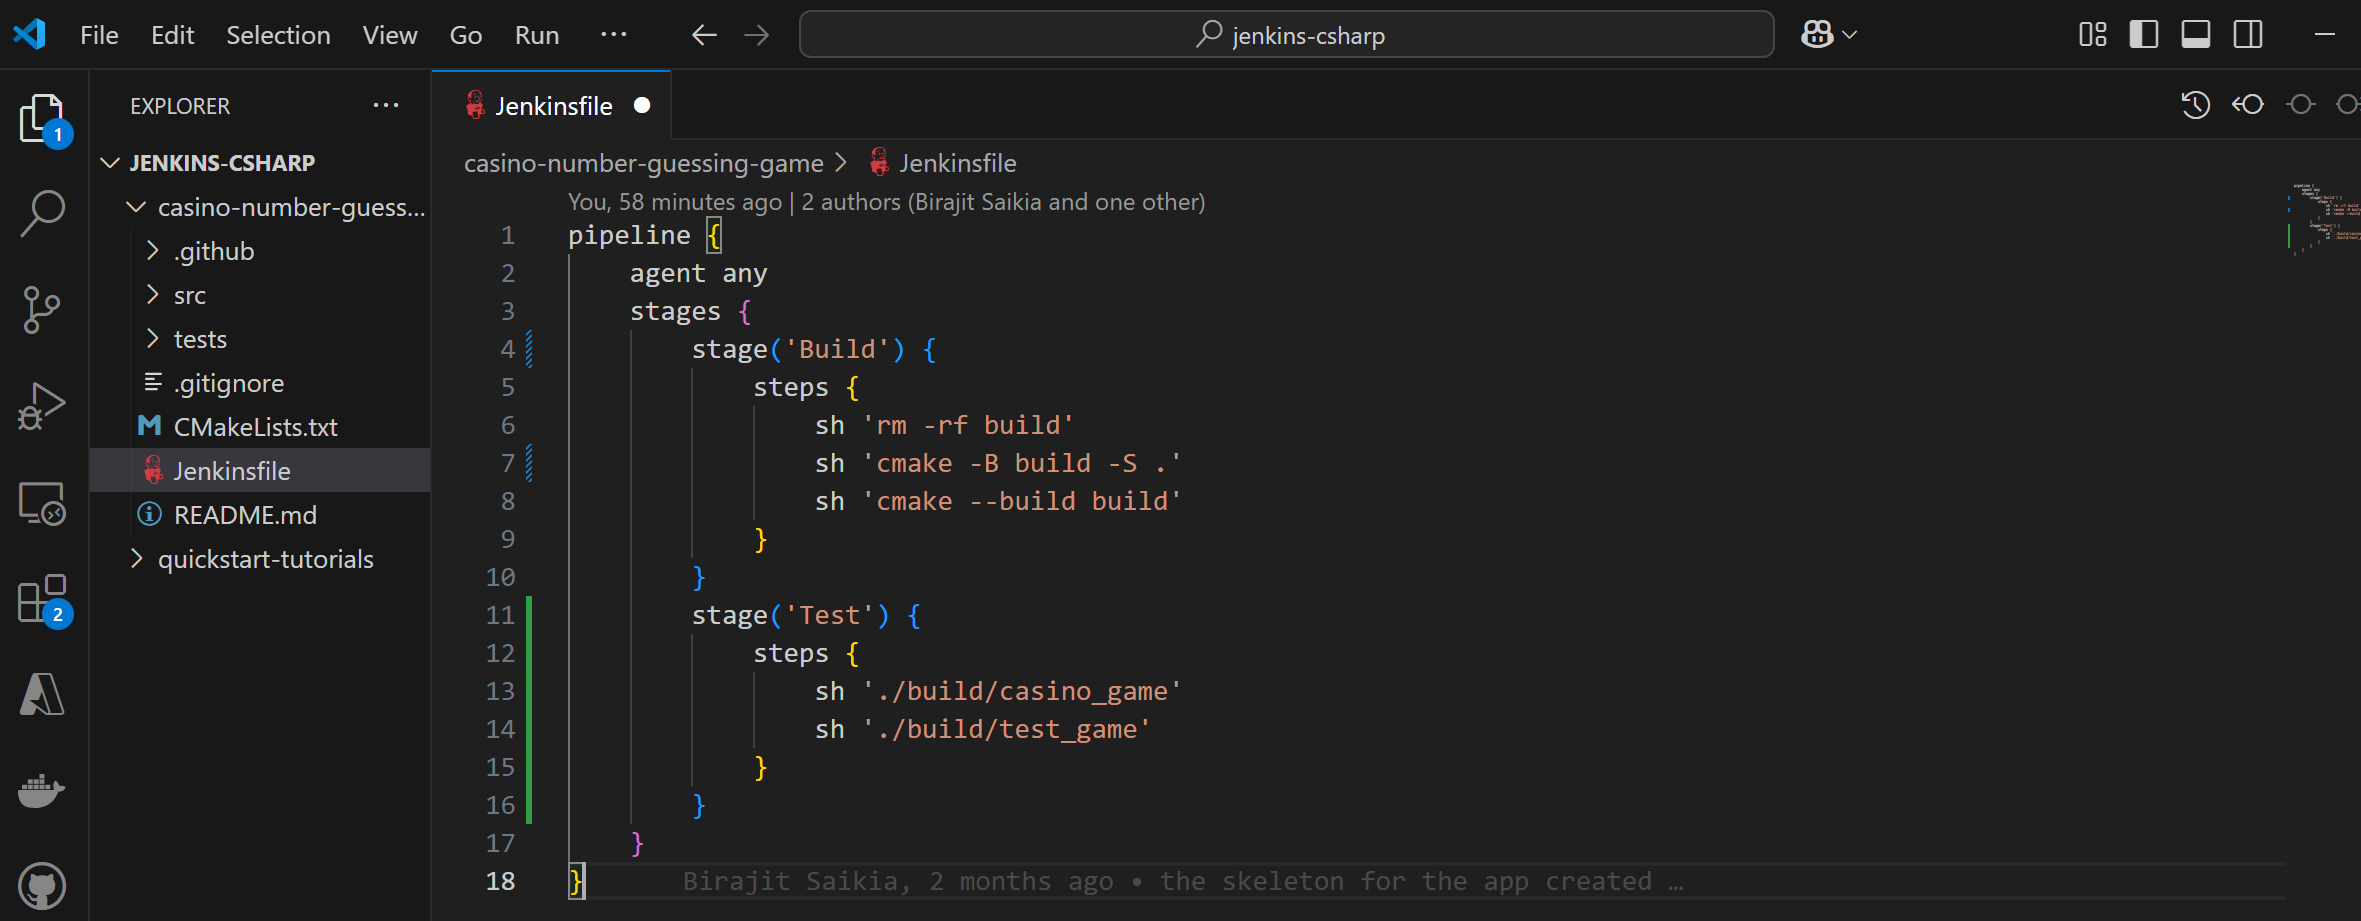
- Head back to Jenkins UI and open Jenkinsfile.
- Copy and paste the following Declarative Pipeline syntax under Build stage of your Jenkinsfile.
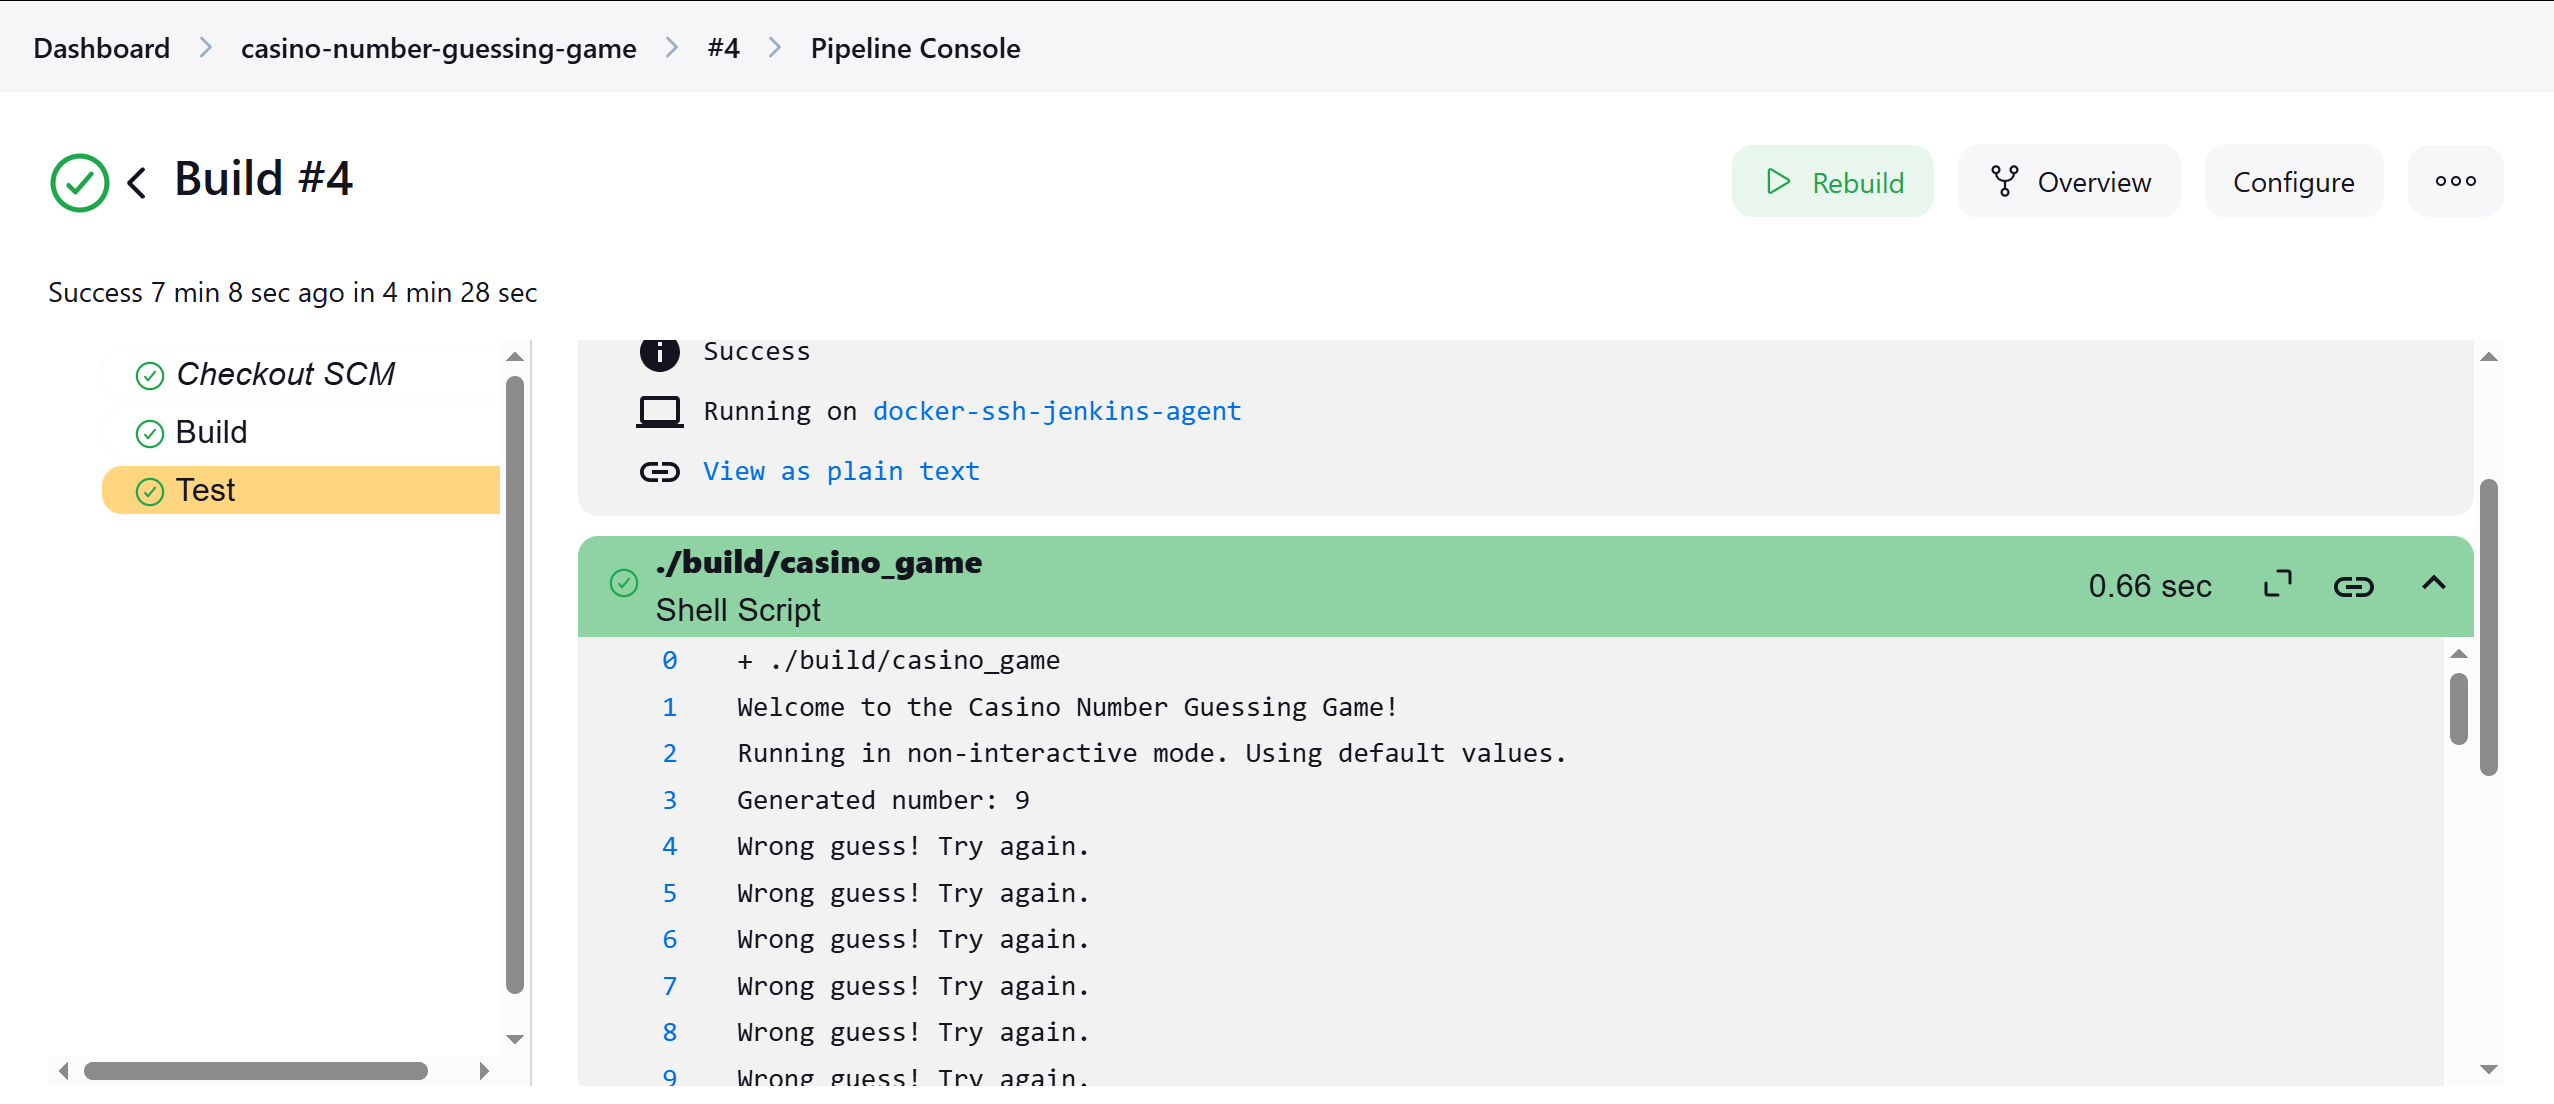
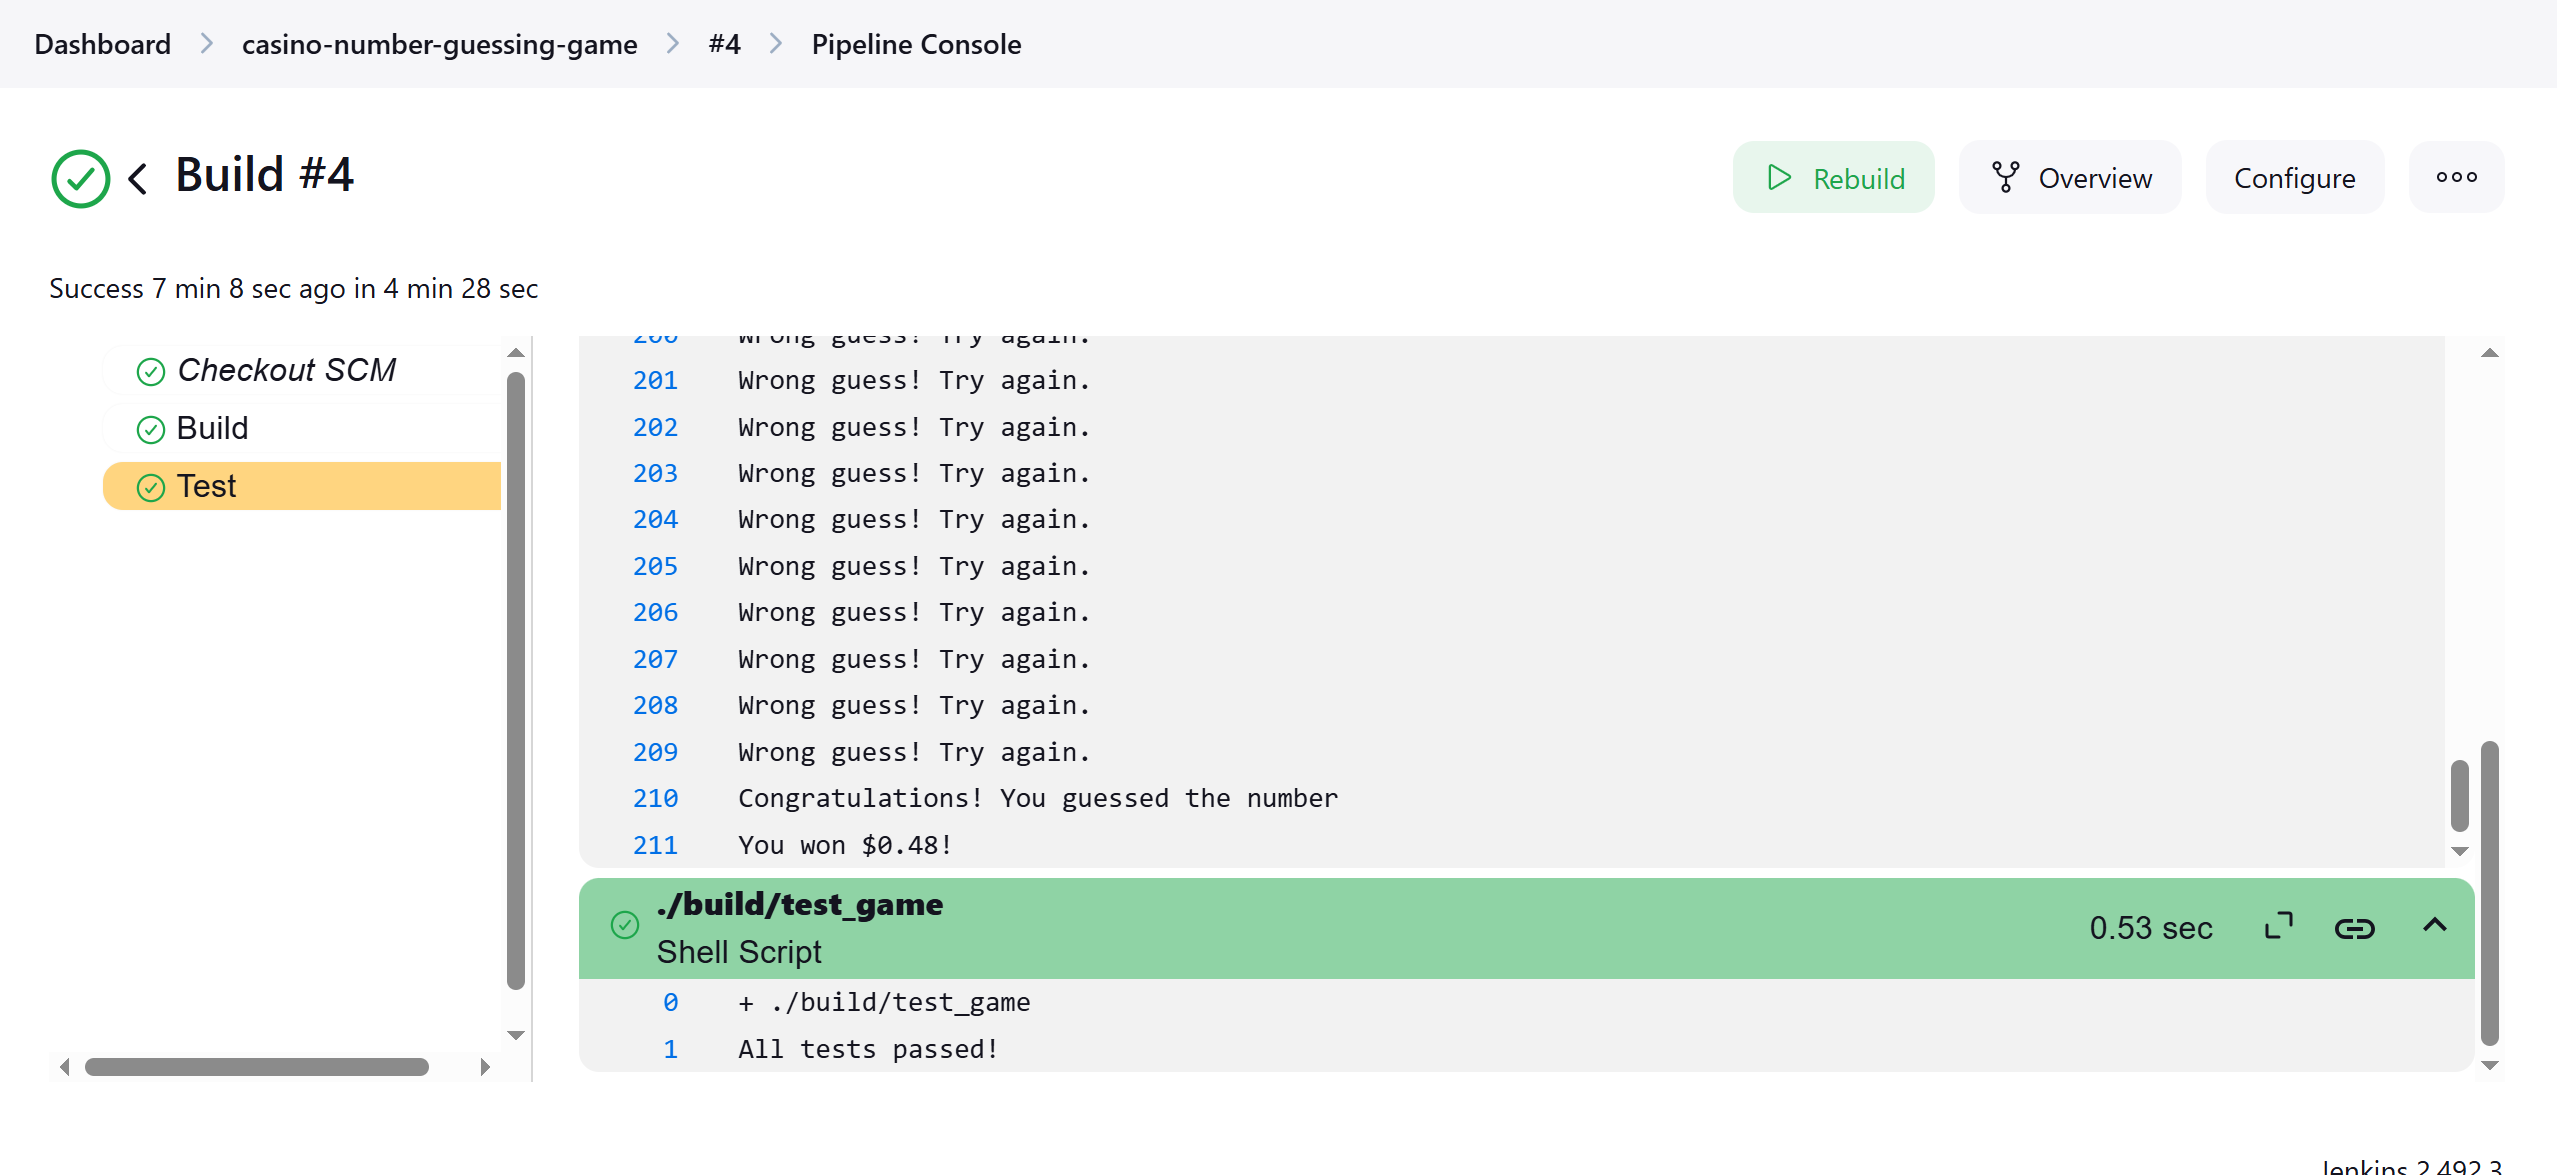
stage('Test') {
            steps {
                sh './build/casino_game'
                sh './build/test_game'
            }
        }
Your Jenkinsfile should look like this:
pipeline {
    agent any
    stages {
        stage('Build') {
            steps {
                sh 'rm -rf build'
                sh 'cmake -B build -S .'
                sh 'cmake --build build'
            }
        }
        stage('Test') {
            steps {
                sh './build/casino_game'
                sh './build/test_game'
            }
        }
    }
}
- Save your Jenkinsfile and push the new changes to your remote Jenkinsfile for Jenkins to access by running the following command:
git add .

git commit -m "Add 'Test' stage"

git push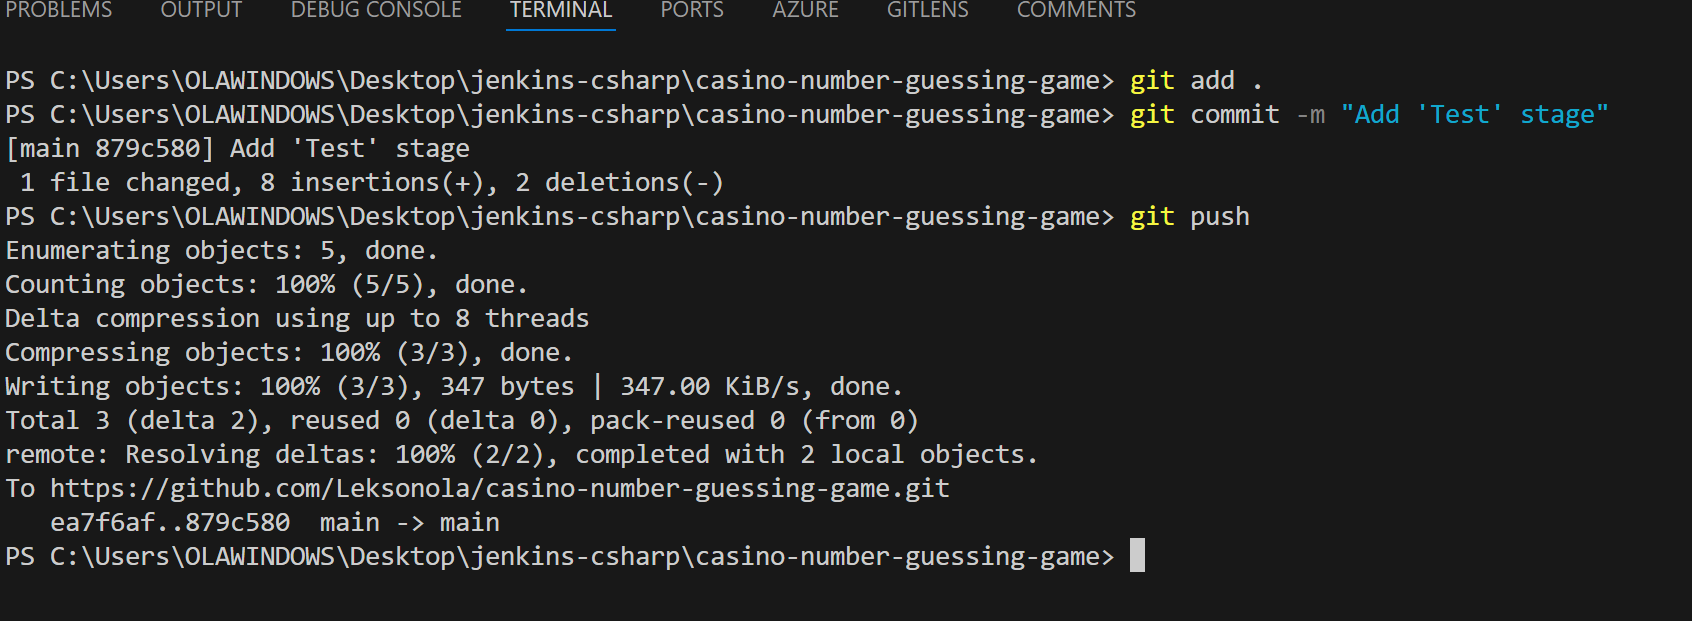
- Click Build Now to launch another build
- After some time, a new column called 'Test' should appear in the Stage View.
- Click on #2 or the number corresponding to your most recent build on the left, under Build History, to view the build details.
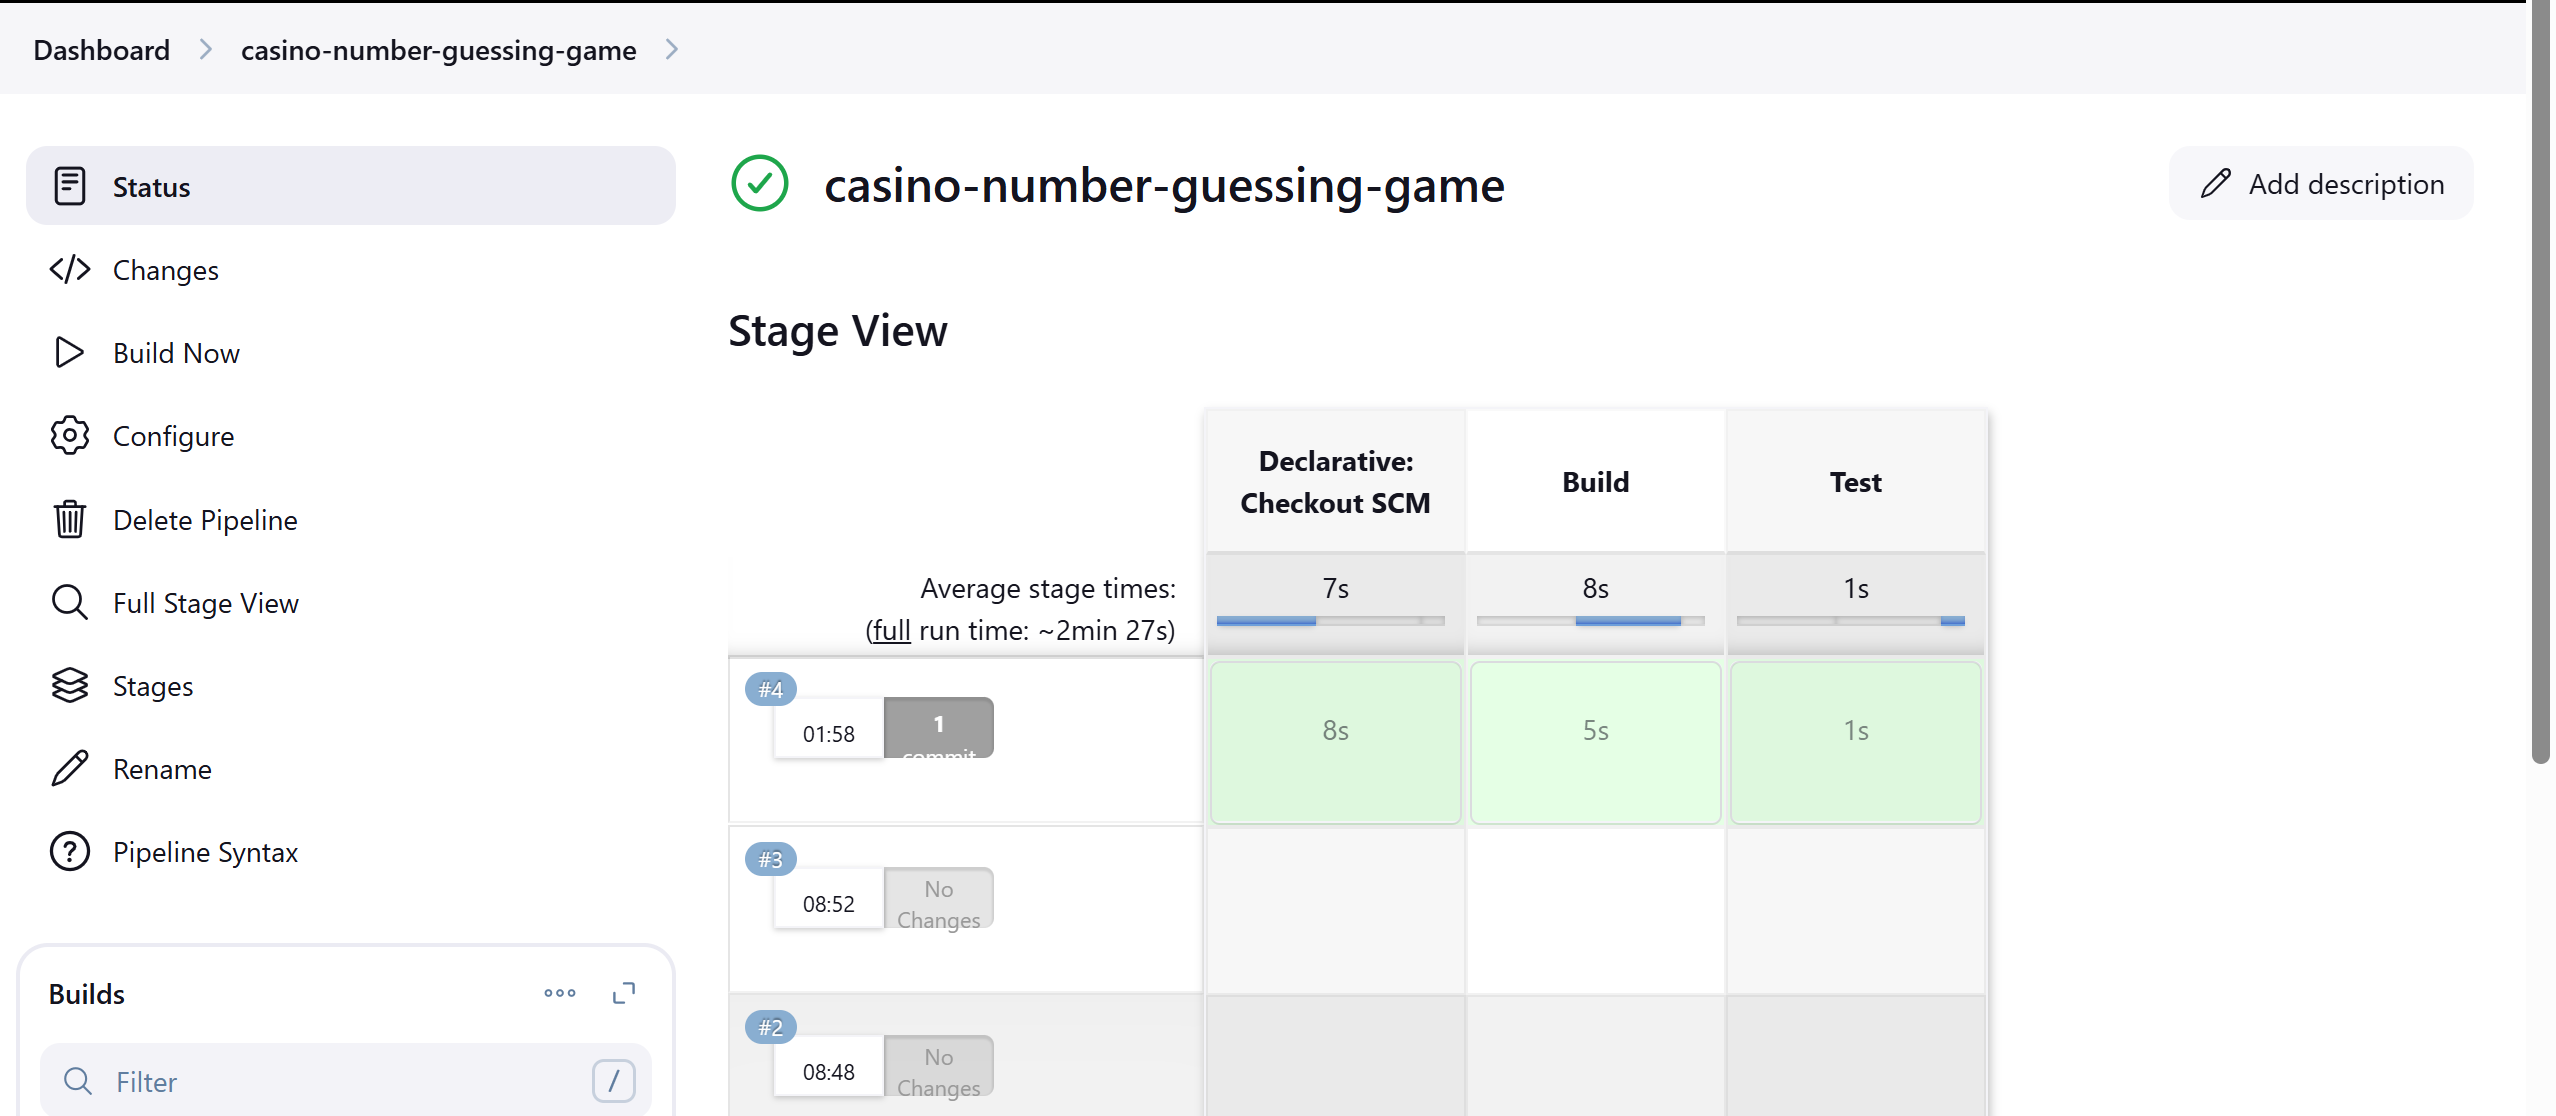
- Select Pipeline overview to see the stages of the Pipeline.
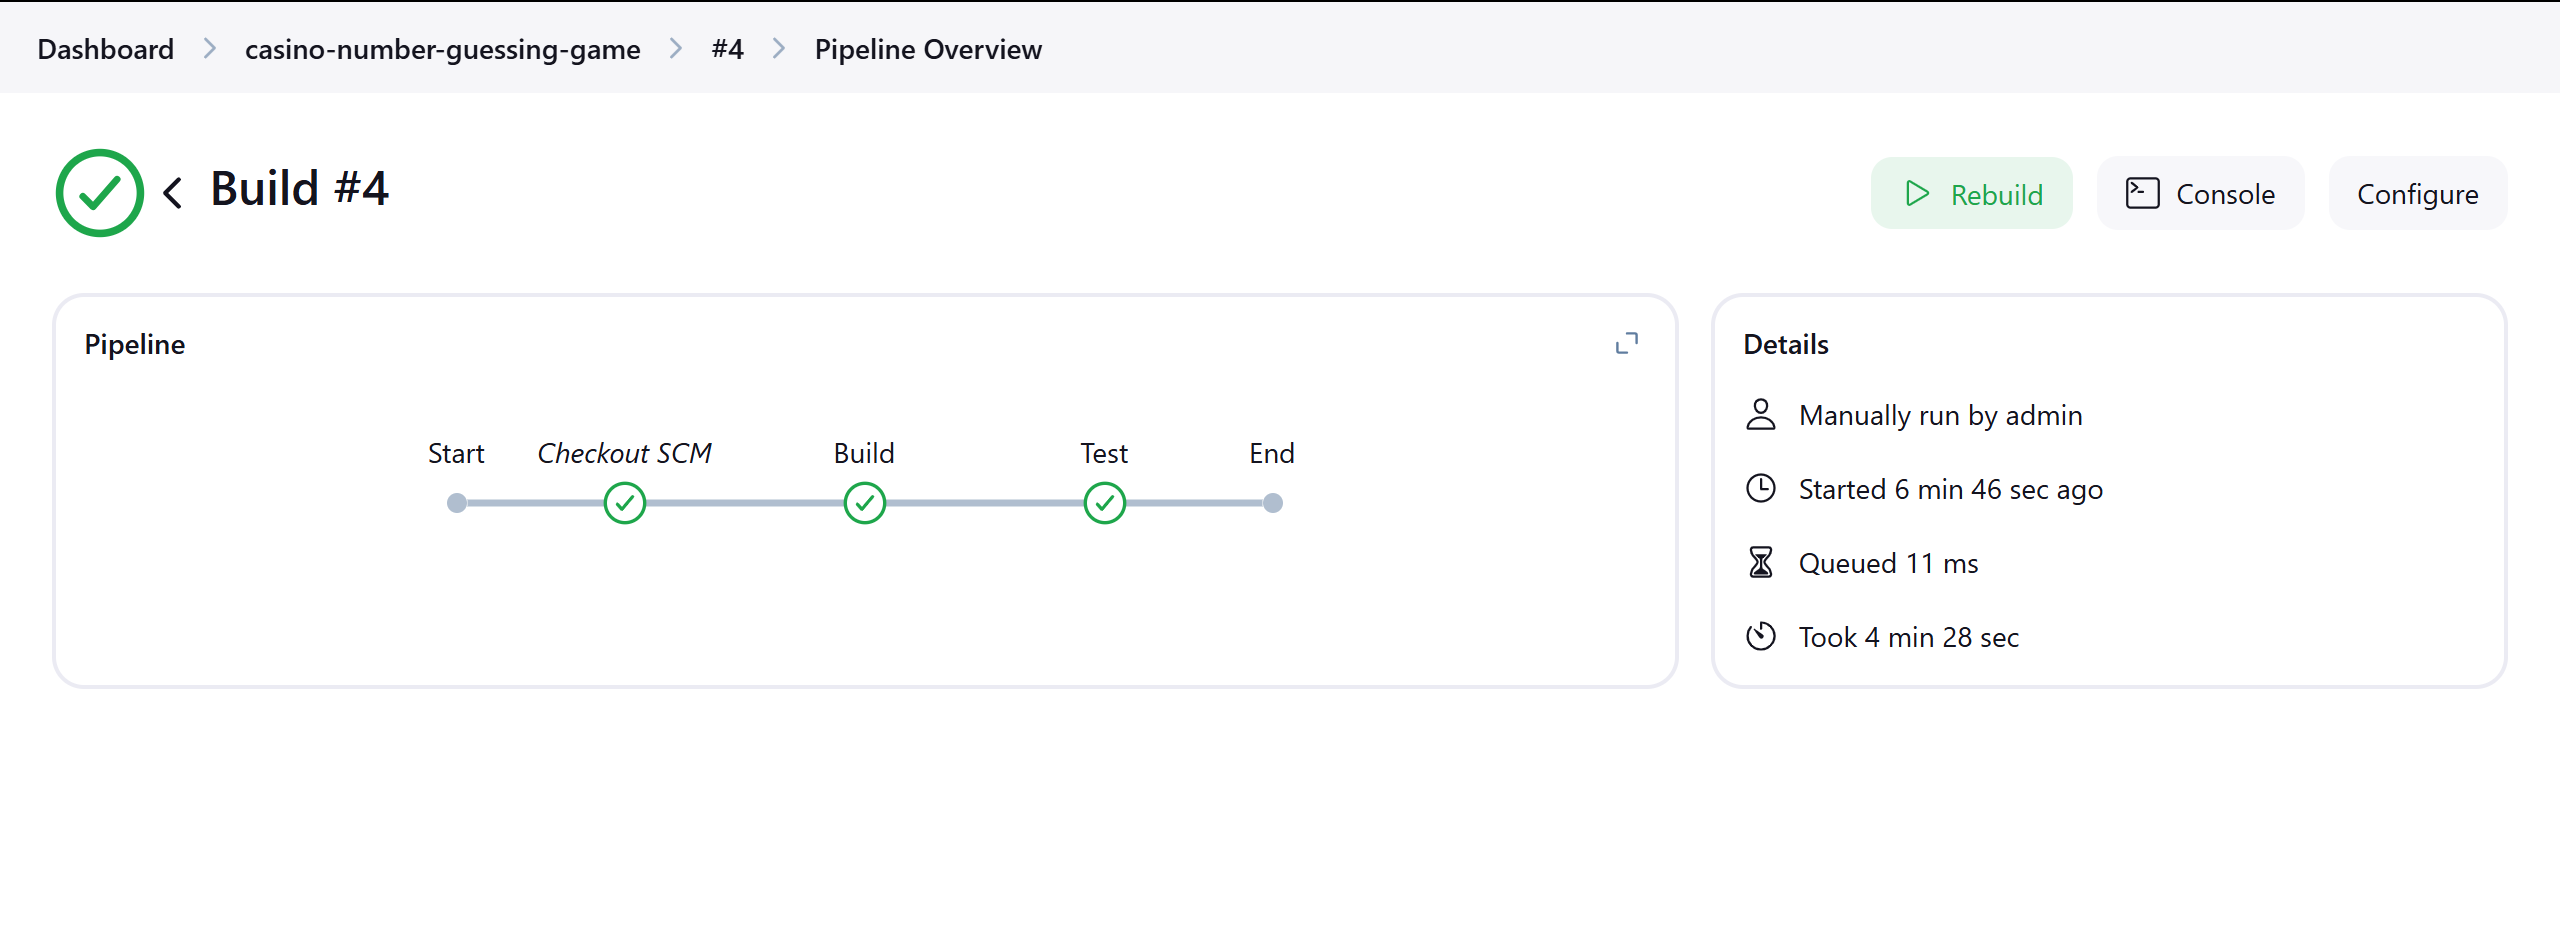
- Take note of the new 'Test' stage. You can select the checkmark next to 'Test' to view the output from that stage.
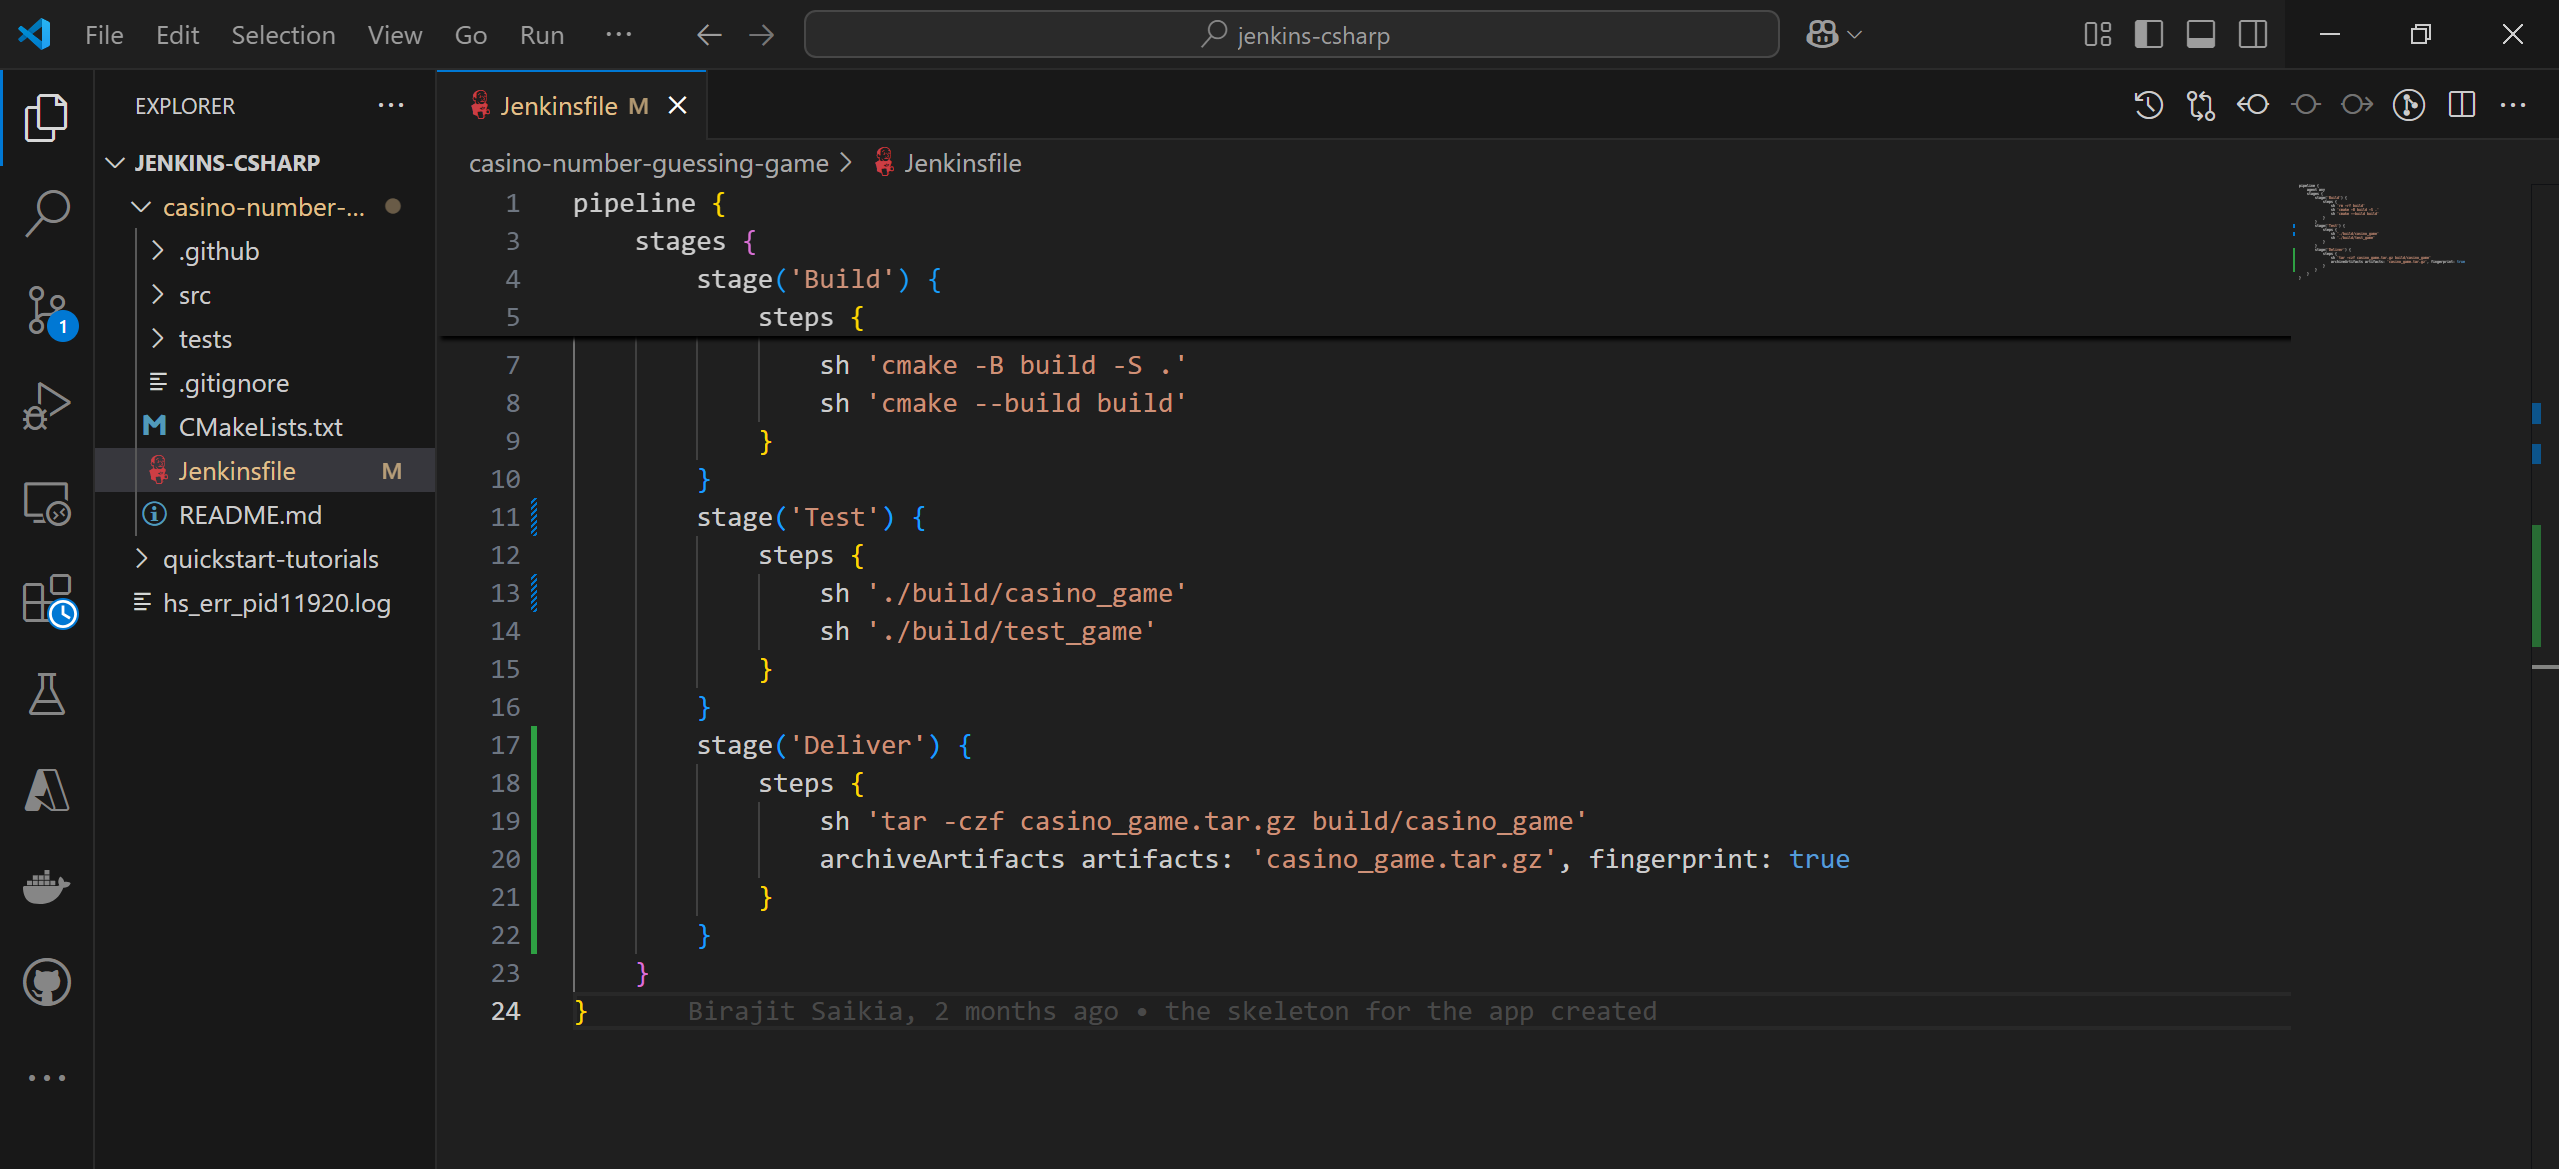
Add a final delivery stage to your Pipeline
- Back at your VS Code with Jenkinsfile opened.
- Copy and paste the following Declarative Pipeline syntax under Test stage of your Jenkinsfile.
stage('Deliver') {
            steps {
                sh 'tar -czf casino_game.tar.gz build/casino_game'
                archiveArtifacts artifacts: 'casino_game.tar.gz', fingerprint: true
            }
        }
Your Jenkinsfile will look like this:
pipeline {
    agent any
    stages {
        stage('Build') {
            steps {
                sh 'rm -rf build'
                sh 'cmake -B build -S .'
                sh 'cmake --build build'
            }
        }
        stage('Test') {
            steps {
                sh './build/casino_game'
                sh './build/test_game'
            }
        }
        stage('Deliver') {
            steps {
                sh 'tar -czf casino_game.tar.gz build/casino_game'
                archiveArtifacts artifacts: 'casino_game.tar.gz', fingerprint: true
            }
        }
    }
}
- Save your Jenkinsfile and push the new changes to your remote Jenkinsfile for Jenkins to access by running the following command:
git add .

git commit -m "Add 'Test' stage"

git push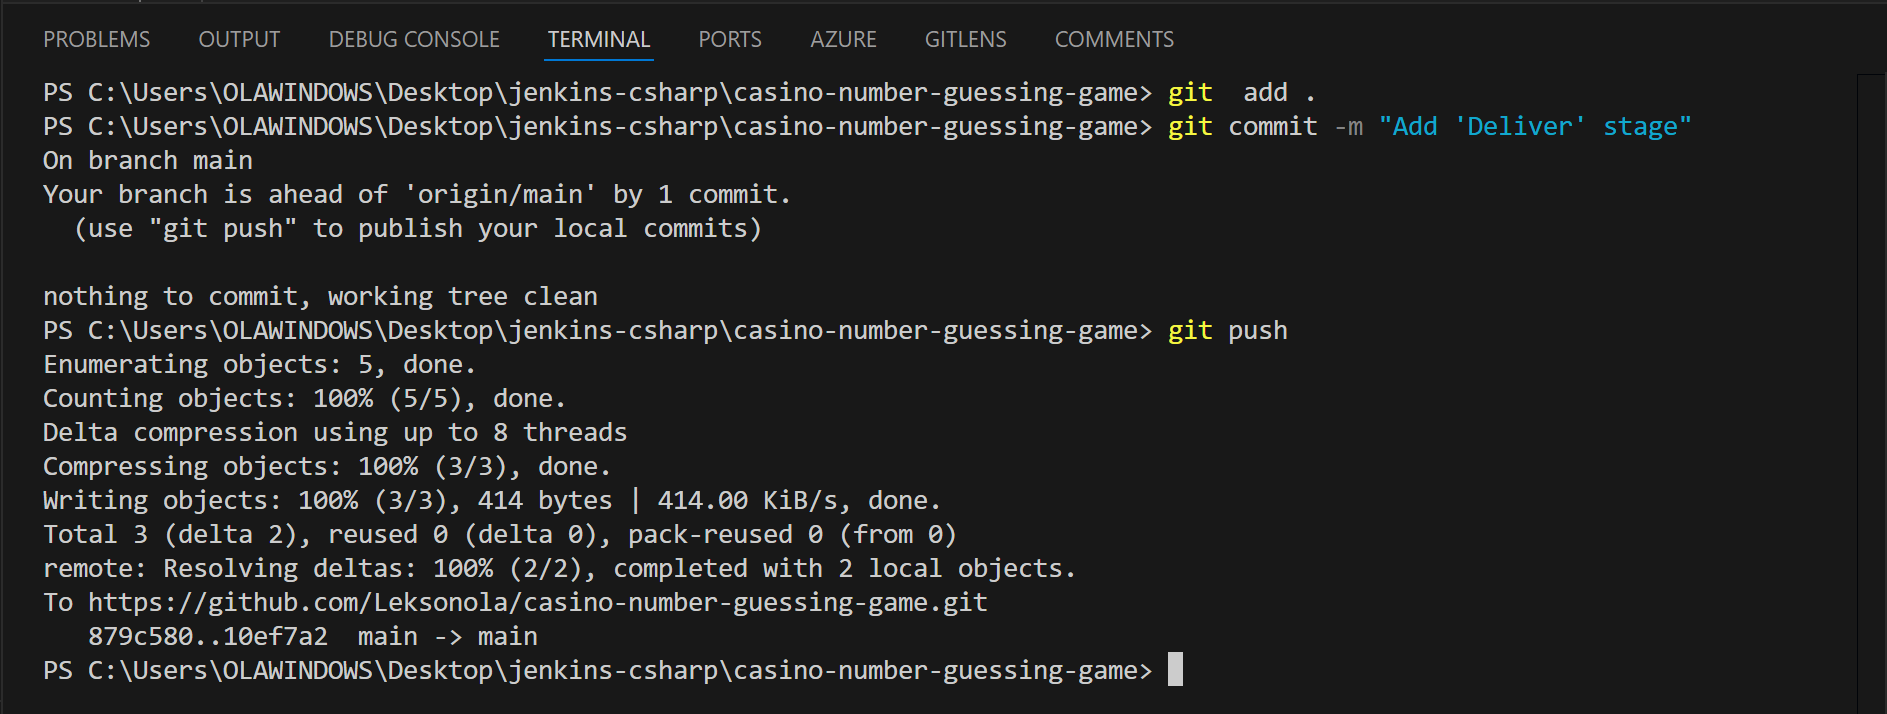
- Click on 'Build Now' on the left. After a short wait, a new column labeled 'Deliver' should appear in the Stage View.
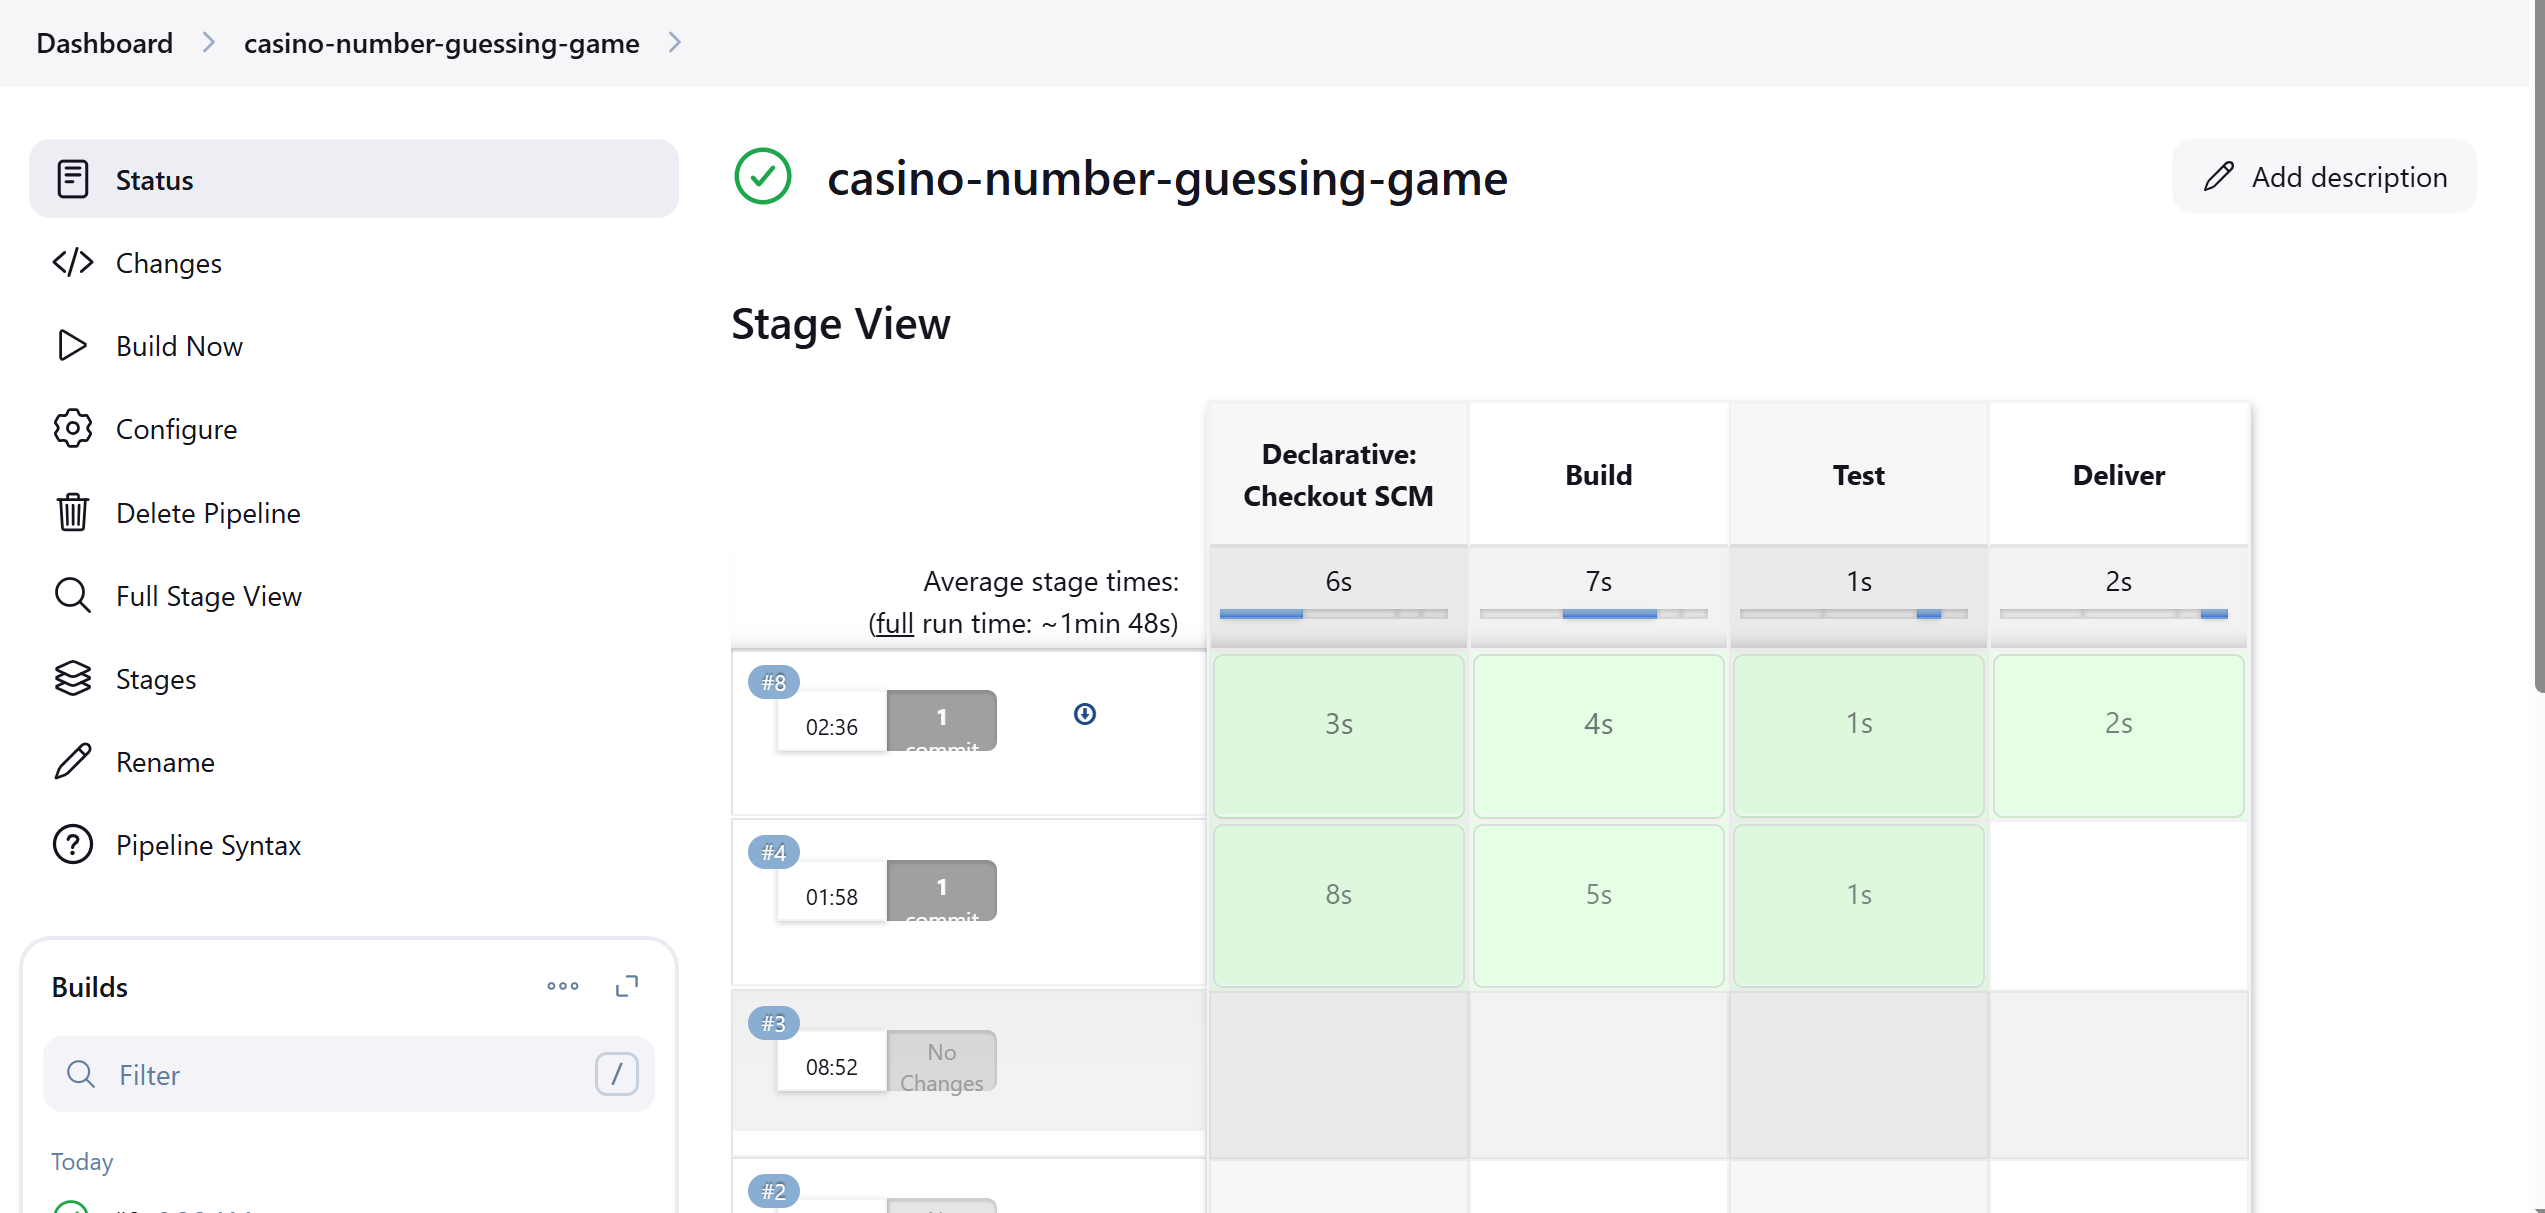
- Click on #3 or the number for your most recent build in the left pane under Build History to view the build details.
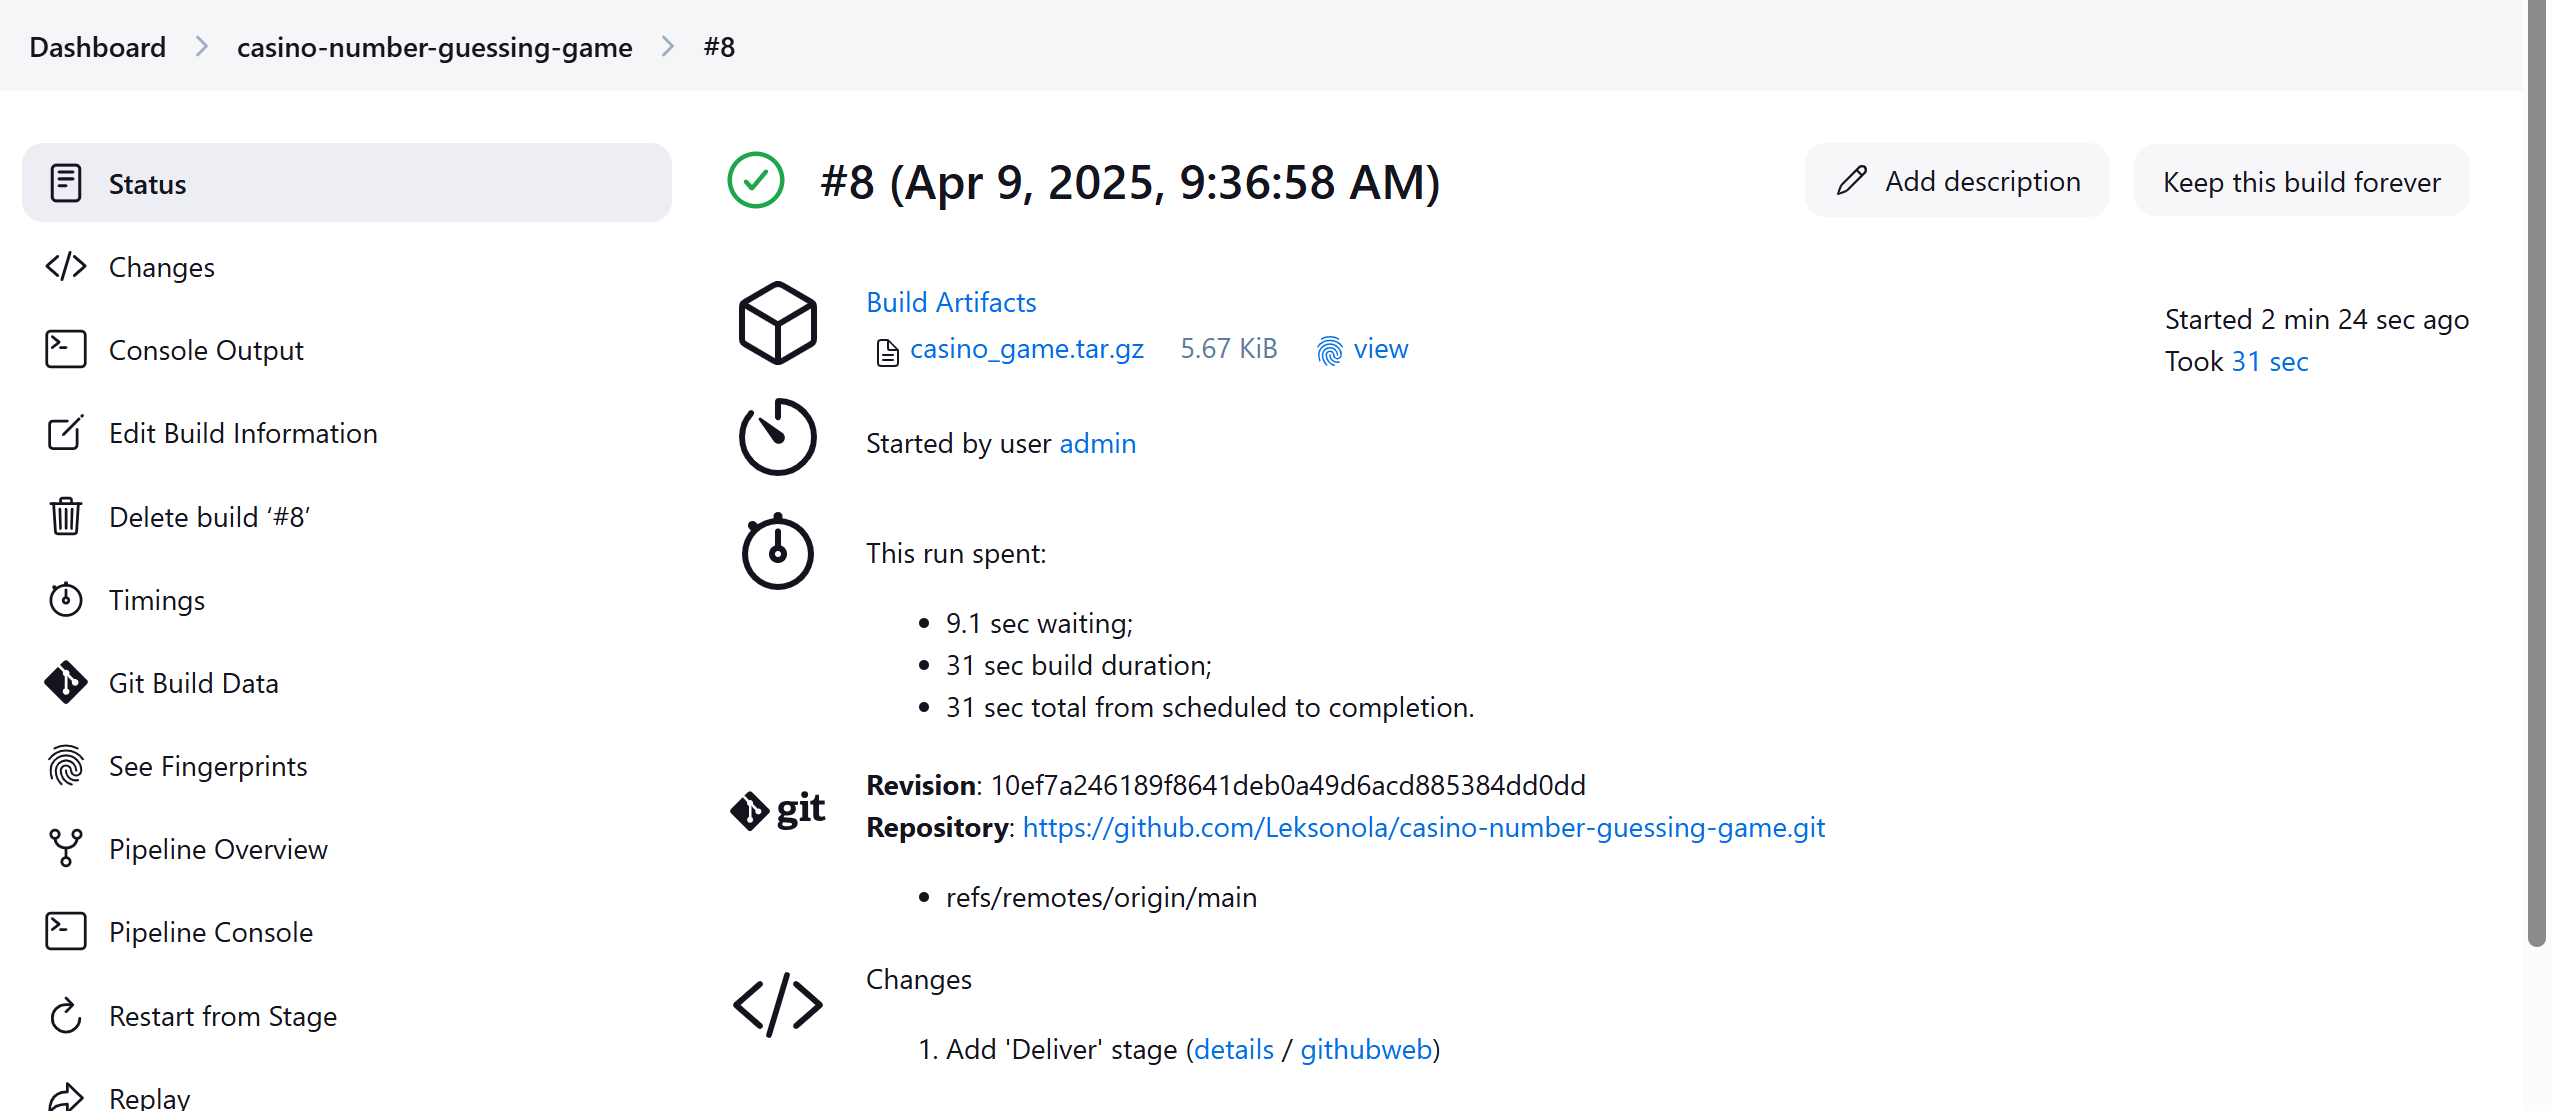
- Select Pipeline Overview to see the stages of the Pipeline.
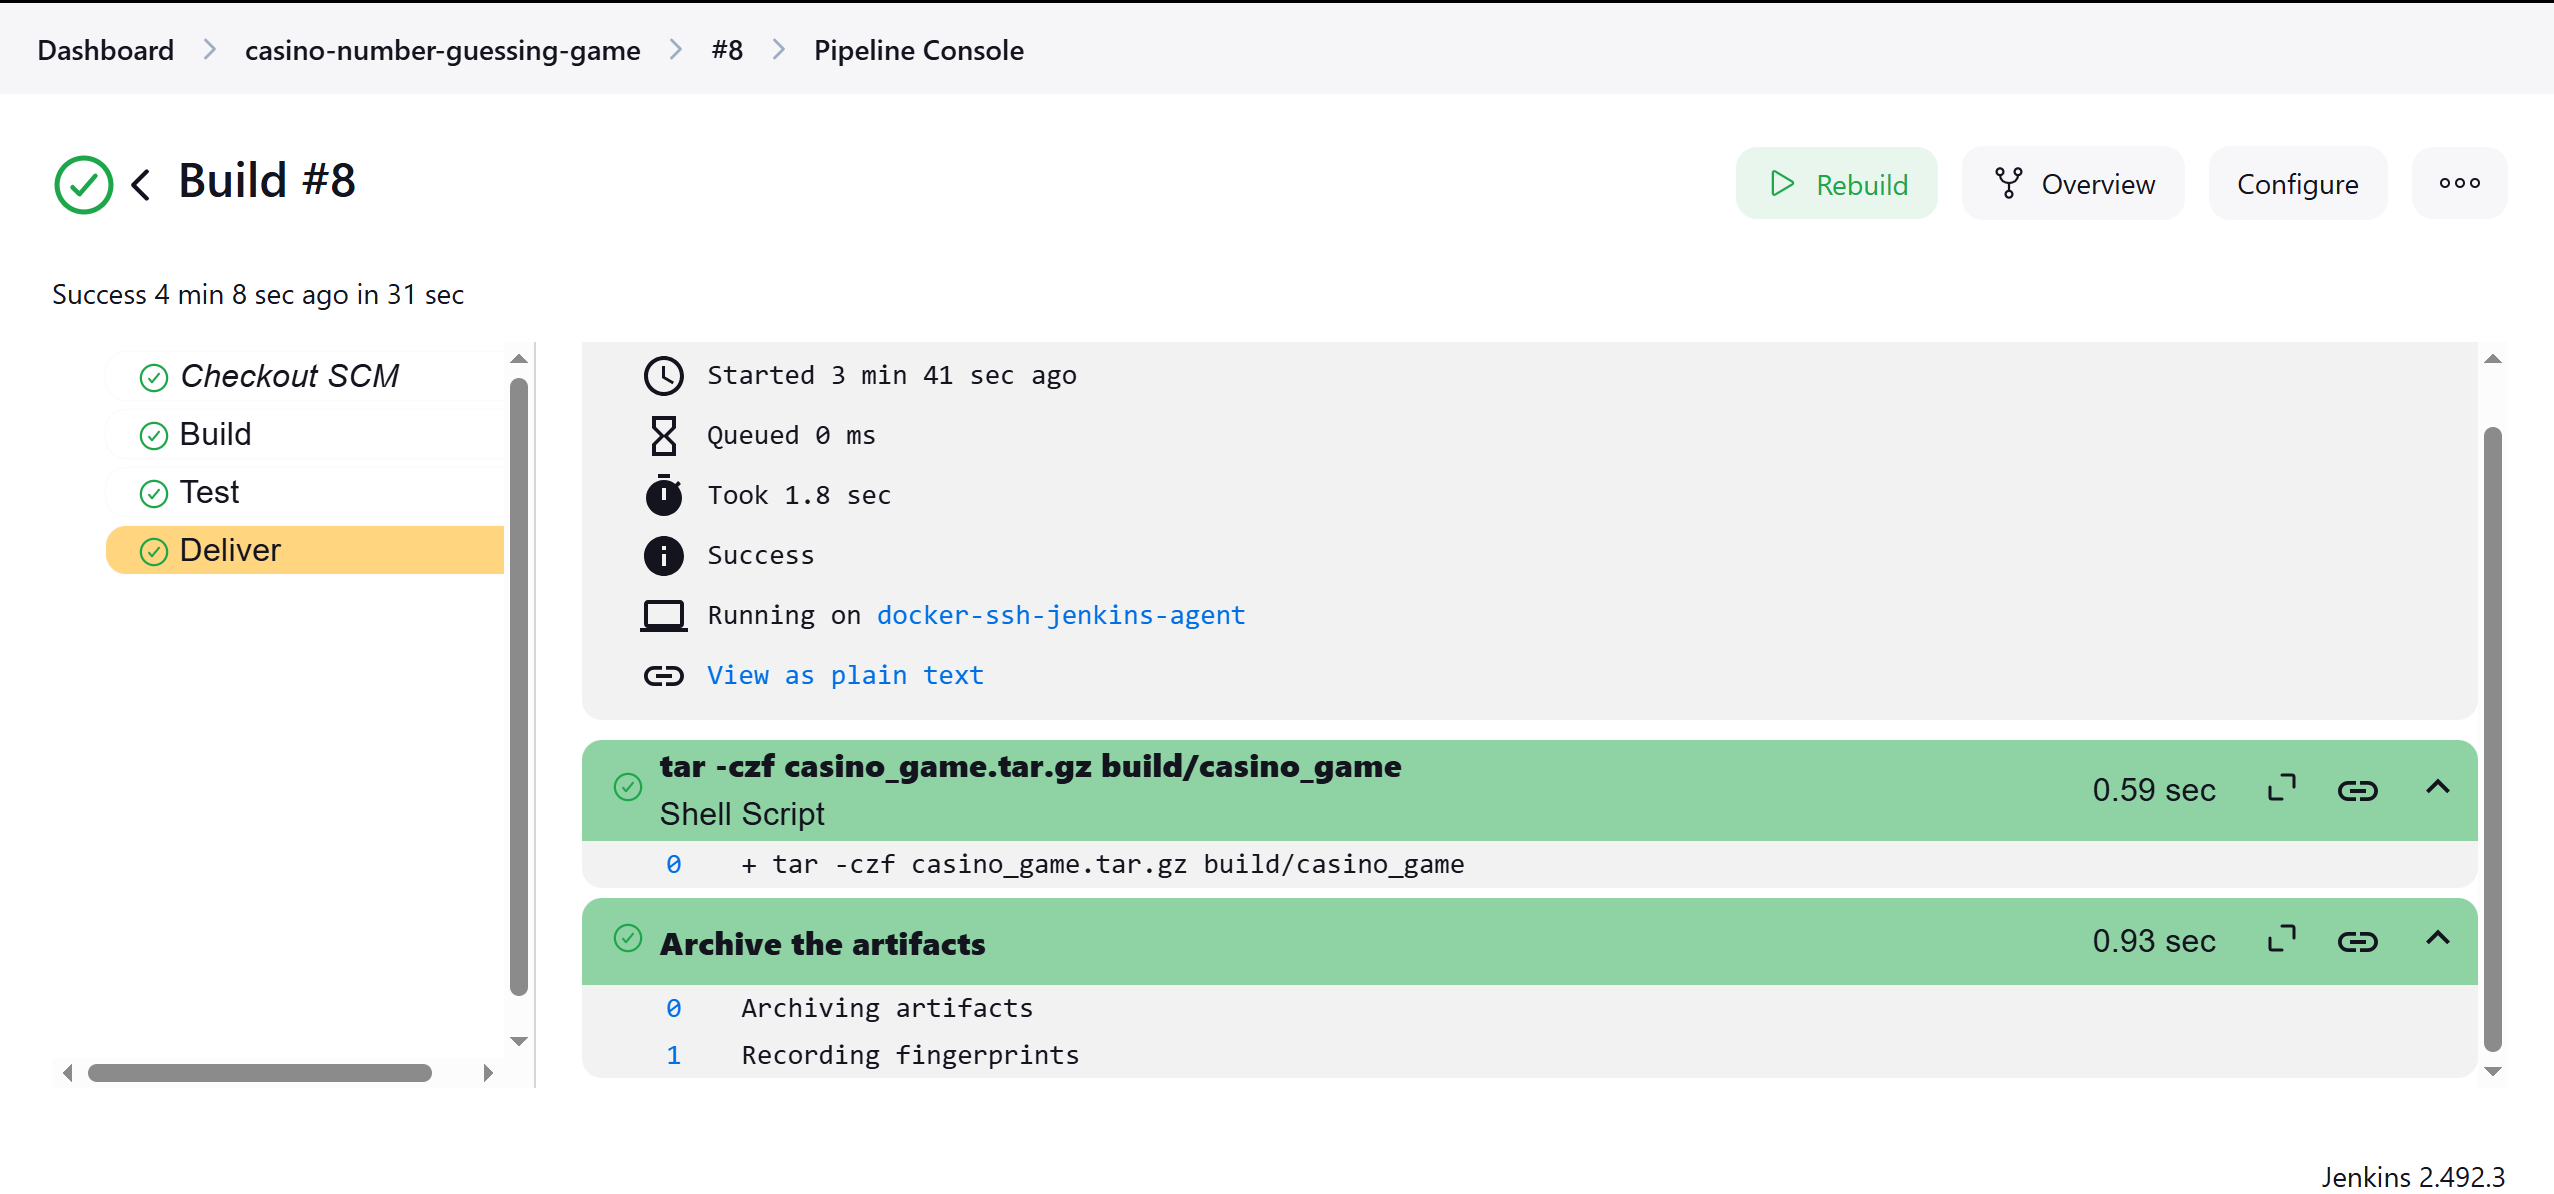
- Select the Deliver stage. You will then see a green part displaying tar -czf casino_game.tar.gz build/casino_game, which represents the successful execution of the tar command.
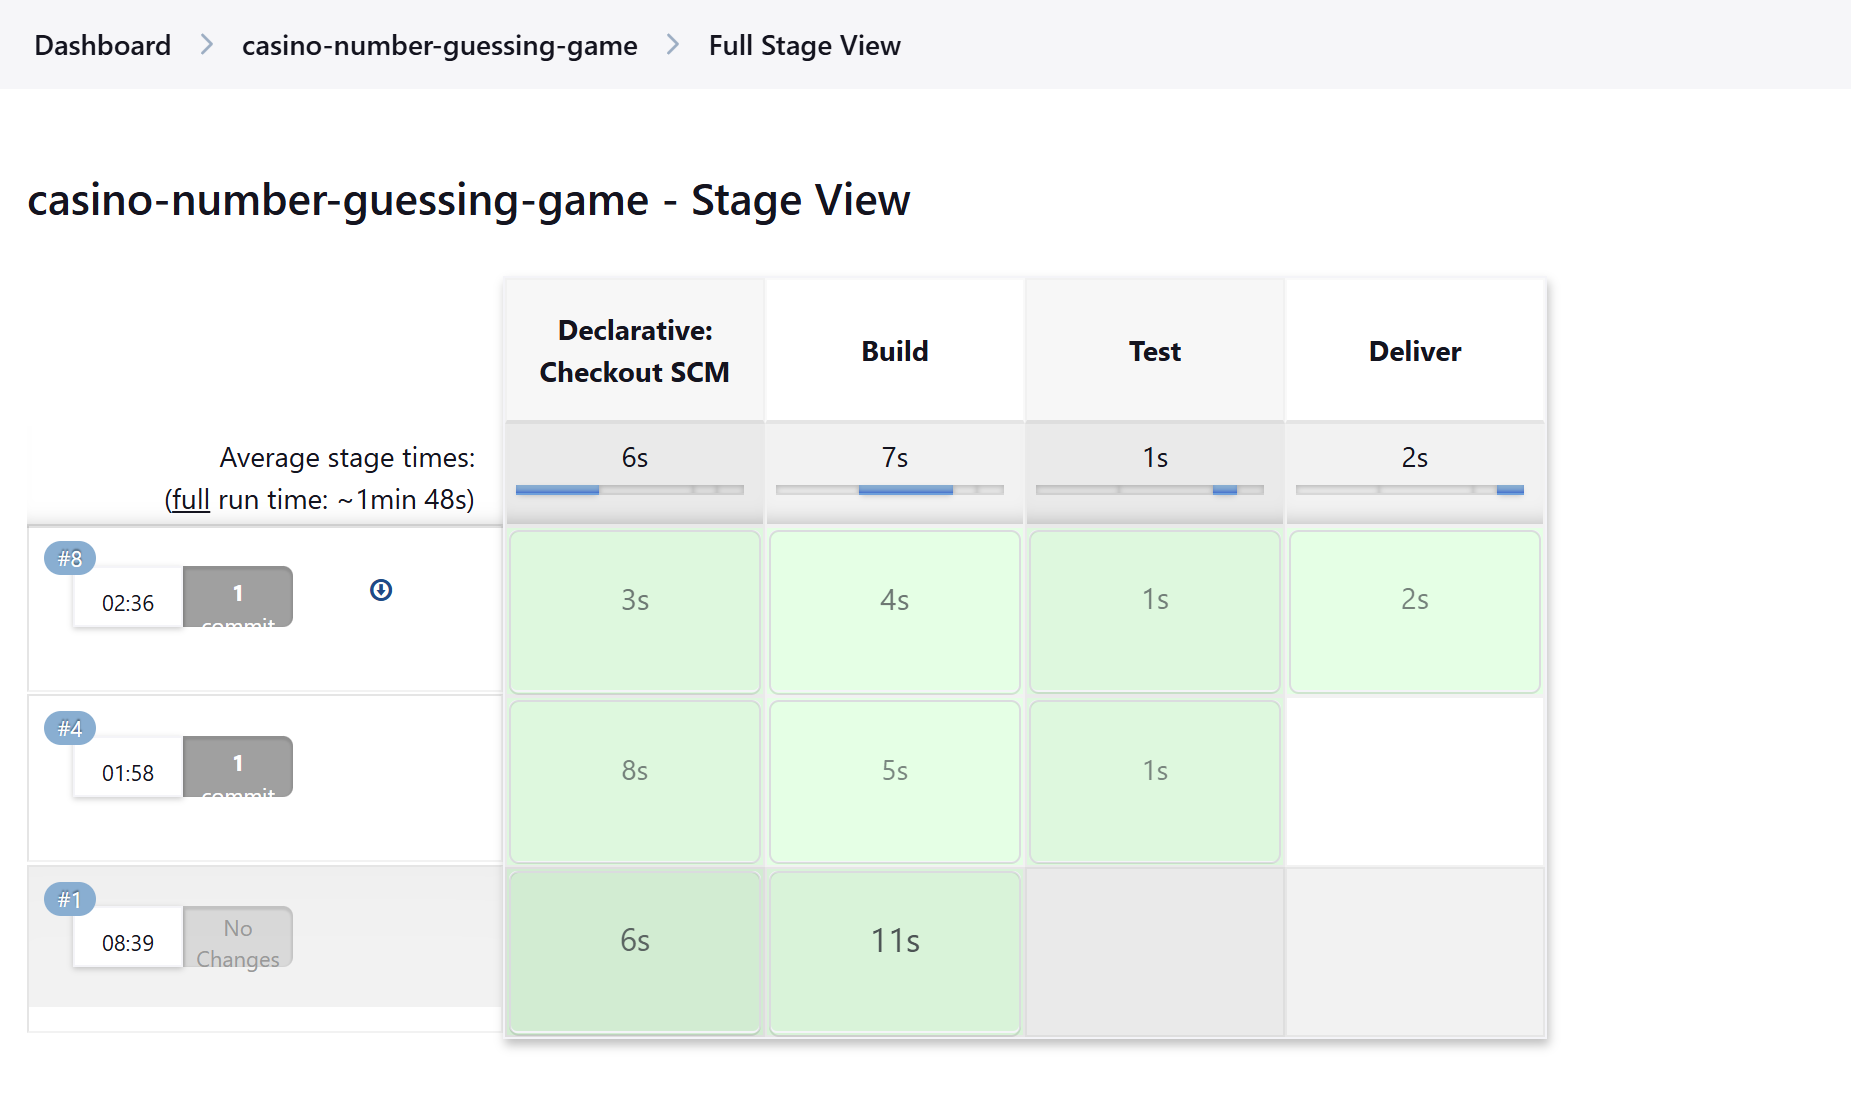
- You can see the full stage view by clicking on the "Full Stage View" in the left menu.

Thanks for staying till the end