
Azure Kubernetes Service (AKS) is Microsoft’s managed Kubernetes offering that simplifies deploying, managing, and scaling containerized applications in the cloud.
Key Points:
Managed Kubernetes:
Microsoft manages the Kubernetes control plane (master nodes), which reduces your operational overhead. You focus on deploying and managing your application workloads.Integrated with Azure Ecosystem:
AKS seamlessly integrates with other Azure services (like Azure Monitor, Azure Active Directory, and Azure DevOps), making it easier to implement monitoring, security, and CI/CD pipelines.Scalability and Reliability:
With features like auto-scaling, self-healing, and load balancing, AKS provides the necessary tools to handle variable workloads and ensure high availability.Simplified Operations:
The service automates tasks such as upgrades, patching, and scaling, which streamlines cluster management.
Use Cases:
- Microservices Architecture: Ideal for running distributed microservices-based applications where each service runs in its own container. Dev/Test Environments: Quickly spin up clusters for testing and development with minimal administrative overhead. Production Workloads: Leverage enterprise-grade features (security, monitoring, scaling) for running critical applications.
In this lesson, we will delve into the process of creating an Azure Kubernetes Service (AKS) cluster in the Azure Portal. AKS is a managed Kubernetes service provided by Microsoft Azure that simplifies the deployment, management, and scaling of containerized applications using Kubernetes. To create an AKS cluster, follow these steps:
1, Log in to the Azure Portal using your credentials.
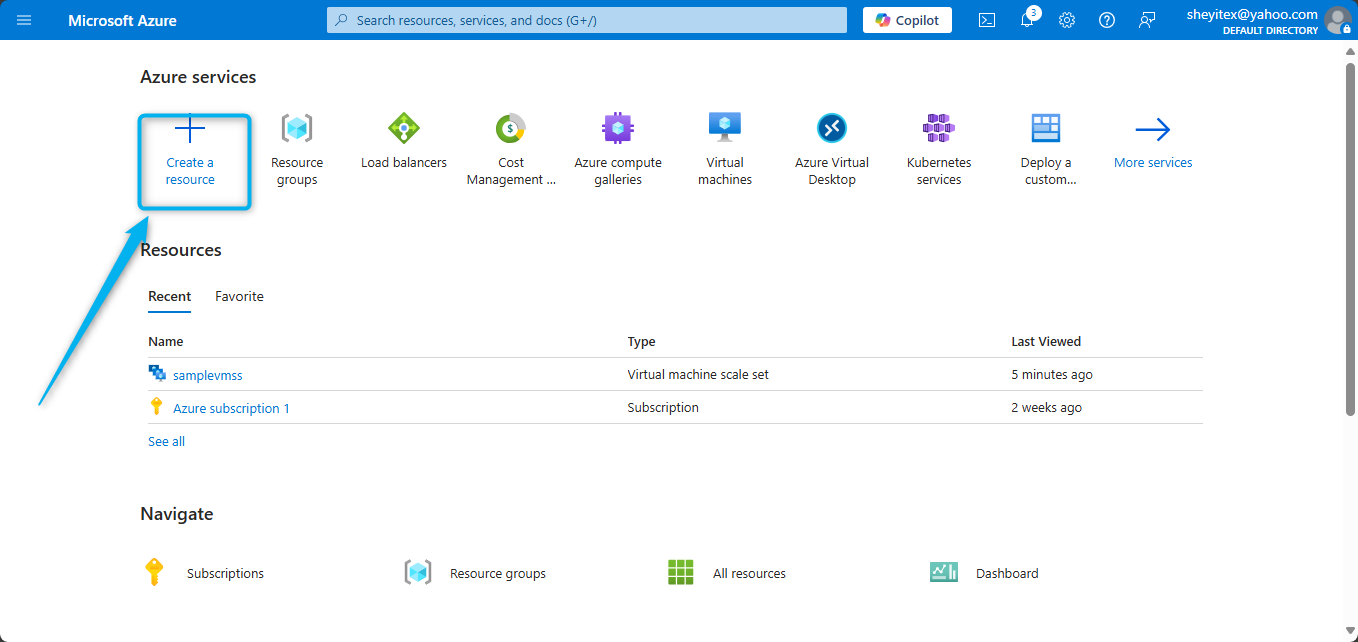
2, Navigate to the Create a resource option..
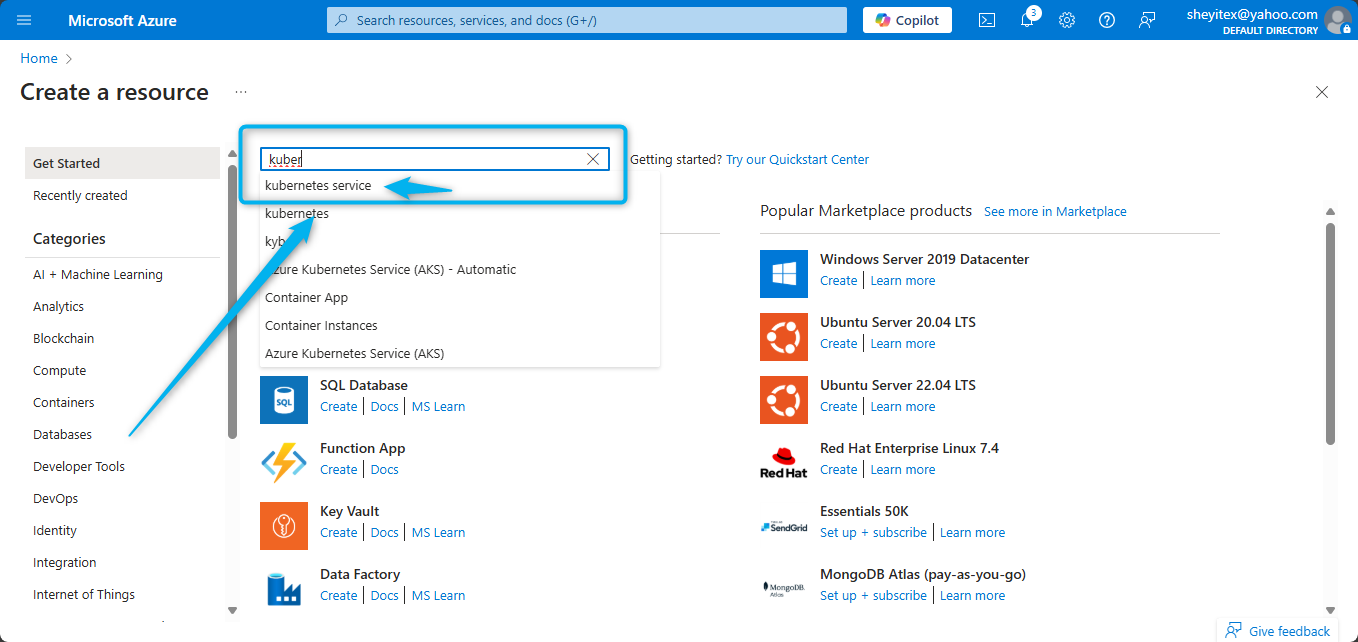
3, Search for Kubernetes Service
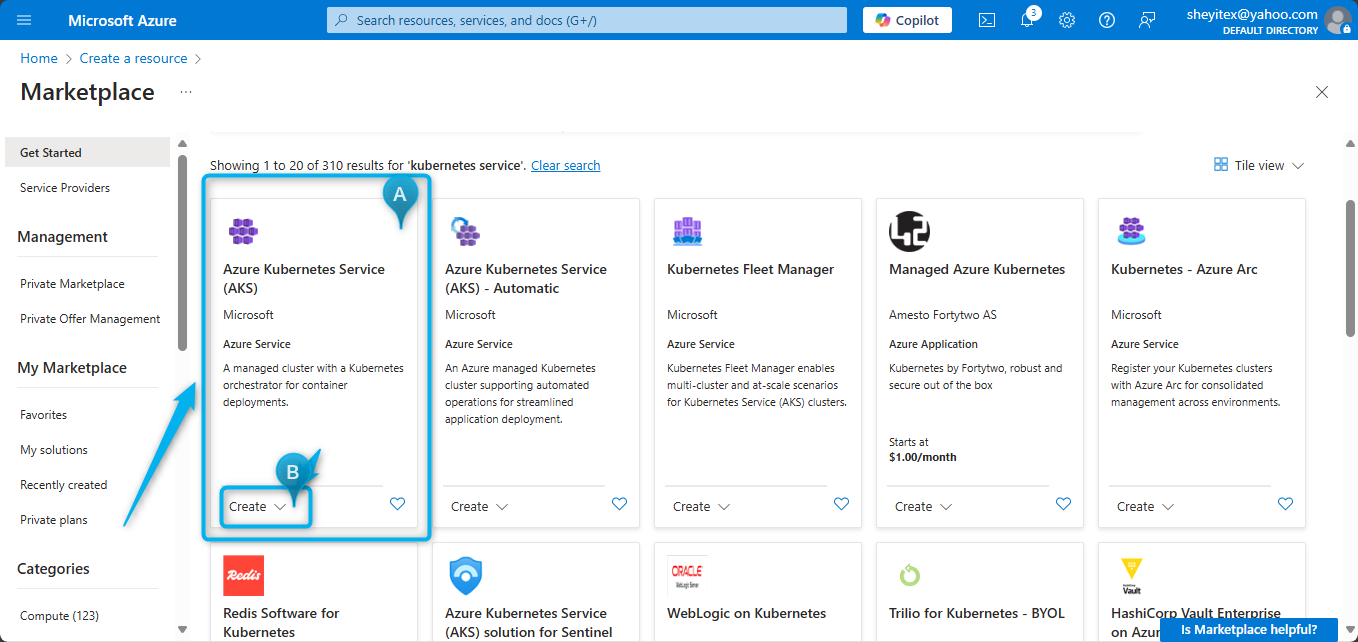
4, Click on Kubernetes Service and then select Create
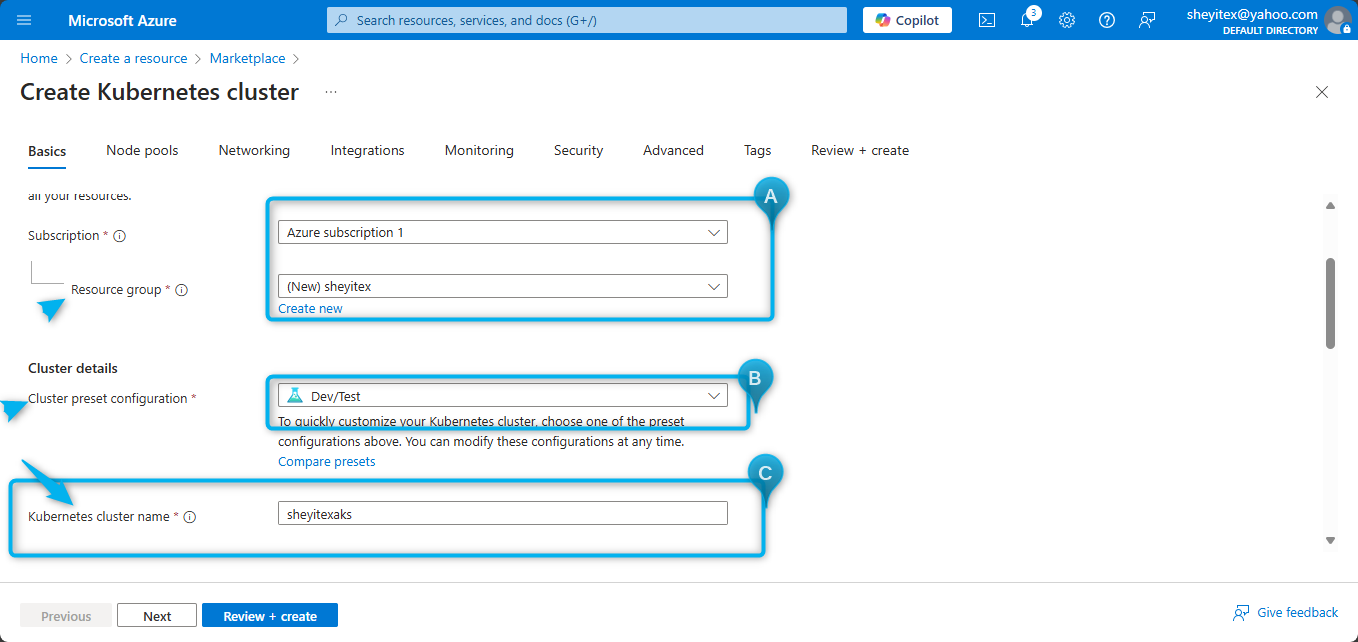
5, Fill in the required information such as subscription, resource group, AKS cluster name, region, and Kubernetes version.
6, Configure additional settings like node size, node count, and authentication method
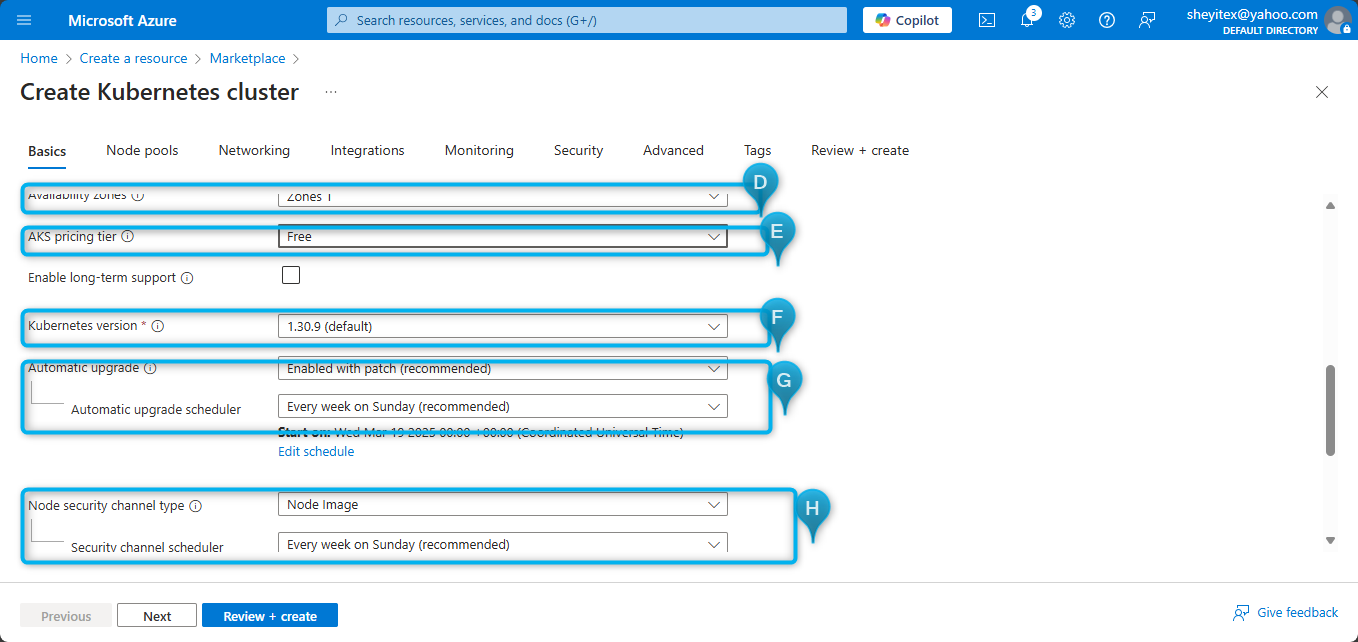
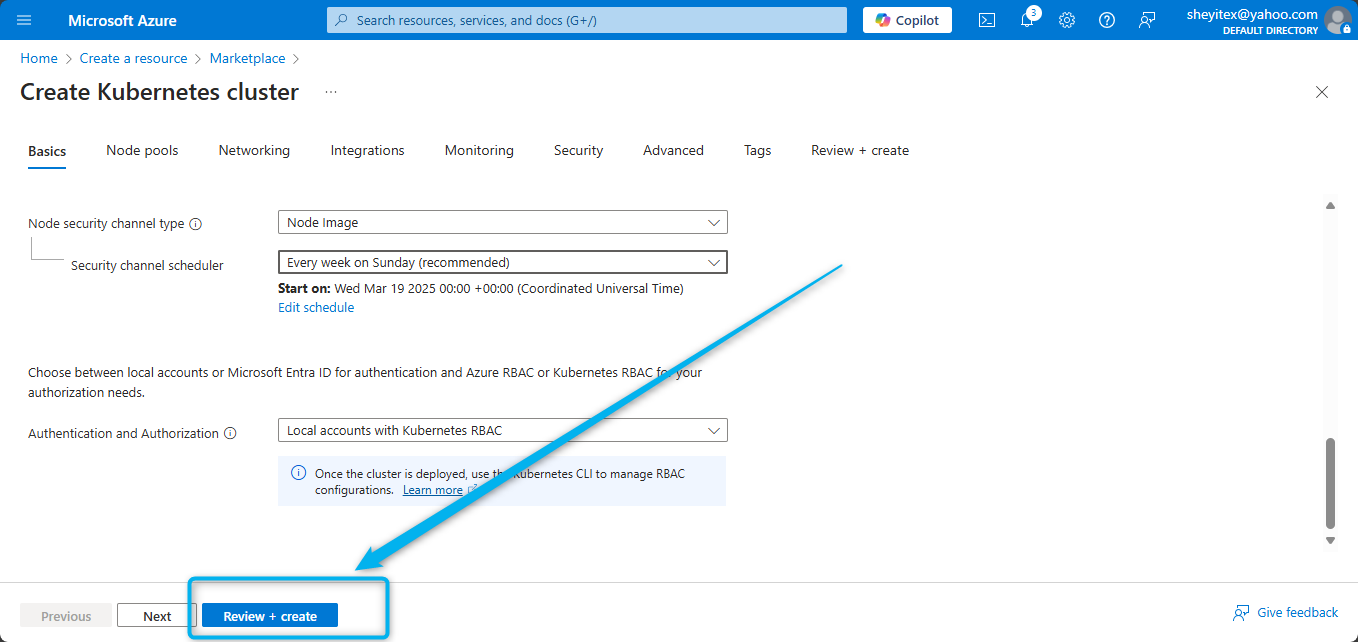
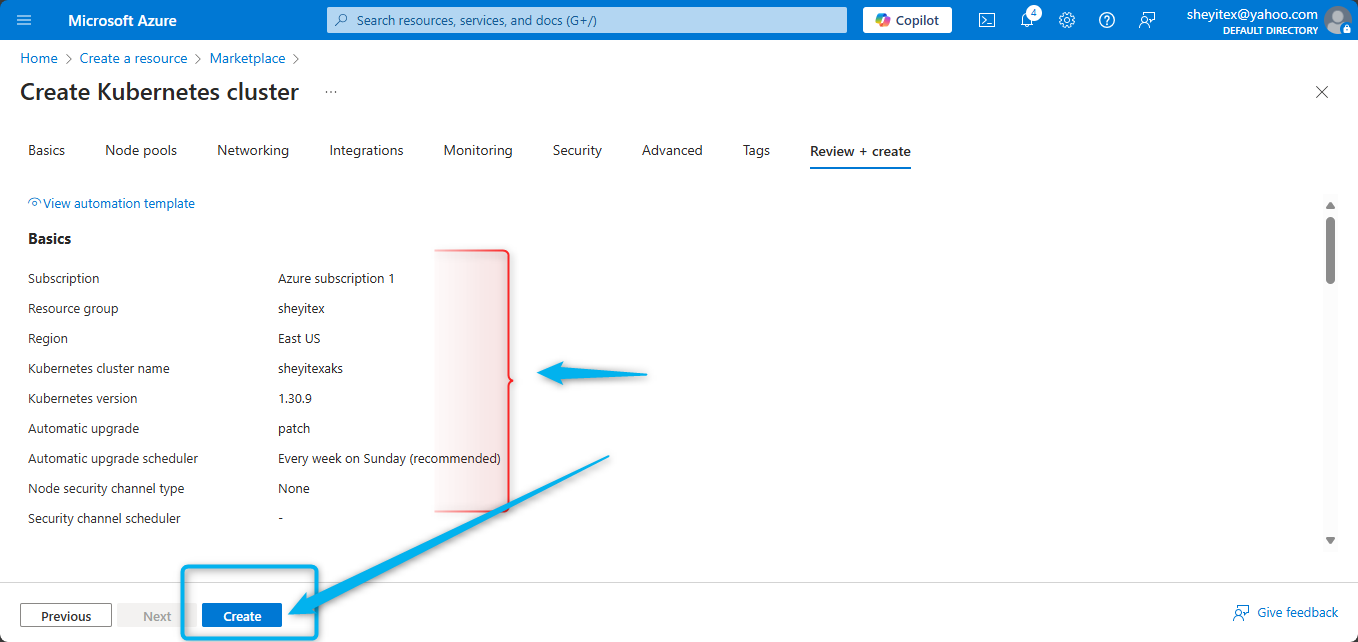
7, Review the settings and click on Review + create
8, Once validation is successful, click on Create to provision the AKS cluster.
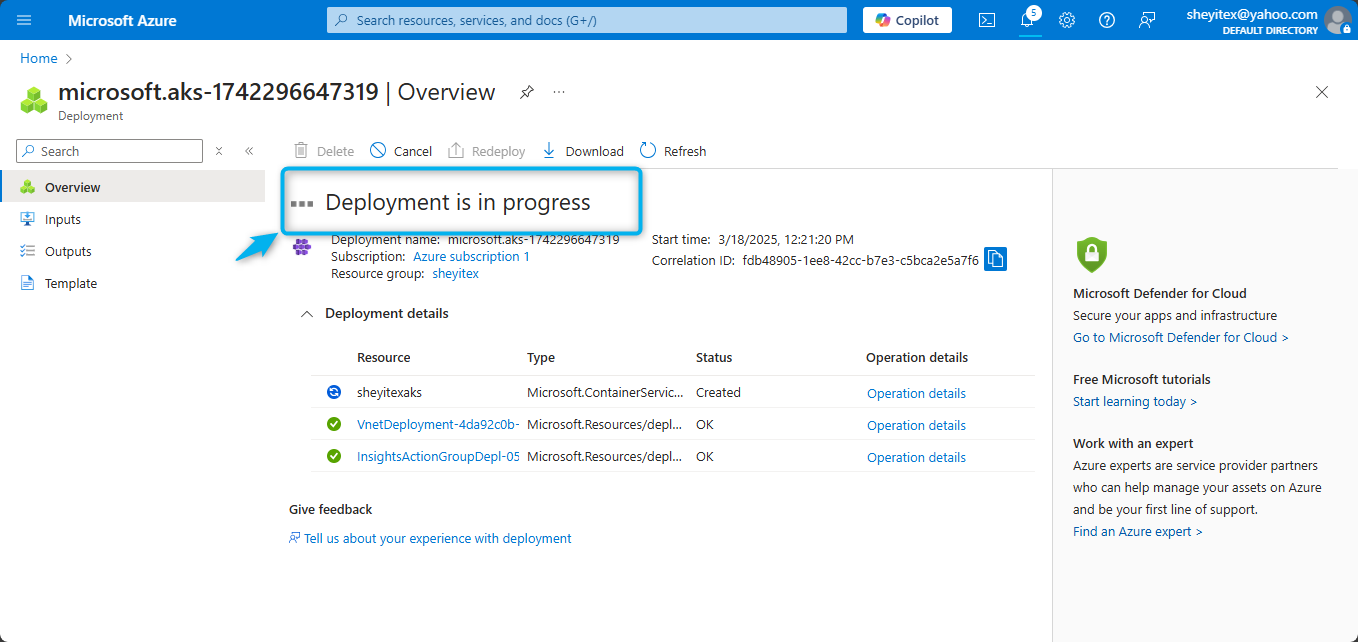
9, Monitor the deployment progress in the Azure Portal.
After the AKS cluster is successfully created, you can interact with it using kubectl commands or through the Azure Portal interface. This lesson provides a foundational understanding of how to create an AKS cluster in the Azure Portal, which is essential for deploying and managing containerized applications in a Kubernetes environment.
Further Learning:
For more in-depth details, you can refer to the official Azure Kubernetes Service documentation which covers setup, configuration, best practices, and more.
In summary, AKS provides a robust platform for container orchestration on Azure by handling much of the underlying complexity of Kubernetes management, allowing you to focus on building and running your applications.


