Introduction
In today's digital era, businesses require web applications that are not only highly scalable but also secure and efficient. One of the most widely adopted architectural patterns to achieve this is the Three-Tier Architecture, which enhances application performance, maintainability, and security.
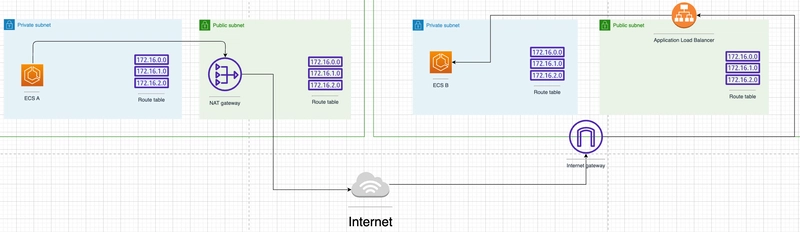
A Three-Tier Architecture consists of:
- Presentation Tier – The frontend that interacts with users (e.g., web servers).
- Application Tier – The logic layer that processes data and handles requests.
- Data Tier – The database layer that securely stores and manages data.
By leveraging AWS services, we can build a scalable, highly available, and secure three-tier application in the cloud. In this blog, I will walk you through the step-by-step implementation of a Three-Tier Architecture on AWS, highlighting key services, best practices, and security measures.
Let's dive in!!
Implemention
Step 1: Create an Amazon S3 Bucket
To store static assets (such as images, scripts, and stylesheets) or application data, we first need to create an Amazon S3 bucket.
Navigate to AWS S3:
- Go to the AWS Management Console.
- Search for S3 in the services search bar.
- Click on Amazon S3.
Create a New Bucket:
- Click on Create bucket

- Enter a unique Bucket name (e.g.,
yourname-bucket). - Choose the AWS Region where you want to store your data.
Configure Bucket Settings:
- Keep Block Public Access settings enabled (for security).
- Enable versioning if needed for data backup.
- Leave other settings as default unless specific configurations are required.
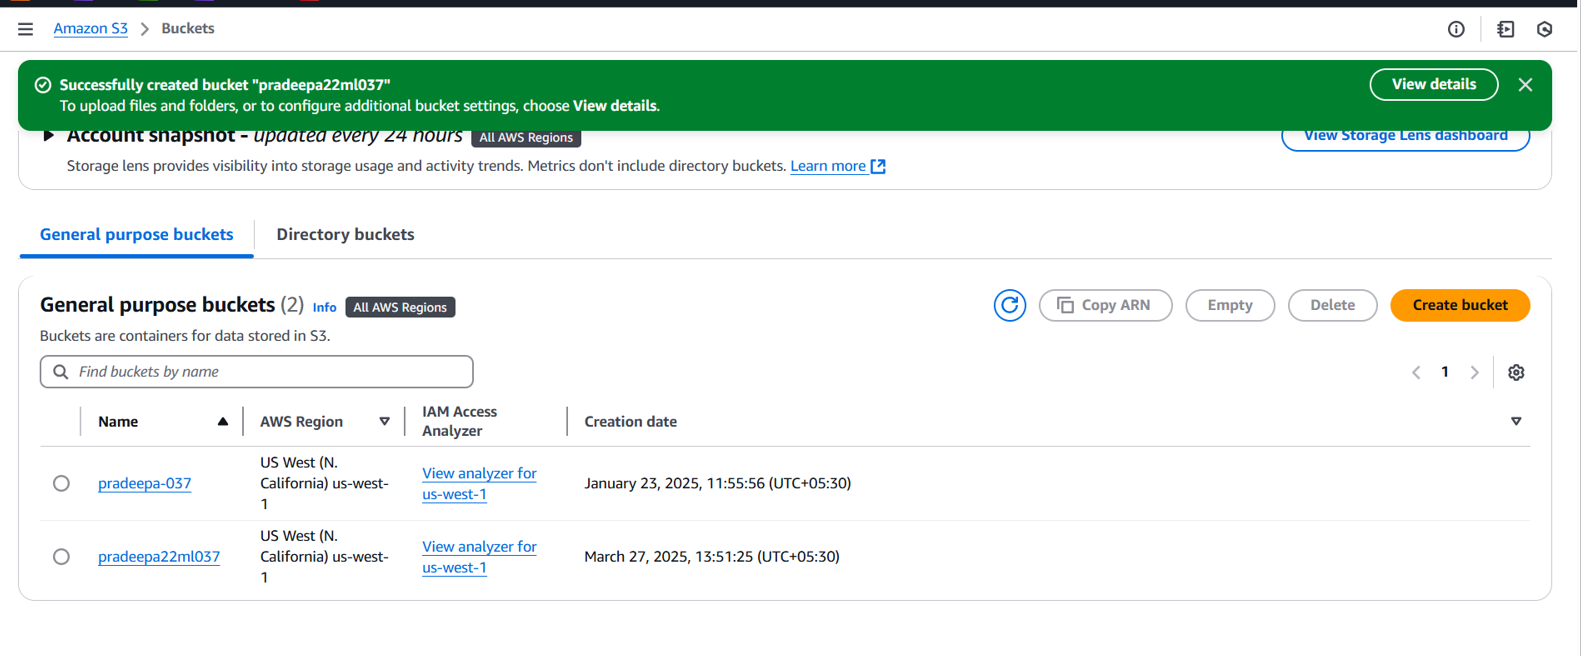
Create the Bucket:
- Click on Create bucket to finalize the setup.
- You will see a success message confirming bucket creation.
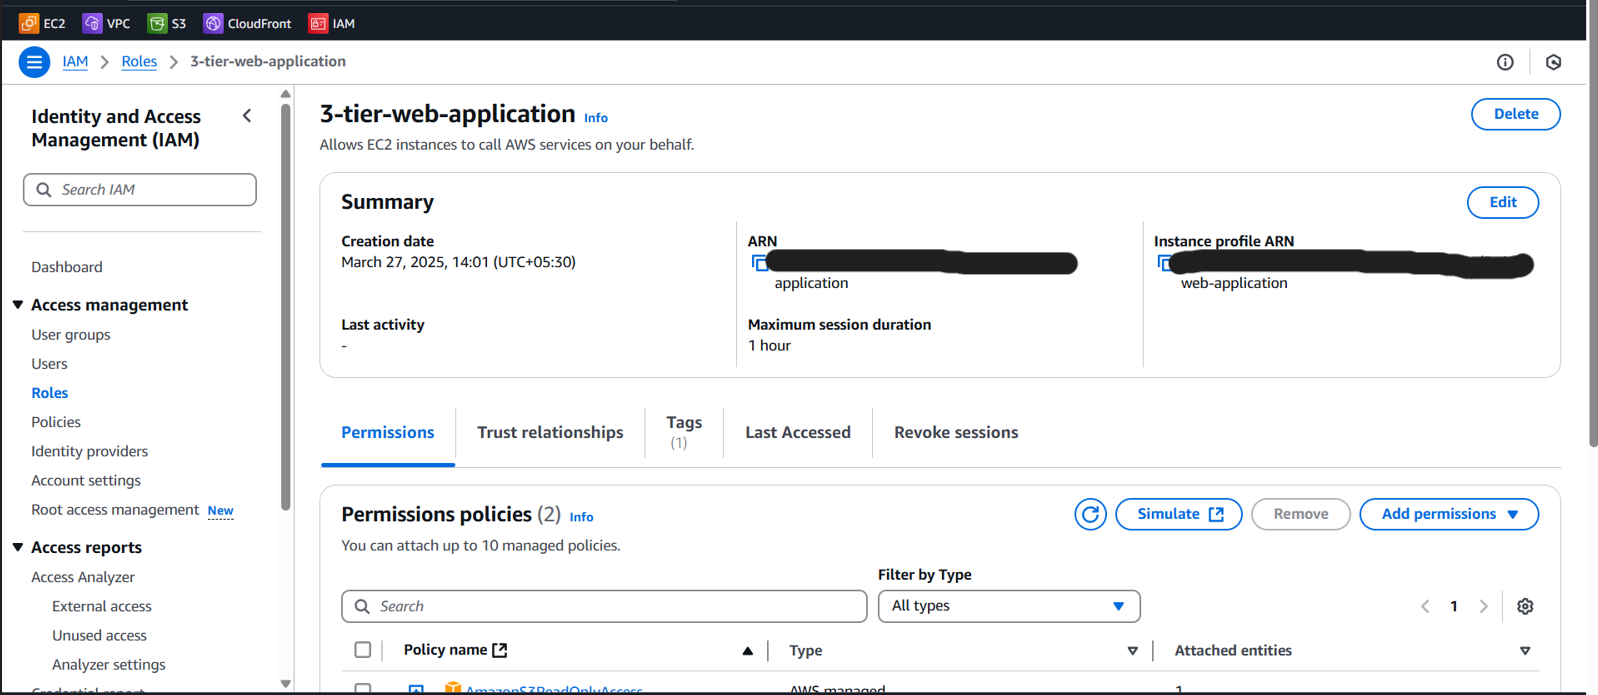
Step 2: Create an IAM Role for EC2
To allow an EC2 instance to access AWS services securely, we need to create an IAM Role and attach the required policies.
Navigate to IAM:
- Go to the AWS Management Console.
- Search for IAM in the services search bar.
- Click on Roles under the Access management section.
Create a New IAM Role:
- Click on Create role.
- Select AWS Service as the trusted entity.
- Choose EC2 as the use case (to allow EC2 instances to assume this role).
- Click Next.
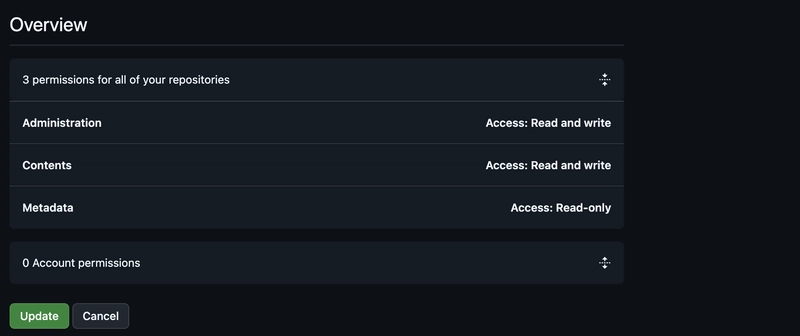
Attach Required Policies:
- Attach the following policies:
- AmazonS3ReadOnlyAccess – Provides read-only access to S3.
- AmazonEC2InstanceProfile – Grants permissions for EC2 to access necessary resources.

- Click Next.
Configure Role Settings:
- Enter a Role Name (e.g.,
3-tier-web-application). - Review the settings and permissions.
- Click Create Role.
Verify IAM Role Creation:
- Go to IAM > Roles and search for the created role (
3-tier-web-application). - Ensure the attached policies are correct.
Step 3: Create a VPC in AWS
A Virtual Private Cloud (VPC) allows you to define a custom network for your AWS resources. Below are the steps to create a VPC.
Navigate to the VPC Dashboard
- Go to the AWS Management Console.
- Search for VPC in the services search bar.
- Click on Your VPCs under the Virtual Private Cloud section.
Create a New VPC
- Click on Create VPC.

- Provide the following details:
-
Name tag:
MyVPC(or any name of your choice) -
IPv4 CIDR Block:
10.0.0.0/16(or any custom CIDR block) - IPv6 CIDR Block: None (optional)
- Tenancy: Default
- Click Create VPC.
-
Name tag:
Verify the VPC Creation
- Navigate back to Your VPCs.
- Ensure your newly created VPC appears in the list.
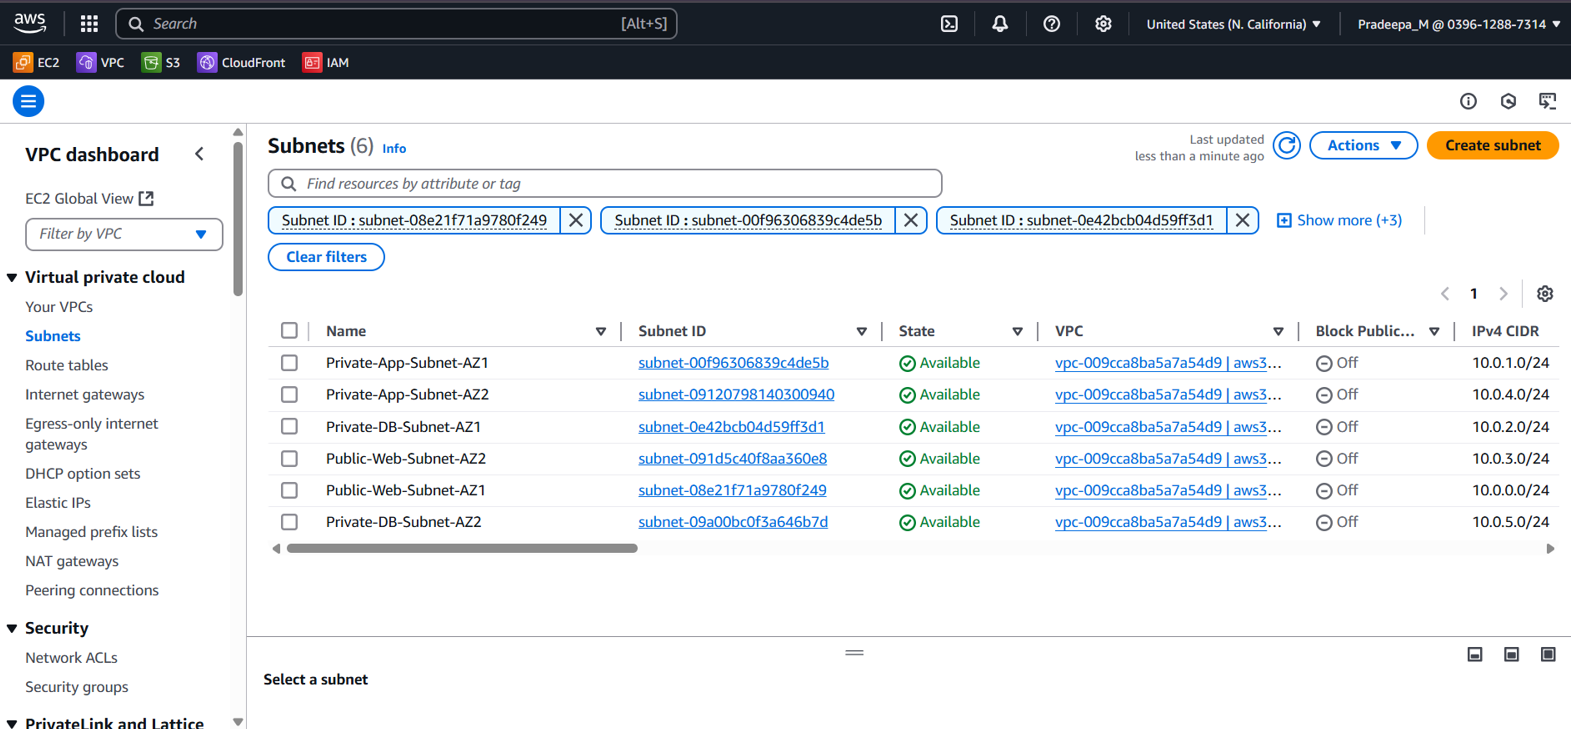
Step 4: Create Six Subnets for 3-Tier Architecture
Navigate to the Subnets Section
- Go to VPC Dashboard → Subnets.
- Click Create Subnet.

Select the VPC
- Choose the VPC created in Step 3.
Create the First Subnet
-
Subnet Name:
Public-Web-Subnet-AZ-1 -
Availability Zone:
us-west-1a(or any AZ in your region) -
IPv4 CIDR Block:
10.0.0.0/24 - Click Create Subnet.
Create the Remaining Subnets
| Subnet Name | Availability Zone | IPv4 CIDR Block |
|---|---|---|
| Public-Web-Subnet-AZ-1 | us-west-1a | 10.0.0.0/24 |
| Private-App-Subnet-AZ-1 | us-west-1a | 10.0.1.0/24 |
| Private-DB-Subnet-AZ-1 | us-west-1a | 10.0.2.0/24 |
| Public-Web-Subnet-AZ-2 | us-west-1b | 10.0.3.0/24 |
| Private-App-Subnet-AZ-2 | us-west-1b | 10.0.4.0/24 |
| Private-DB-Subnet-AZ-2 | us-west-1b | 10.0.5.0/24 |
Verify Subnets
- Ensure all subnets are available in the VPC Dashboard.
Step 5: Create an Internet Gateway and Attach It to the VPC
An Internet Gateway (IGW) allows communication between resources inside the VPC and the internet. This step is crucial for making public subnets accessible.
Steps to Create an Internet Gateway
- Navigate to VPC Dashboard → Internet Gateways.
- Click Create Internet Gateway.

- Provide a Name (e.g.,
three-tier-igw). - Click Create Internet Gateway.
Attach IGW to the VPC
- Select the Internet Gateway created (
three-tier-igw). - Click Actions → Attach to VPC.
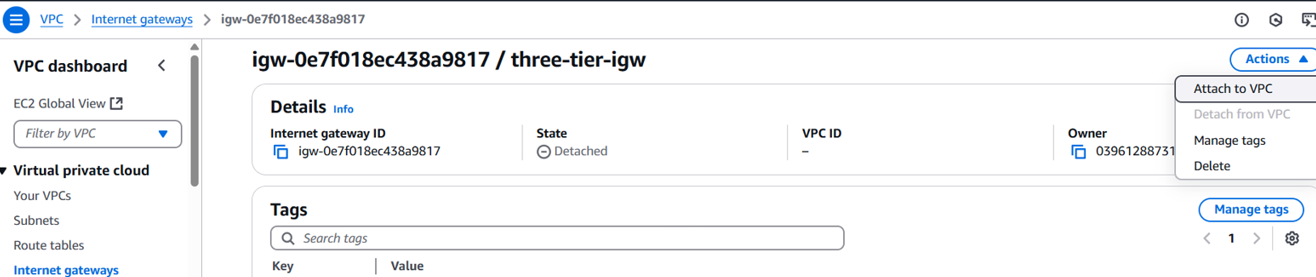
- Select the VPC created in Step 1 (
aws3tierworkshop). - Click Attach Internet Gateway.
IGW is now attached to the VPC!
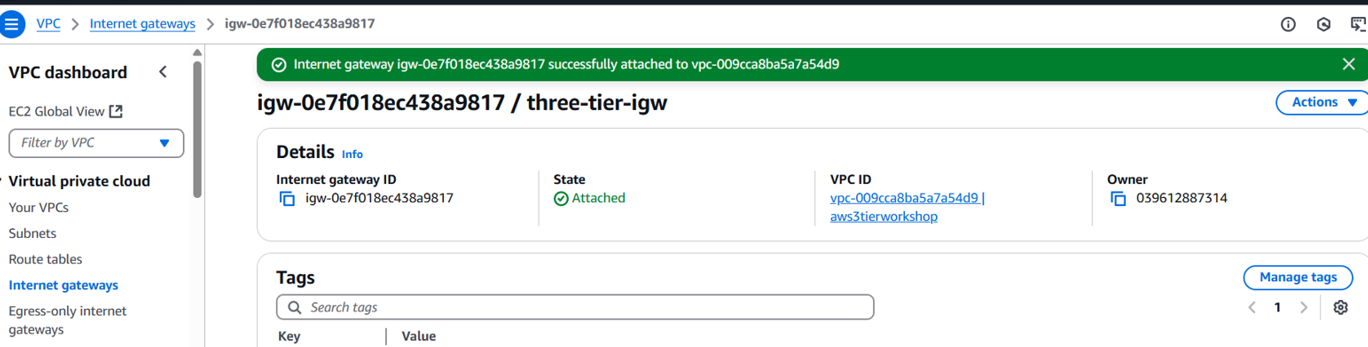
This allows resources in the public subnet to access the internet when configured correctly in the route table.
Step 6: Create and Attach a NAT Gateway
To allow private subnets to access the internet securely while keeping them protected, we need to create a NAT Gateway in each public subnet.
Navigate to AWS NAT Gateway
- Open the AWS Management Console.
- Go to VPC Dashboard → NAT Gateways.
- Click Create NAT Gateway.

step 1: Create NAT Gateway for AZ1
-
Name:
NAT-GW-AZ1 -
Subnet:
Public-Web-Subnet-AZ-1 - Connectivity Type: Public
- Elastic IP: Click Allocate Elastic IP → Select an available Elastic IP.
- Click Create NAT Gateway.

step 2: Repeat step 1 and 2 for the other subnet.
Verify NAT Gateway Status
- Go to VPC Dashboard → NAT Gateways.
- Ensure that the State of the NAT Gateways is Available.

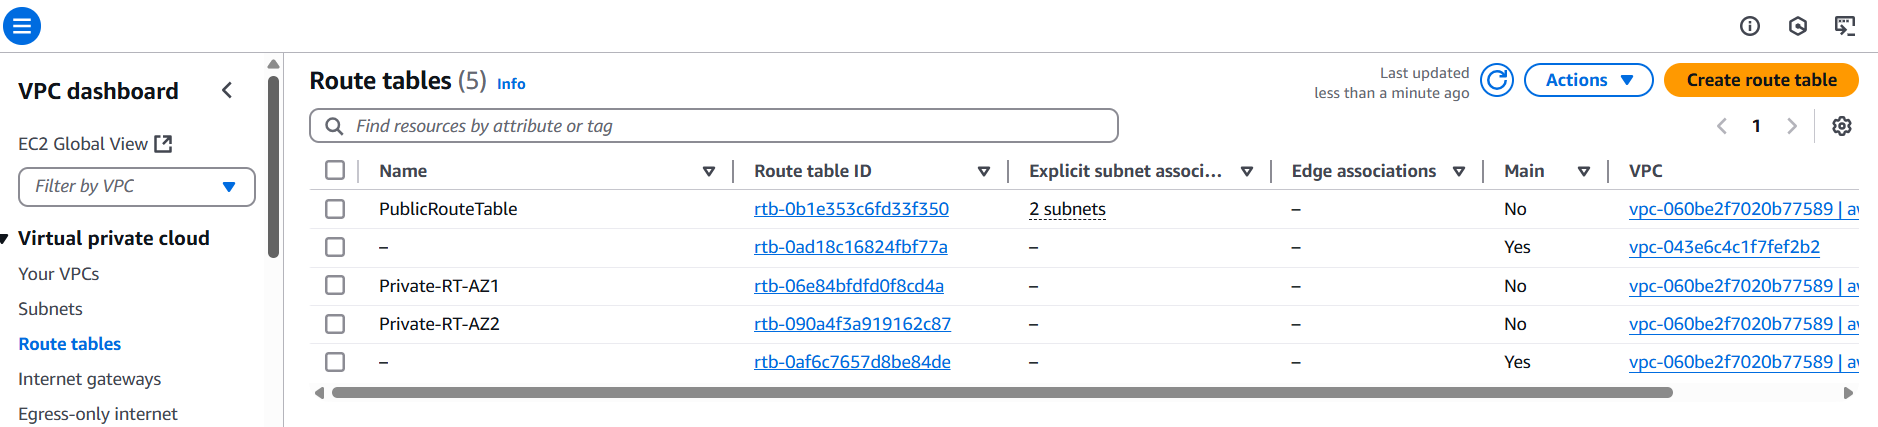
Step 7: Configure Route Tables and Associate Subnets
Now that we've created the NAT Gateways, we need to configure the Route Tables to ensure proper routing between public and private subnets.

View Existing Route Tables
- Navigate to AWS Console → VPC Dashboard → Route Tables.
- You should see multiple route tables, including:
-
PublicRouteTable(for public subnets) -
Private-RT-AZ1(for private subnets in AZ1) -
Private-RT-AZ2(for private subnets in AZ2)
-
Step 1: Configure Public Route Table
Objective: Allow public subnets to have direct internet access via the Internet Gateway.
- Select PublicRouteTable from the list.
- Navigate to the Routes tab → Click Edit Routes.
- Add the following rule:
-
Destination:
0.0.0.0/0 - Target: Select your Internet Gateway (IGW-ID).
-
Destination:
- Click Save Routes.
Step 2: Configure Private Route Tables
Objective: Allow private subnets to access the internet via the NAT Gateways.
Private Route Table for AZ1
- Select Private-RT-AZ1.
- Navigate to the Routes tab → Click Edit Routes.
- Add the following rule:
-
Destination:
0.0.0.0/0 - Target: Select NAT-GW-AZ1.
-
Destination:
- Click Save Routes.
Private Route Table for AZ2
- Select Private-RT-AZ2.
- Navigate to the Routes tab → Click Edit Routes.
- Add the following rule:
-
Destination:
0.0.0.0/0 - Target: Select NAT-GW-AZ2.
-
Destination:
- Click Save Routes.
Step 3: Associate Subnets with Route Tables
Associate Public Subnets with Public Route Table
- Select PublicRouteTable.
- Navigate to the Subnet Associations tab → Click Edit Subnet Associations.
- Select the Public-Web-Subnet-AZ-1 and Public-Web-Subnet-AZ-2.
- Click Save Associations.
Associate Private Subnets with Private Route Tables
- Select Private-RT-AZ1.
- Navigate to the Subnet Associations tab → Click Edit Subnet Associations.
- Select Private-App-Subnet-AZ-1.
Click Save Associations.
Select Private-RT-AZ2.
Navigate to the Subnet Associations tab → Click Edit Subnet Associations.
Select Private-App-Subnet-AZ-2.
Click Save Associations.
Step 4: Verify the Routing Setup
- Go back to Route Tables in the VPC Dashboard.
- Ensure each route table has the correct routes and subnet associations.
- Your Public Subnets should be linked to the Public Route Table, and your Private Subnets should be linked to their respective Private Route Tables.
Now your VPC networking is fully configured with proper internet and internal routing!
Step 8: Security Groups
Security groups control the traffic allowed to our Elastic Load Balancers and EC2 instances. We will set up multiple security groups to enforce access rules.
Security Group for Public Load Balancer
- Navigate to Security Groups in the VPC Dashboard (under Security).

- Create a new security group for the public, internet-facing load balancer.
- Add an inbound rule:
- Type: HTTP
- Source: Your IP (for admin access)
Security Group for Public Web Instances
- Create a new security group for public instances in the web tier.
- Add two inbound rules:
- Allow HTTP traffic from the internet-facing load balancer security group.
- Allow HTTP traffic from your IP (for direct instance access).
Security Group for Internal Load Balancer
- Create a new security group for the internal load balancer.
- Add an inbound rule:
- Type: HTTP
- Source: Public instance security group (allows traffic from web tier instances).
Security Group for Private Instances (App Tier)
- Create a new security group for private instances.
- Add two inbound rules:
- Allow TCP traffic on port 4000 from the internal load balancer security group (to receive traffic).
- Allow TCP traffic on port 4000 from your IP (for testing).
Security Group for Private Database Instances
- Create a new security group for private database instances.
- Add an inbound rule:
- Type: MYSQL/Aurora (Port 3306)
- Source: Private instance security group (allows only app-tier instances to access the database).
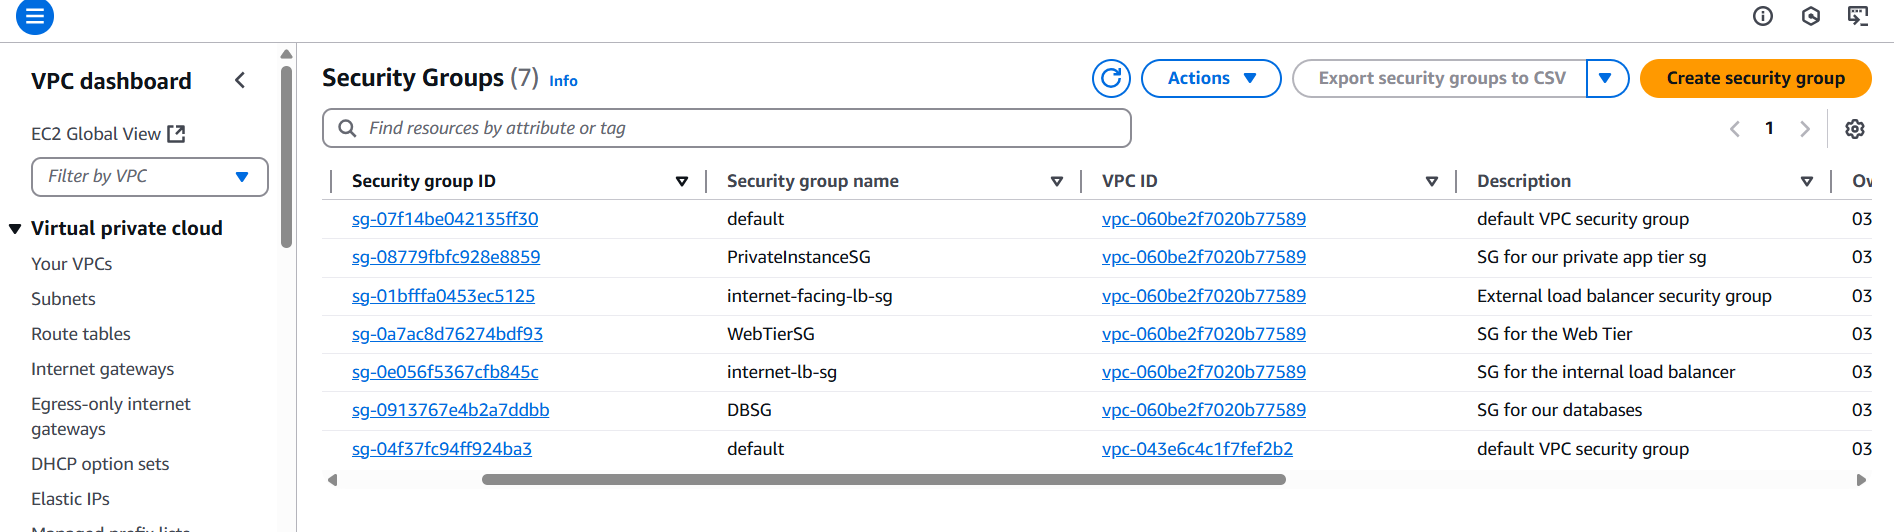
With these security groups, we ensure that only necessary traffic is allowed at each layer of the architecture while maintaining security and accessibility.
Step 9: Subnet Group
Database Deployment - Subnet Groups
To deploy our database in a high-availability setup, we need to create an RDS Subnet Group that includes subnets from different availability zones.
Creating a DB Subnet Group
- Navigate to the RDS Dashboard in the AWS Console.
- Click on Subnet groups on the left-hand side.
- Click Create DB subnet group.

- Provide the following details:
- Name: A meaningful name for the subnet group.
- Description: A brief description.
- VPC: Select the VPC we created earlier.
-
Add Subnets:
- Select the subnets from each availability zone that were specifically created for the database layer.
- If unsure, navigate back to the VPC Dashboard to verify and select the correct Subnet IDs.
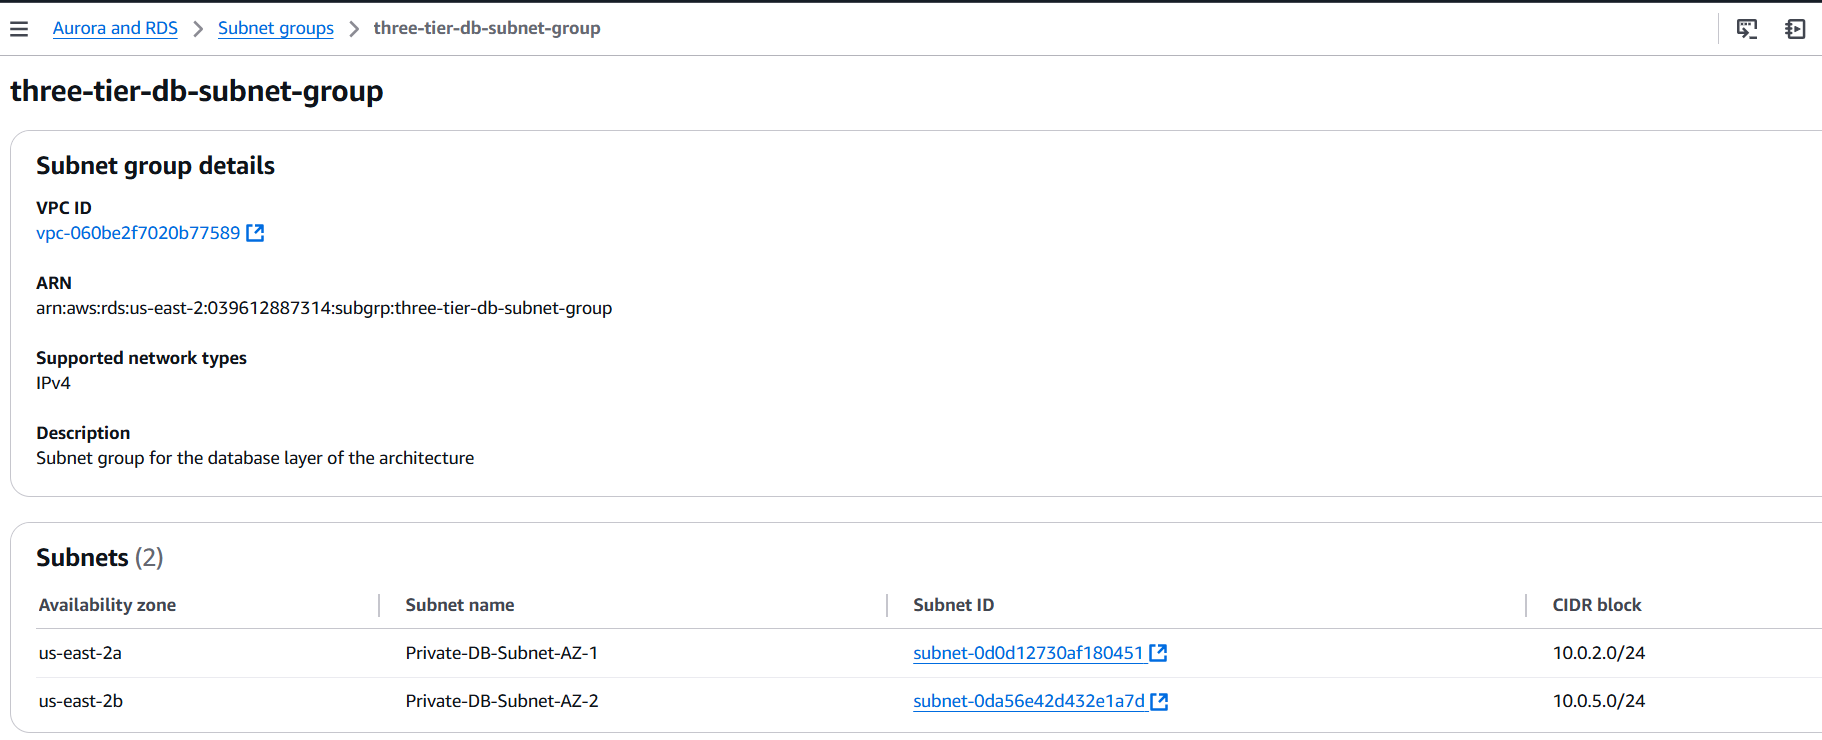
This ensures our database is deployed across multiple availability zones, improving fault tolerance and reliability.
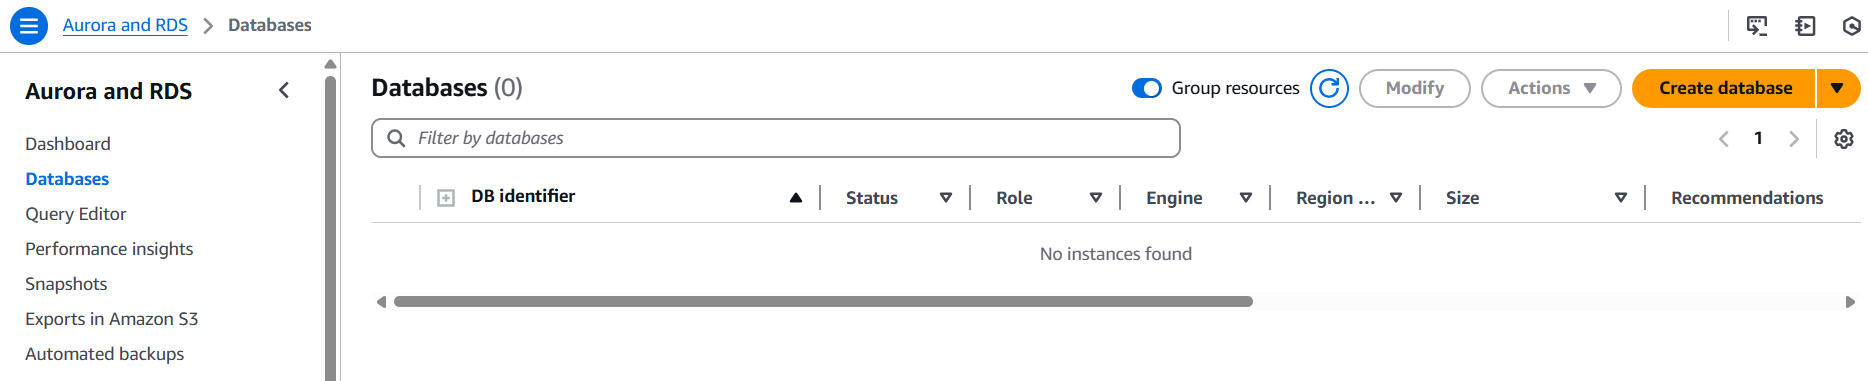
Step 10: Database Deployment
Creating the Database
- Navigate to the RDS Dashboard in the AWS Console.
- Click Databases on the left-hand side.
- Click Create database.
Configuring the Database
-
Choose database creation method:
- Select Standard create.
- Choose MySQL-Compatible Amazon Aurora as the engine.
- Leave all Engine options as default.
-
Select a Template:
- Choose Dev/Test since this isn't a production setup.
-
Set Database Credentials:
- Set a Master username and password.
- Note down these credentials for later authentication.
-
Configure High Availability:
- Under Availability and durability, select the option to create an Aurora Replica (reader node) in a different availability zone.
-
Set Network & Security Settings:
- Under Connectivity,
- Choose the VPC we created earlier.
- Select the DB subnet group created in the previous step.
- Set Public access to No.
- Attach the Security Group for the database layer.
- Under Connectivity,
-
Choose Authentication Method:
- Select Password authentication.
Create the Database
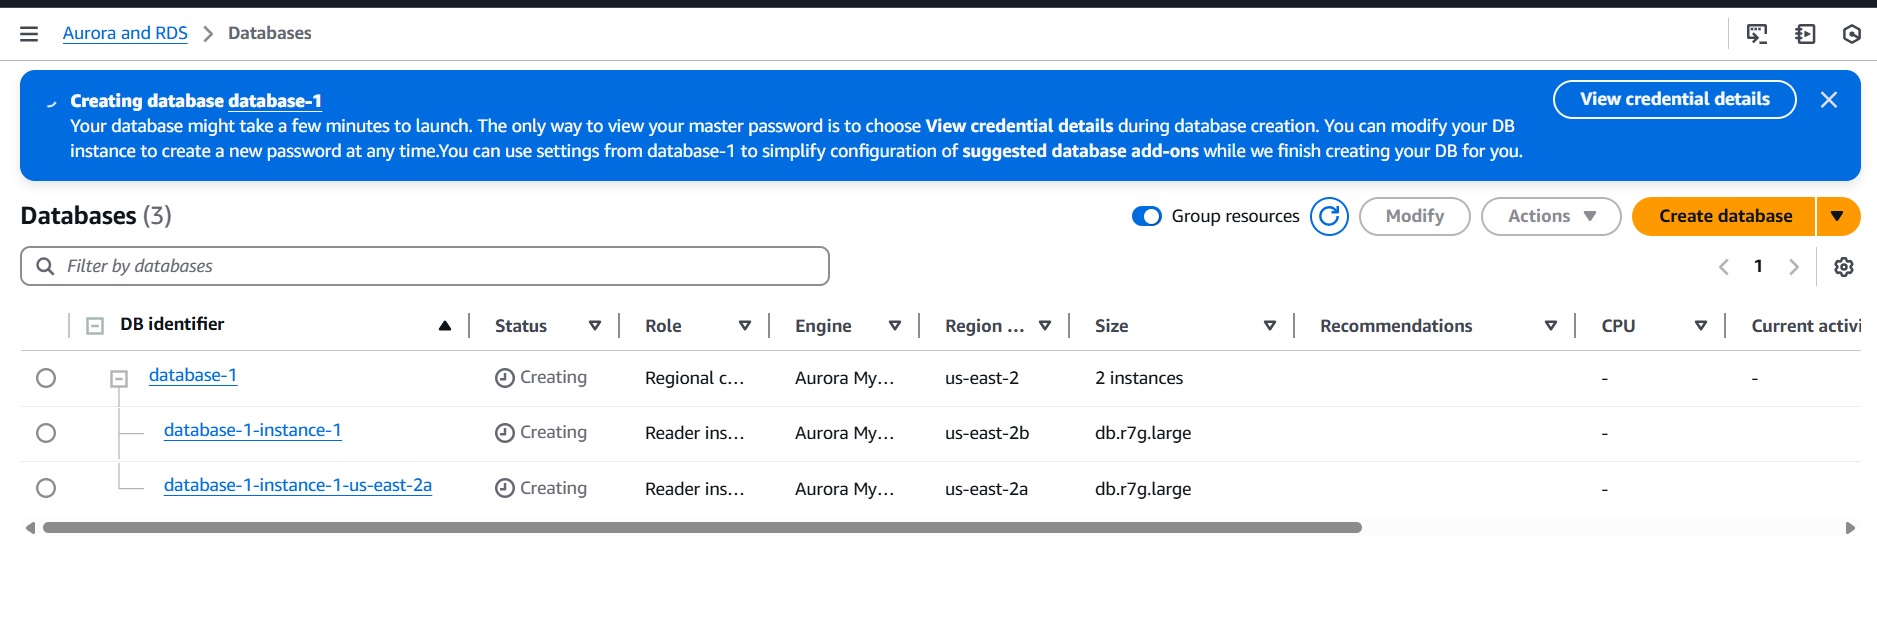
- Copying Database Credentials
- If you chose to auto-generate the password, make sure to copy and save it immediately after database creation, as AWS will not show it again.
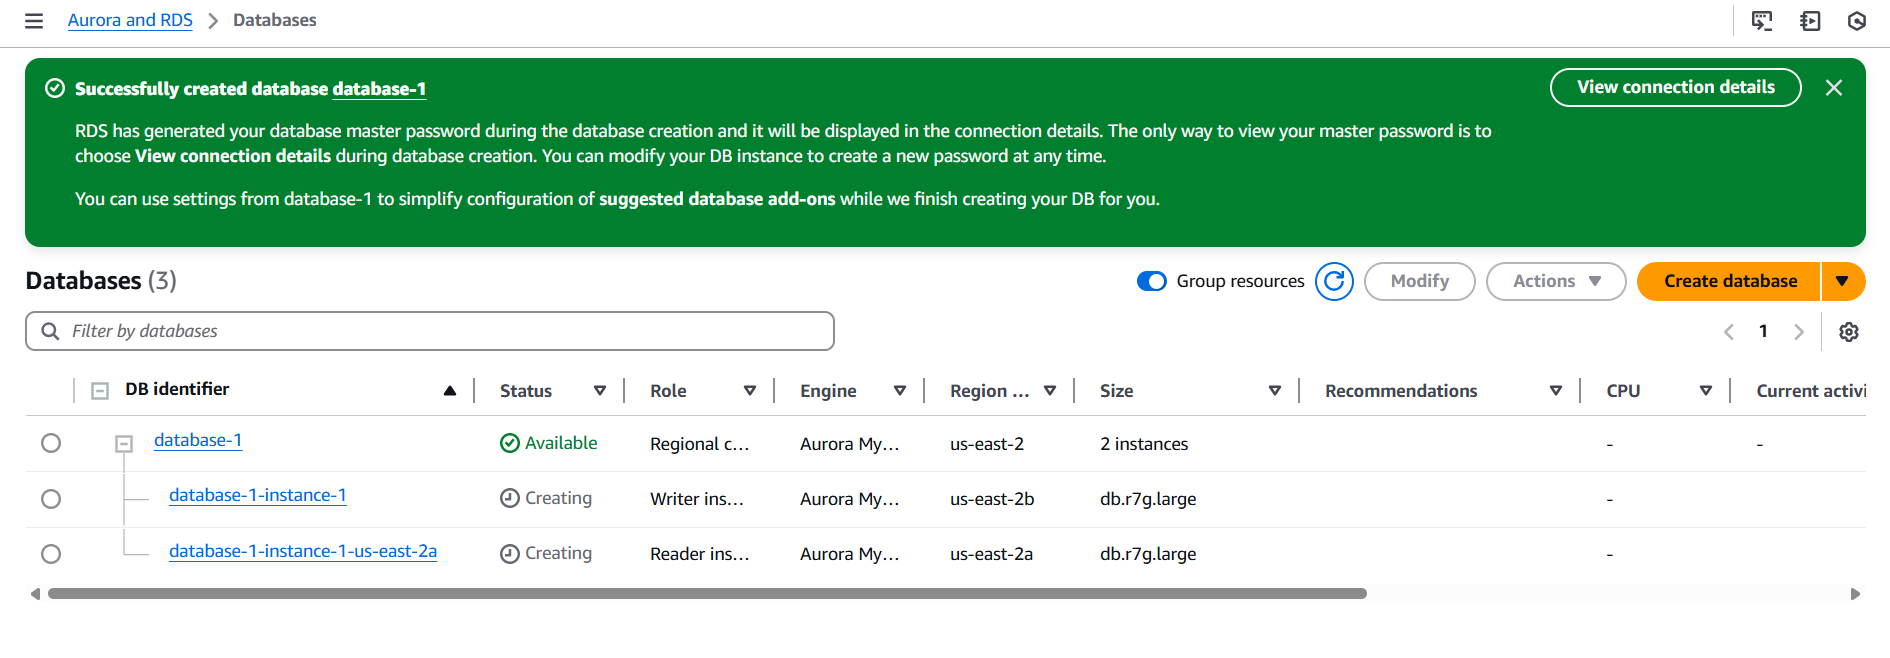
Post-Deployment Checks
- Once the database is provisioned, you should see:
- A Writer instance
- A Reader instance (in a different availability zone).
- Note down the Writer endpoint for database connectivity in later steps.
Step 11: App Instance Deployment
Launching an EC2 Instance
-
Navigate to EC2 Service
- Go to the AWS Management Console.
- Open the EC2 Dashboard.
- Click on Instances → Launch Instances.

-
Choose an Amazon Machine Image (AMI)
- Select Amazon Linux 2 AMI.
-
Select an Instance Type
- Choose t2.micro (Free Tier eligible).
- Click Next: Configure Instance Details.
-
Configure Instance Details
- Network: Select the VPC created earlier.
- Subnet: Choose one of the Private App Subnets.
- IAM Role: Assign the IAM role created for this instance.
- Key Pair: Proceed without a key pair, as we will use EC2 Instance Connect.
-
Set Security Group
- Select the Private Instance Security Group created in Step 8.
-
Launch the Instance
- Click Launch Instance.
- Wait for the instance to be provisioned.

Step 12: Connect to the Instance & Configure the Database
Connecting to the EC2 Instance
-
Access the EC2 Dashboard
- Navigate to the AWS EC2 Dashboard.
- Click on Instances to view all running instances.
- Select the desired instance by marking the checkbox next to it.
- Click the Connect button located at the top-right corner.
-
Establish Connection Using Session Manager
- In the Connect to instance page, select the Session Manager tab.
- Click on the Connect button to initiate the session. A new browser tab will open, providing terminal access to your instance.
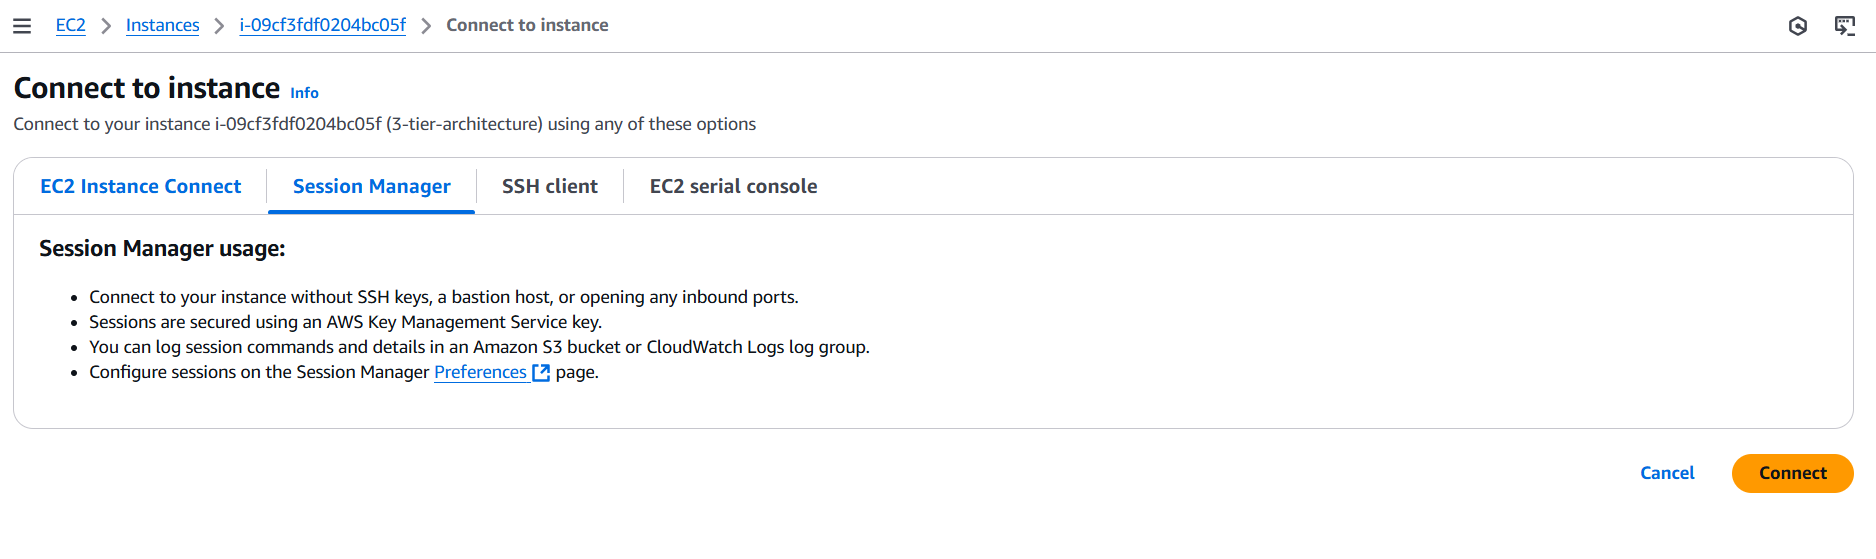
Note: If the Session Manager tab is unavailable or the connect button is disabled, ensure that:
- The instance has the SSM Agent installed and running.
- The associated IAM role has the necessary permissions, specifically the
AmazonSSMManagedInstanceCorepolicy.- The instance can route to the necessary AWS endpoints, either through the internet or via VPC endpoints. :contentReference[oaicite:0]{index=0}
-
Switch to the
ec2-userAccount- Once connected, the default user might be
ssm-user. Switch to theec2-userby executing:
sudo -i -u ec2-user - Once connected, the default user might be
-
Verify Internet Connectivity
- Test the internet connection by pinging an external server:
ping -c 4 8.8.8.8
- If you receive responses, your instance has internet access. Stop the ping test by pressing
Ctrl + C.
Troubleshooting: If the ping test fails:
- Verify that the instance's subnet route table directs internet-bound traffic to a NAT Gateway or an Internet Gateway, as appropriate.
- Ensure that security groups and network ACLs allow outbound ICMP traffic.
Configuring the Database
1. Install the MySQL Client
-
Update the package repository and install the MySQL client:
sudo yum update -y sudo yum install mysql -y -
If the above installation encounters issues, consider the following alternative steps:
 sudo wget https://dev.mysql.com/get/mysql57-community-release-el7-11.noarch.rpm
 sudo rpm -ivh mysql57-community-release-el7-11.noarch.rpm
 sudo yum install mysql-community-client -y
2. Connect to the Amazon RDS Database
-
Initiate a connection to your RDS instance using the MySQL client. Replace
YOUR-RDS-ENDPOINTwith your database's endpoint andYOUR-USERNAMEwith your database username:
mysql -h YOUR-RDS-ENDPOINT -u YOUR-USERNAME -p When prompted, enter the corresponding password.
Note: Ensure that the security group associated with your RDS instance allows inbound traffic from your EC2 instance on the MySQL port (default: 3306).
3. Create a Database and Table
-
Once connected to the MySQL prompt, create a new database named
webappdb:
CREATE DATABASE webappdb; -
Verify the creation by listing all databases:
SHOW DATABASES; -
Switch to the newly created database:
USE webappdb; -
Create a table named
transactions:
CREATE TABLE transactions ( id INT NOT NULL AUTO_INCREMENT, amount DECIMAL(10,2), description VARCHAR(100), PRIMARY KEY (id) ); -
Confirm the table creation:
SHOW TABLES;
4. Insert and Retrieve Data
-
Insert a sample record into the
transactionstable:
INSERT INTO transactions (amount, description) VALUES (400.00, 'groceries'); -
Retrieve and display the inserted data:
SELECT * FROM transactions;
5. Exit the MySQL Client
-
Terminate the MySQL session by typing:
EXIT;
Uploading Files to S3
1. Install AWS CLI (If Not Installed)
sudo yum install -y aws-cli2. Configure AWS CLI
Run the following command and enter your AWS credentials:
aws configure-
Access Key ID:
[Your AWS Access Key] -
Secret Access Key:
[Your AWS Secret Key] -
Region:
[Your AWS Region] -
Output Format:
json
3. Upload a File to S3
Replace YOUR-BUCKET-NAME with your actual S3 bucket name and yourfile.txt with the file you want to upload.
aws s3 cp yourfile.txt s3://YOUR-BUCKET-NAME/4. Upload a Directory to S3
If you need to upload the entire app-tier folder:
aws s3 cp app-tier/ s3://YOUR-BUCKET-NAME/app-tier/ --recursive5. Verify Uploads
To list files in your S3 bucket:
aws s3 ls s3://YOUR-BUCKET-NAME/Security Reminder: Always ensure that database credentials and AWS credentials are stored securely and not hard-coded into your applications. Consider using AWS Secrets Manager or Parameter Store for managing sensitive information.
Step 13: Internal Load Balancing and Auto Scaling
App Tier AMI
-
Navigate to the EC2 Dashboard
- Open the AWS EC2 Dashboard.
- Click on Instances in the left-hand navigation panel.
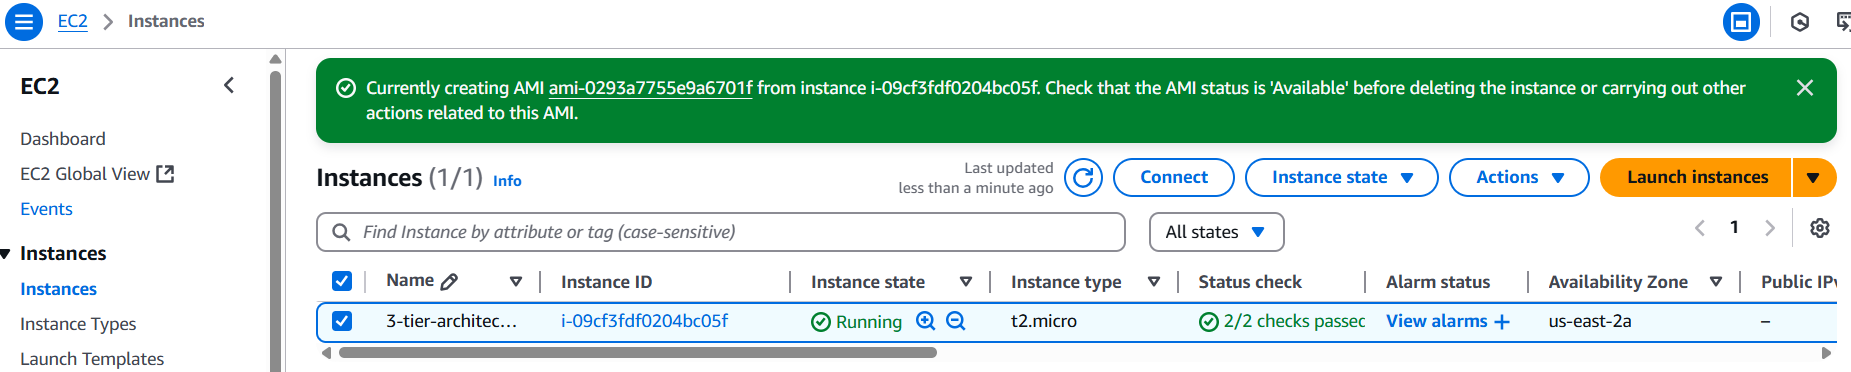
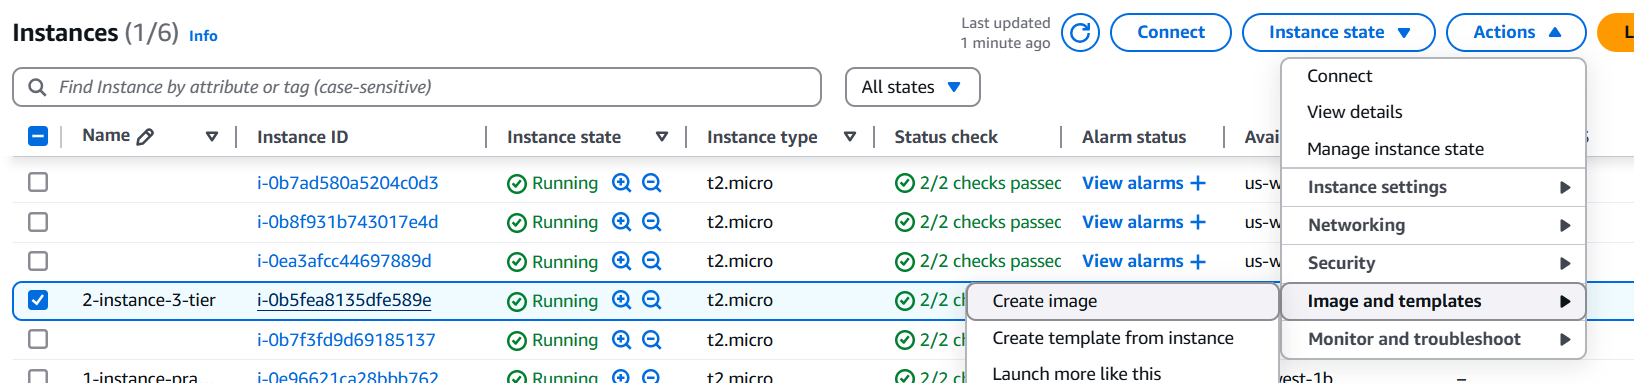
-
Create an AMI (Amazon Machine Image)
- Select the app-tier instance that was previously created.
- Click on Actions → Image and templates → Create Image.
-
Configure the Image
- Provide a name and description for the AMI.
- Click Create Image to start the process.
-
Monitor Image Creation
- The AMI creation process may take a few minutes.
- To monitor the status, navigate to AMIs under the Images section in the left-hand navigation panel.
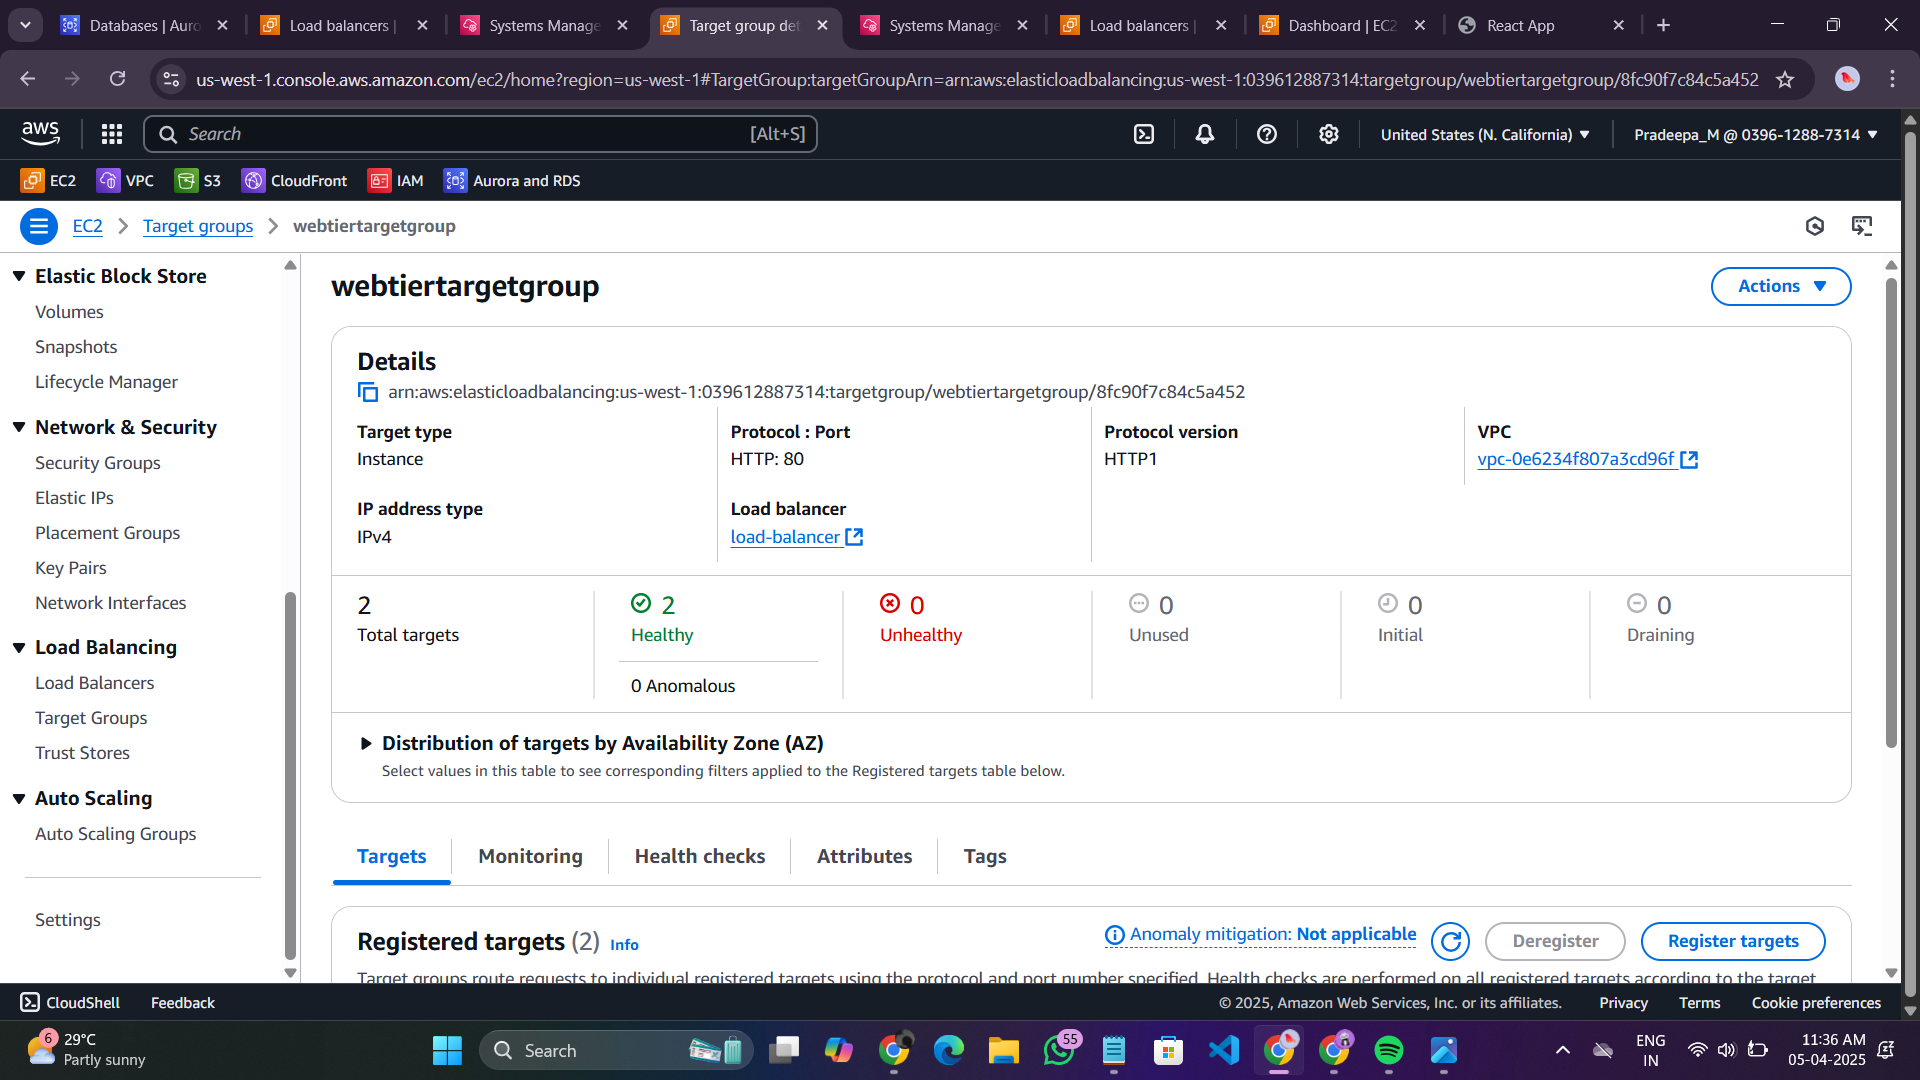
Step 14: Target Group
Creating a Target Group
While the AMI is being created, we can proceed with setting up a target group for the load balancer.
-
Navigate to Target Groups
- Open the AWS EC2 Dashboard.
- In the left-hand navigation panel, go to Target Groups under Load Balancing.
- Click Create Target Group.

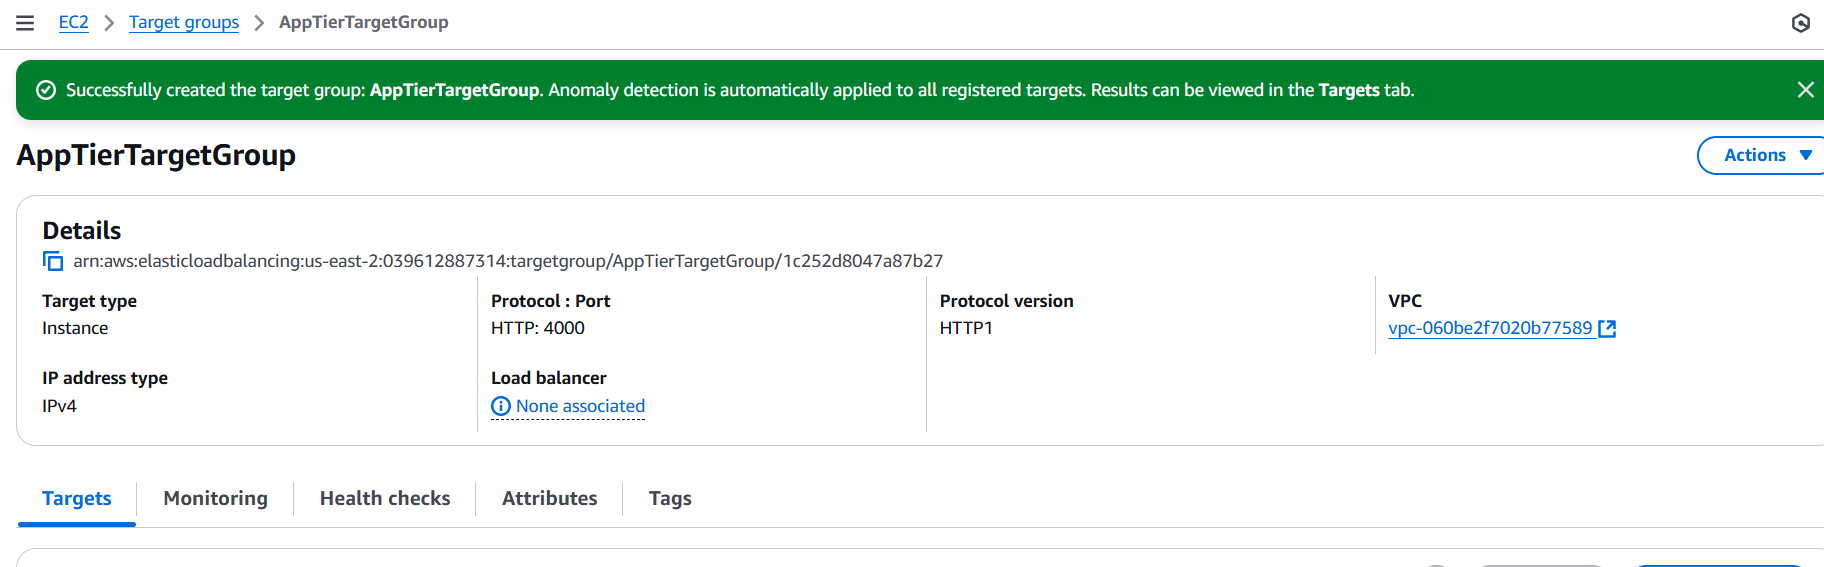
-
Configure the Target Group
- Select Instances as the Target Type.
- Provide a name for the target group.
- Set the Protocol to HTTP and the Port to 4000. (This is the port our Node.js app is running on.)
- Choose the VPC used in the previous steps.
- Change the Health Check Path to
/health, which corresponds to the health check endpoint of our app. - Click Next.
-
Skip Target Registration
- Do not register any targets at this stage.
- Skip this step and create the target group.
Step 15: Internal Load Balancer
Creating an Internal Load Balancer
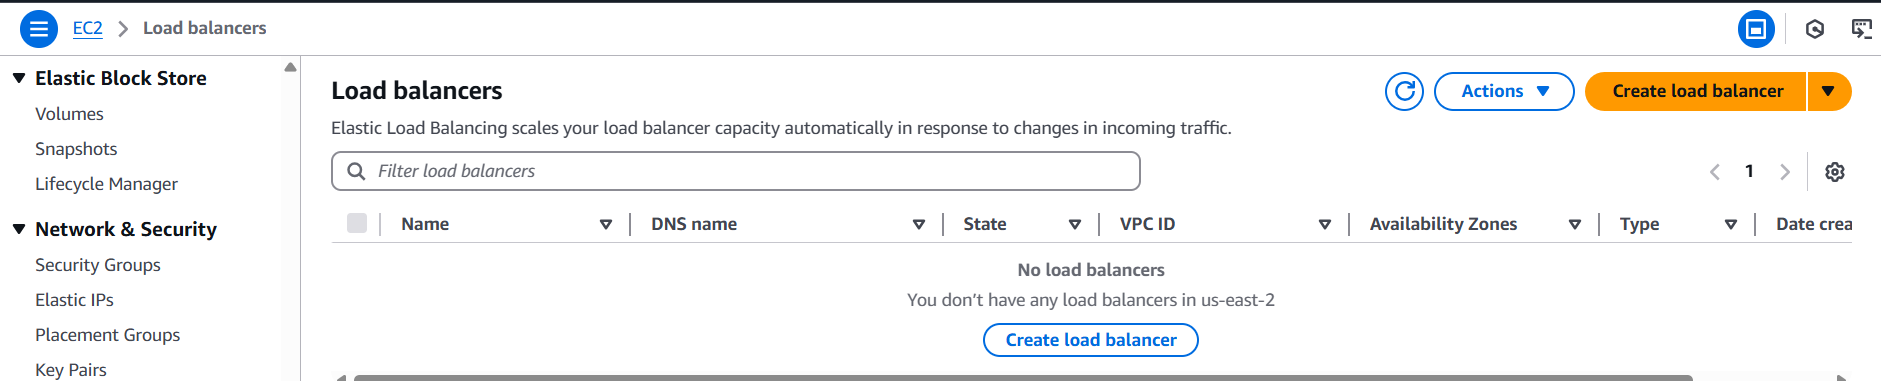
-
Navigate to Load Balancers
- Open the AWS EC2 Dashboard.
- On the left-hand navigation panel, go to Load Balancers under Load Balancing.
- Click Create Load Balancer.
-
Choose Load Balancer Type
- Select Application Load Balancer (ALB) for handling HTTP traffic.
- Click the Create button.
-
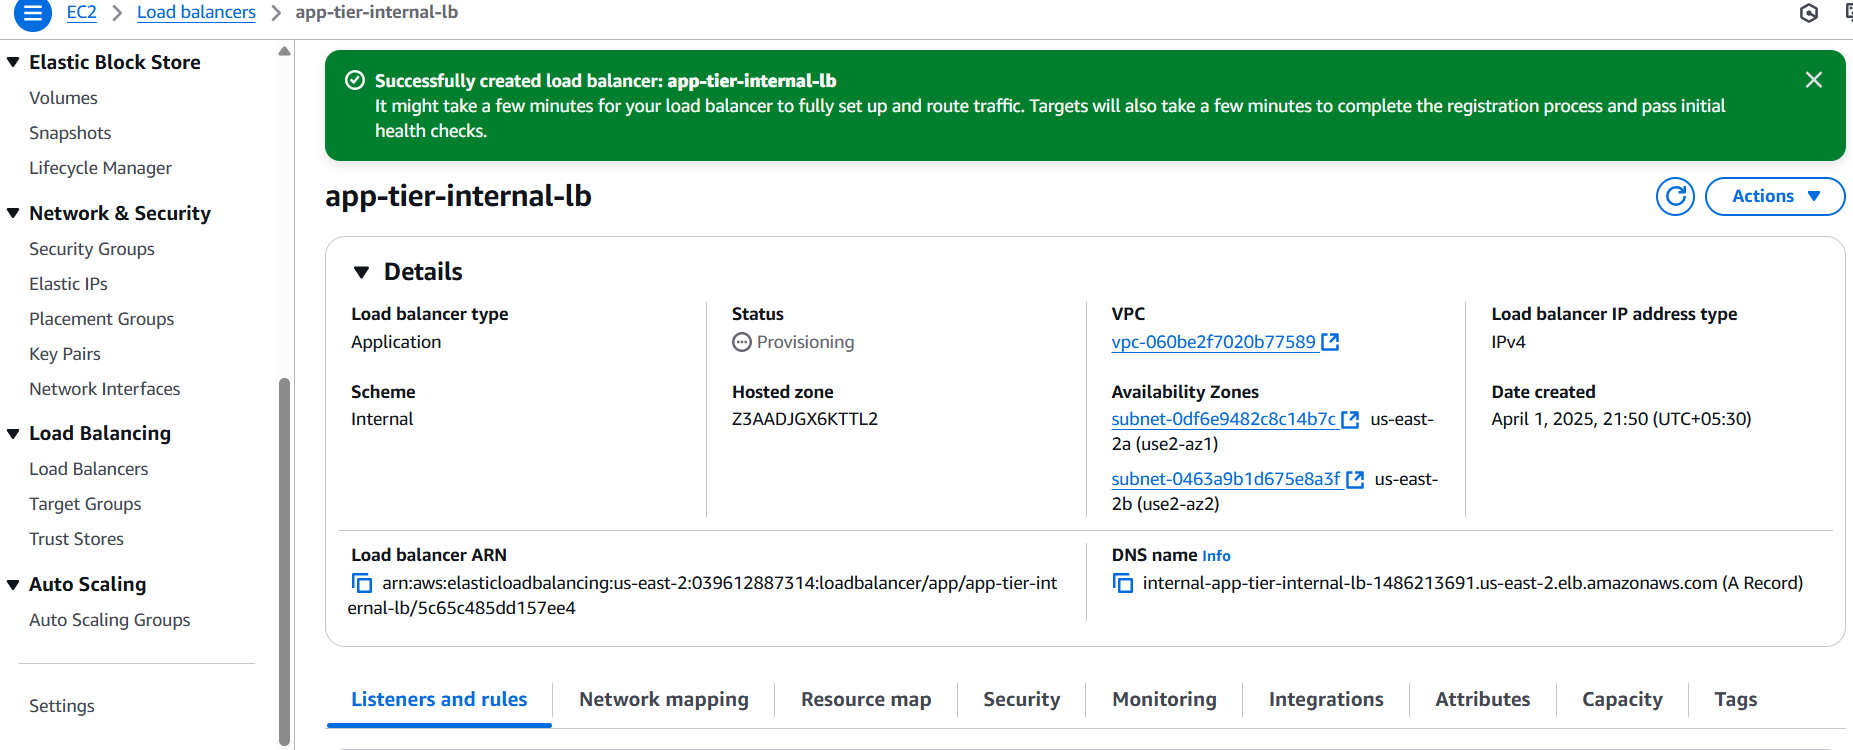
Configure the Load Balancer
- Provide a name for the Load Balancer.
- Choose Internal as the type (since this ALB will not be public-facing).
- This ALB will route traffic from the Web Tier to the App Tier.
-
Select Network Configuration
- Choose the correct VPC.
- Select the private subnets for deployment.
-
Assign Security Group
- Use the security group created earlier for the internal ALB.
-
Configure Listener and Target Group
- The ALB will listen for HTTP traffic on port 80.
- Set the Target Group to the one created in Step 14.
- Select it from the dropdown.
-
Create the Load Balancer
- Click Create Load Balancer to finalize the setup.
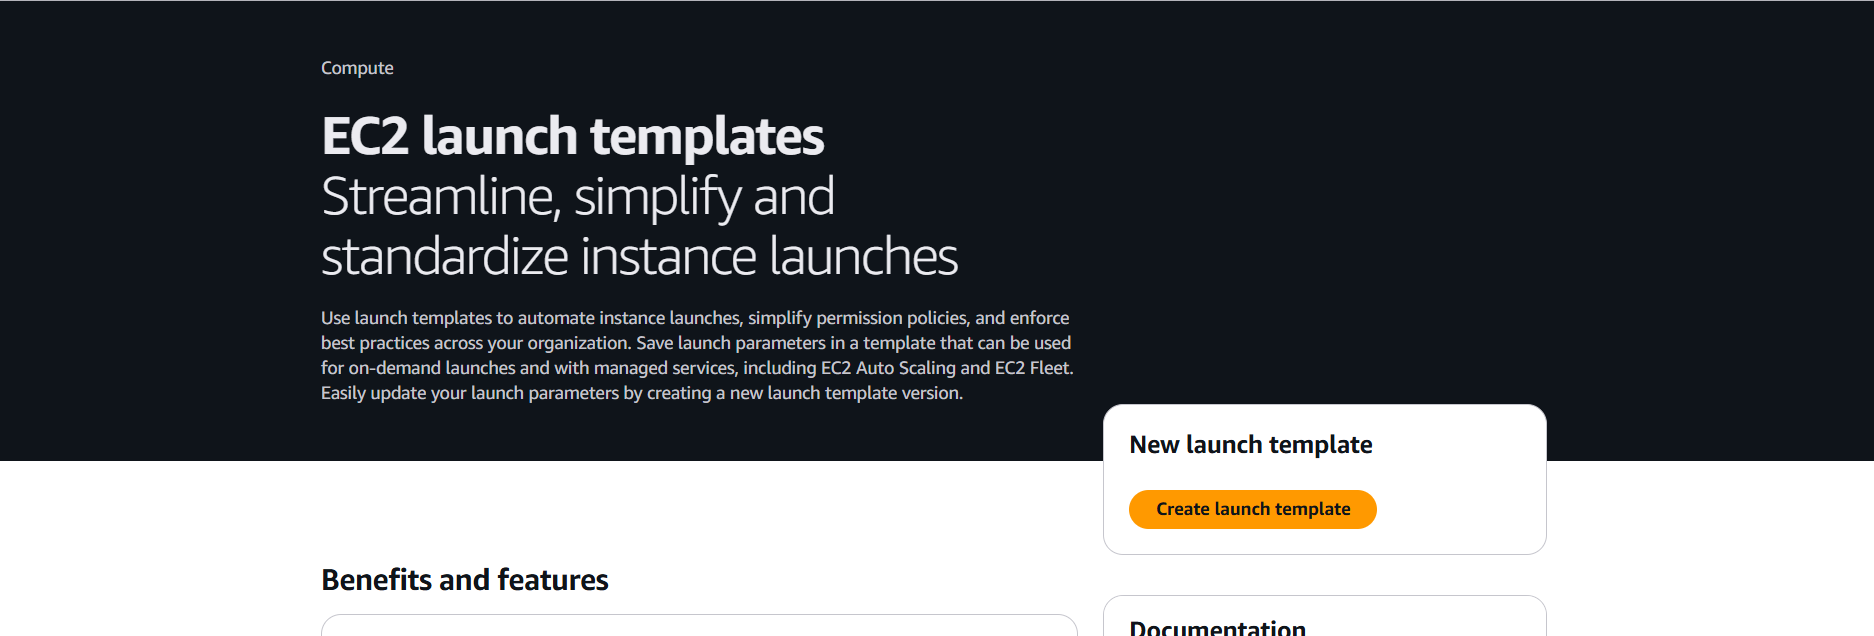
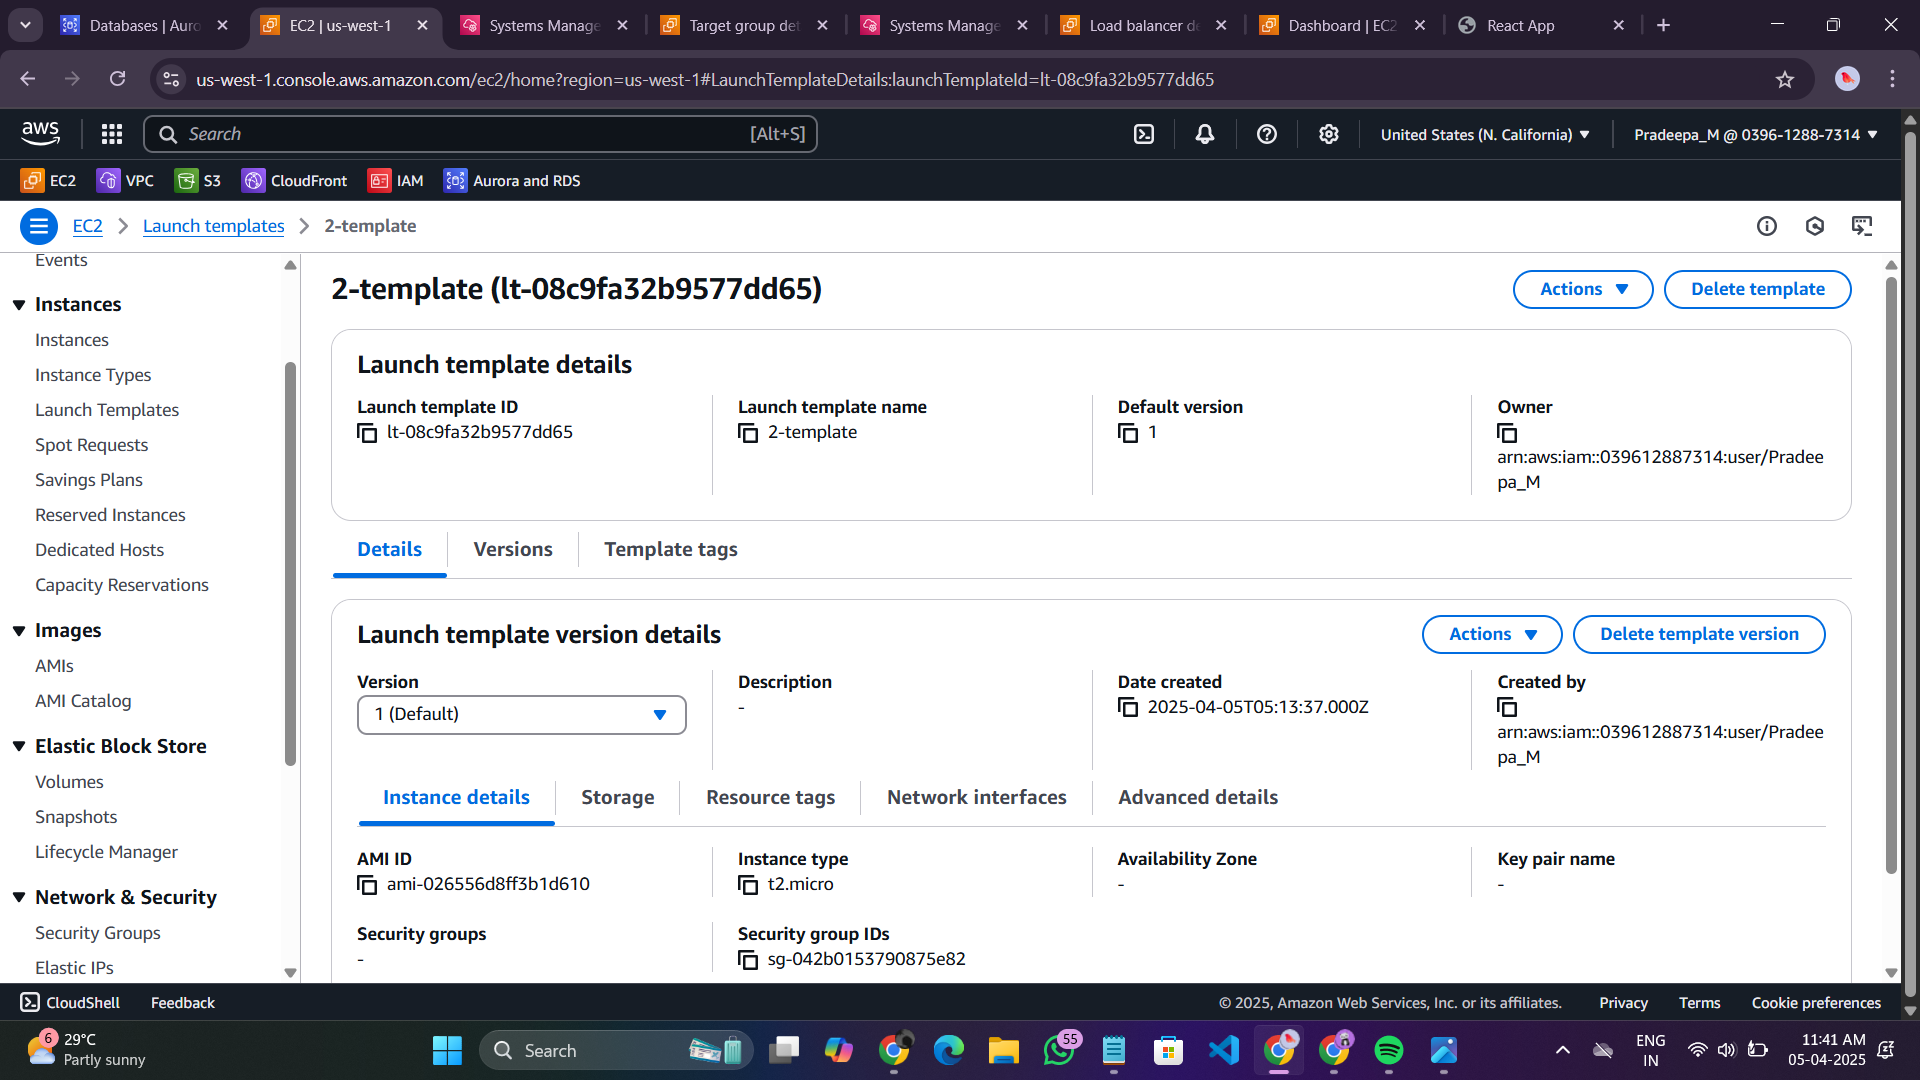
Step 16: Launch Template
Creating a Launch Template
-
Navigate to Launch Templates
- Open the AWS EC2 Dashboard.
- On the left-hand side, go to Launch Templates under Instances.
- Click Create Launch Template.
-
Configure Launch Template
- Provide a name for the launch template.
- Under Application and OS Images, select the App Tier AMI created earlier.
-
Select Instance Type
- Choose t2.micro as the instance type.
-
Exclude Key Pair and Network Settings
- Do not include a key pair in the template.
- The network settings will be configured in the Auto Scaling Group.
-
Set Security Group
- Assign the security group used for the App Tier.
-
Advanced Settings
- Under Advanced details, select the IAM instance profile that has been used for other EC2 instances.
-
Create Launch Template
- Click Create Launch Template to finalize the setup.
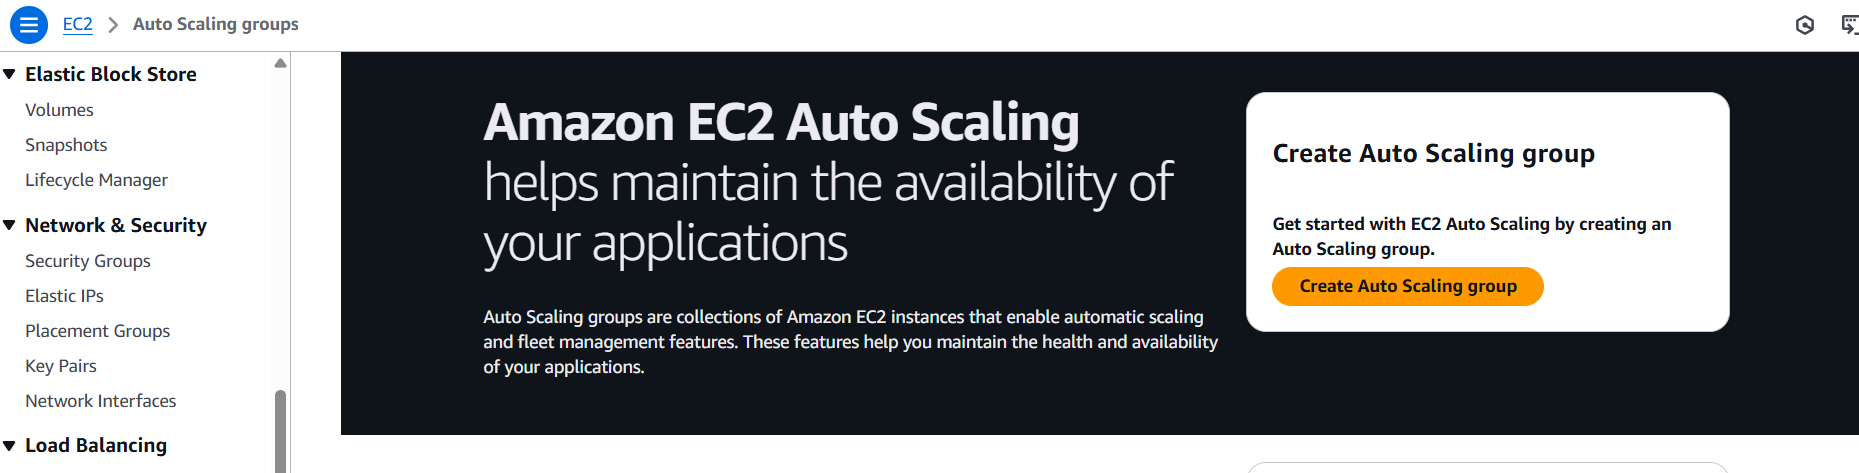
Step 17: Auto Scaling
Creating an Auto Scaling Group
-
Navigate to Auto Scaling Groups
- Open the AWS EC2 Dashboard.
- On the left-hand side, go to Auto Scaling Groups under Auto Scaling.
- Click Create Auto Scaling Group.
-
Set Auto Scaling Group Name
- Enter a name for your Auto Scaling Group.
- Select the Launch Template created in the previous step.
- Click Next.
-
Configure Instance Launch Options
- Select the VPC.
- Choose the private instance subnets for the App Tier.
- Click Next.
-
Attach to Load Balancer
- Attach the Auto Scaling Group to the Load Balancer created earlier.
- Select the existing target group from the dropdown.
- Click Next.
-
Configure Group Size and Scaling Policies
- Set:
-
Desired capacity:
2 -
Minimum capacity:
2 -
Maximum capacity:
2
-
Desired capacity:
- Click Skip to review.
- Set:
-
Finalize and Create Auto Scaling Group
- Click Next until the final step.
- Click Create Auto Scaling Group.

Step 18: Update Config File and Web Instance Deployment
Update Config File
- Open the
application-code/nginx.conffile from the repository you downloaded. - Scroll to line 58 and replace
[INTERNAL-LOADBALANCER-DNS]with your internal load balancer’s DNS.- To find the DNS Name:
- Navigate to EC2 Dashboard → Load Balancers.
- Select your internal load balancer.
- Copy the DNS Name from the details page.
- To find the DNS Name:
- Save the file and upload both:
- The updated
nginx.conffile. - The
application-code/web-tierfolder. - To the S3 bucket you created for this lab.
- The updated
Web Instance Deployment
1. Launch a Web Instance
- Navigate to EC2 Dashboard → Click on Instances (left-hand side).
- Click Launch Instances.

- Select Amazon Linux 2 AMI.
- Choose t2.micro (Free Tier Eligible) and click Next: Configure Instance Details.
2. Configure Instance Details
- Key-Pair: Proceed without a key-pair (using EC2 Instance Login).
-
Network Settings:
- Select the correct VPC.
- Choose a Public Subnet (AZ-1).
- Enable Auto-Assign Public IP.
-
Security Group:
- Use the existing Web Tier Security Group.
-
IAM Role:
- Select the already created IAM Role.
- Click Launch Instance.
Connect to the Instance
- Go to EC2 Dashboard → Click Instances.
- Wait until the Instance State is Running.

- Select the instance and click Connect (top-right corner).
- Choose Session Manager Tab → Click Connect.
- A new browser tab will open.
4. Test Internet Connectivity
Run the following commands to verify connectivity:
sudo -su ec2-user
ping 8.8.8.8
Step 19: Configure Web Instance
We will now install the necessary components for running our front-end application.
1. Install NVM and Node.js
Run the following commands to install NVM and Node.js 16:
curl -o- https://raw.githubusercontent.com/nvm-sh/nvm/v0.38.0/install.sh | bash
source ~/.bashrc
nvm install 16
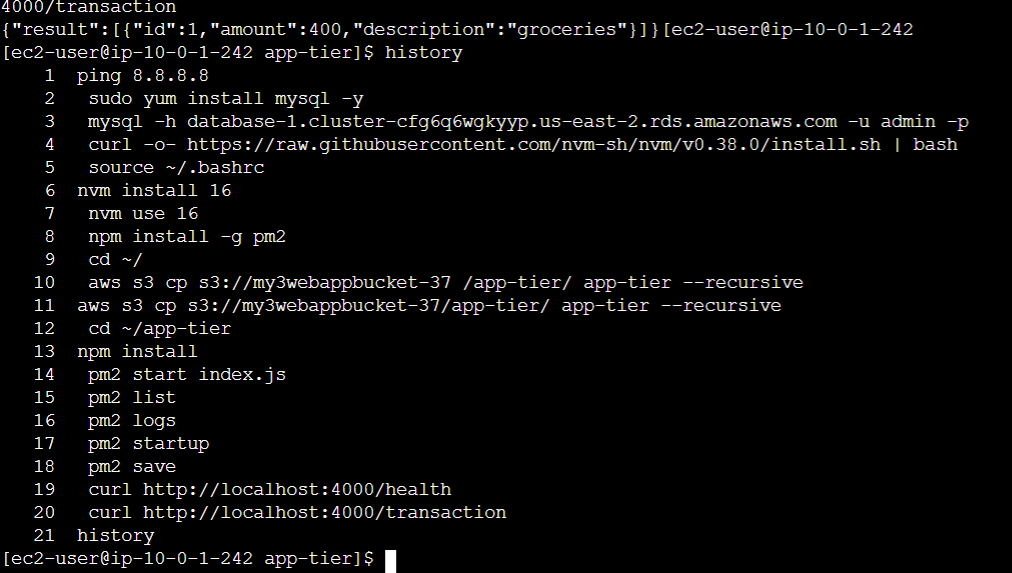
nvm use 162. Download Web Tier Code from S3
Replace BUCKET_NAME with your actual S3 bucket name.
cd ~/
aws s3 cp s3://BUCKET_NAME/web-tier/ web-tier --recursive
3. Build the React Application
Navigate to the web-tier folder and build the React app:
cd ~/web-tier
npm install
npm run build
4. Install and Configure NGINX
NGINX is used as a web server to serve the front-end application and route API calls to the internal load balancer.
Install NGINX:
sudo amazon-linux-extras install nginx1 -yNavigate to NGINX Configuration Directory:
cd /etc/nginx
ls
You should see an nginx.conf file.
Replace nginx.conf with the one from S3:
sudo rm nginx.conf
sudo aws s3 cp s3://BUCKET_NAME/nginx.conf .
Restart NGINX:
sudo service nginx restart5. Set Permissions and Enable Auto-Start
Grant necessary permissions:
chmod -R 755 /home/ec2-userEnsure NGINX starts on boot:
sudo chkconfig nginx onStep 20: External Load Balancer and Auto Scaling
Create Web Tier AMI
We will now create an Amazon Machine Image (AMI) for the Web Tier to use later with our Auto Scaling Group.
1. Navigate to Instances
- Go to the EC2 Dashboard.
- Click on Instances on the left-hand panel.

2. Select the Web Tier Instance
- Find the Web Tier instance you launched.
- Click on the checkbox to select it.

3. Create Image
- Click on Actions → Image and templates → Create image.
4. Fill Out Image Details
-
Name: Give your image a meaningful name (e.g.,
web-tier-ami). - Description: Add a short description (e.g., "AMI for Web Tier Auto Scaling").
5. Create and Monitor
- Click the Create image button.
- To monitor the image creation progress:
- Go to AMIs under Images in the left navigation panel of the EC2 Dashboard.
Step 21: Target Group
While the AMI is being created, we can create the target group for our external load balancer.
1. Navigate to Target Groups
- Go to the EC2 Dashboard.
- On the left-hand side, under Load Balancing, click Target Groups.
- Click Create Target Group.

2. Target Group Settings
- Select Instances as the target type.
- Give your target group a name.
3. Configure Protocol and Port
- Set the protocol to HTTP.
- Set the port to 80 (this is the port NGINX is listening on).
- Select the same VPC used previously.
- Change the health check path to
/health.
4. Skip Registering Targets
- Do not register any targets for now.
- Click Create Target Group to finish.
Step 22: Internet-Facing Load Balancer
We will now create an Application Load Balancer (ALB) that is internet-facing. This ALB will route traffic from users to our Web Tier instances.
1. Navigate to Load Balancers
- Go to the EC2 Dashboard.
- On the left sidebar, under Load Balancing, click Load Balancers.
- Click Create Load Balancer.

2. Choose Load Balancer Type
- Select Application Load Balancer.
- Click the Create button.
3. Basic Configuration
-
Name: Give your ALB a name (e.g.,
web-tier-alb). - Scheme: Choose Internet-facing. > This ALB is public-facing and will handle traffic from users on the internet.
- IP address type: Choose IPv4.
4. Network Mapping
- Select the correct VPC.
- Select public subnets in multiple Availability Zones (AZs).
5. Configure Security Groups
- Choose the Security Group created for the Web Tier Load Balancer.
6. Listener and Routing
- Listener protocol: HTTP
- Port: 80
- Forward to: Choose the Target Group created in Step 21 for the web tier.
7. Create Load Balancer
- Click Create Load Balancer to complete the setup.

Step 23: Launch Template (Web Tier)
Before we configure Auto Scaling, we need to create a Launch Template using the Web Tier AMI we created earlier.
1. Navigate to Launch Templates
- Go to the EC2 Dashboard.
- On the left sidebar under Instances, click Launch Templates.
- Click Create Launch Template.

2. Basic Configuration
-
Name: Provide a name for your Launch Template (e.g.,
web-tier-launch-template). - Under Application and OS Images (Amazon Machine Image), select the Web Tier AMI you previously created.
3. Instance Type
- Choose t2.micro.
4. Key Pair and Network Settings
- Do not include a Key Pair (we’ll use EC2 Instance Connect).
- Leave Network Settings unchecked, as we’ll configure them inside the Auto Scaling Group.
5. Security Group and IAM Role
- Select the Security Group created for the Web Tier.
- Under Advanced Details, set the IAM instance profile we’ve been using for EC2 instances.
6. Create Template
- Click Create Launch Template to finish.
Step 24: Auto Scaling Group (Web Tier)
We will now create the Auto Scaling Group (ASG) for our Web Tier instances.
1. Navigate to Auto Scaling Groups
- Go to the EC2 Dashboard.
- On the left sidebar under Auto Scaling, click Auto Scaling Groups.
- Click Create Auto Scaling Group.

2. Configure Basic Settings
-
Name: Provide a name for the ASG (e.g.,
web-tier-asg). - Launch Template: Select the Launch Template created in Step 23.
- Click Next.
3. Instance Launch Options
- Select the appropriate VPC.
- Choose the public subnets created for the Web Tier.
4. Configure Load Balancer
- Attach the Auto Scaling Group to the Web Tier Load Balancer.
- Select the Target Group associated with the Web Tier ALB.
- Click Next.
5. Configure Group Size and Scaling Policies
- Desired Capacity: 2
- Minimum Capacity: 2
- Maximum Capacity: 2
- Click Skip to review.
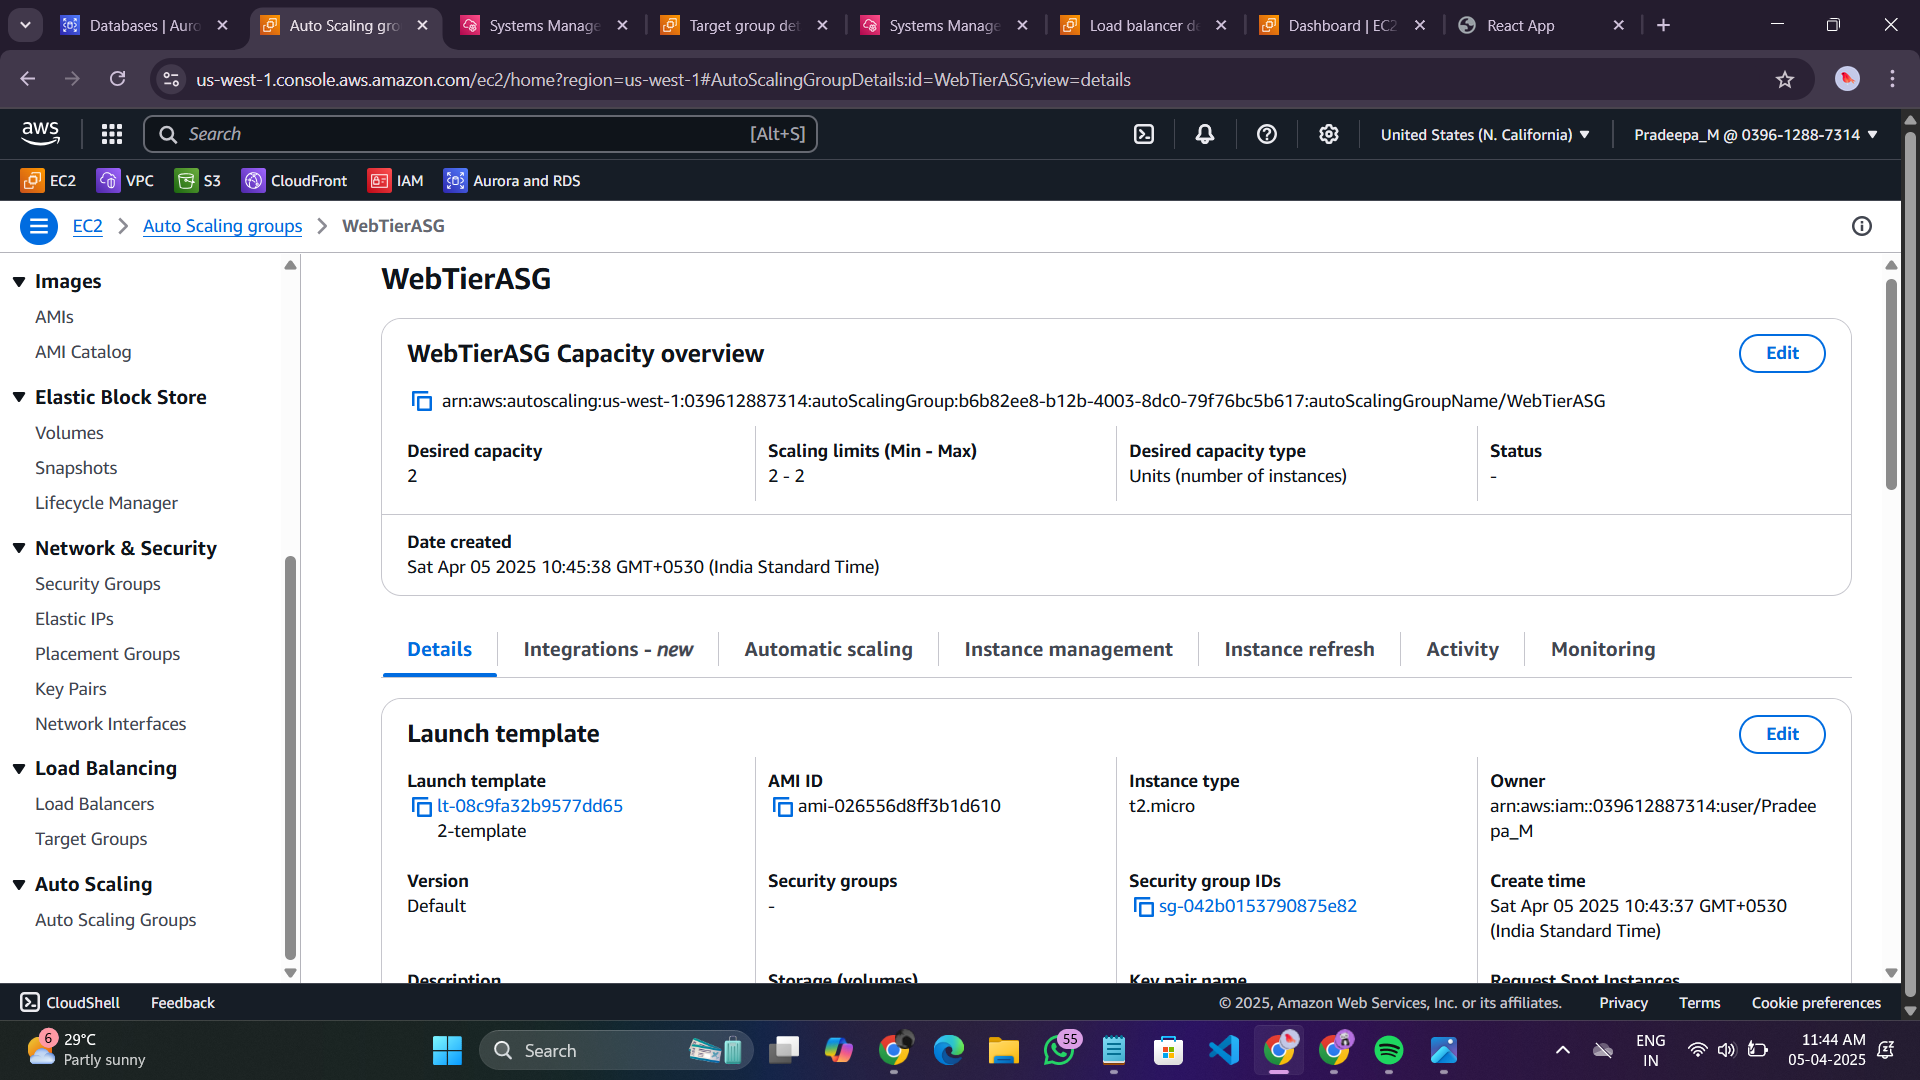
6. Create Auto Scaling Group
- Review your settings.
- Click Create Auto Scaling Group.

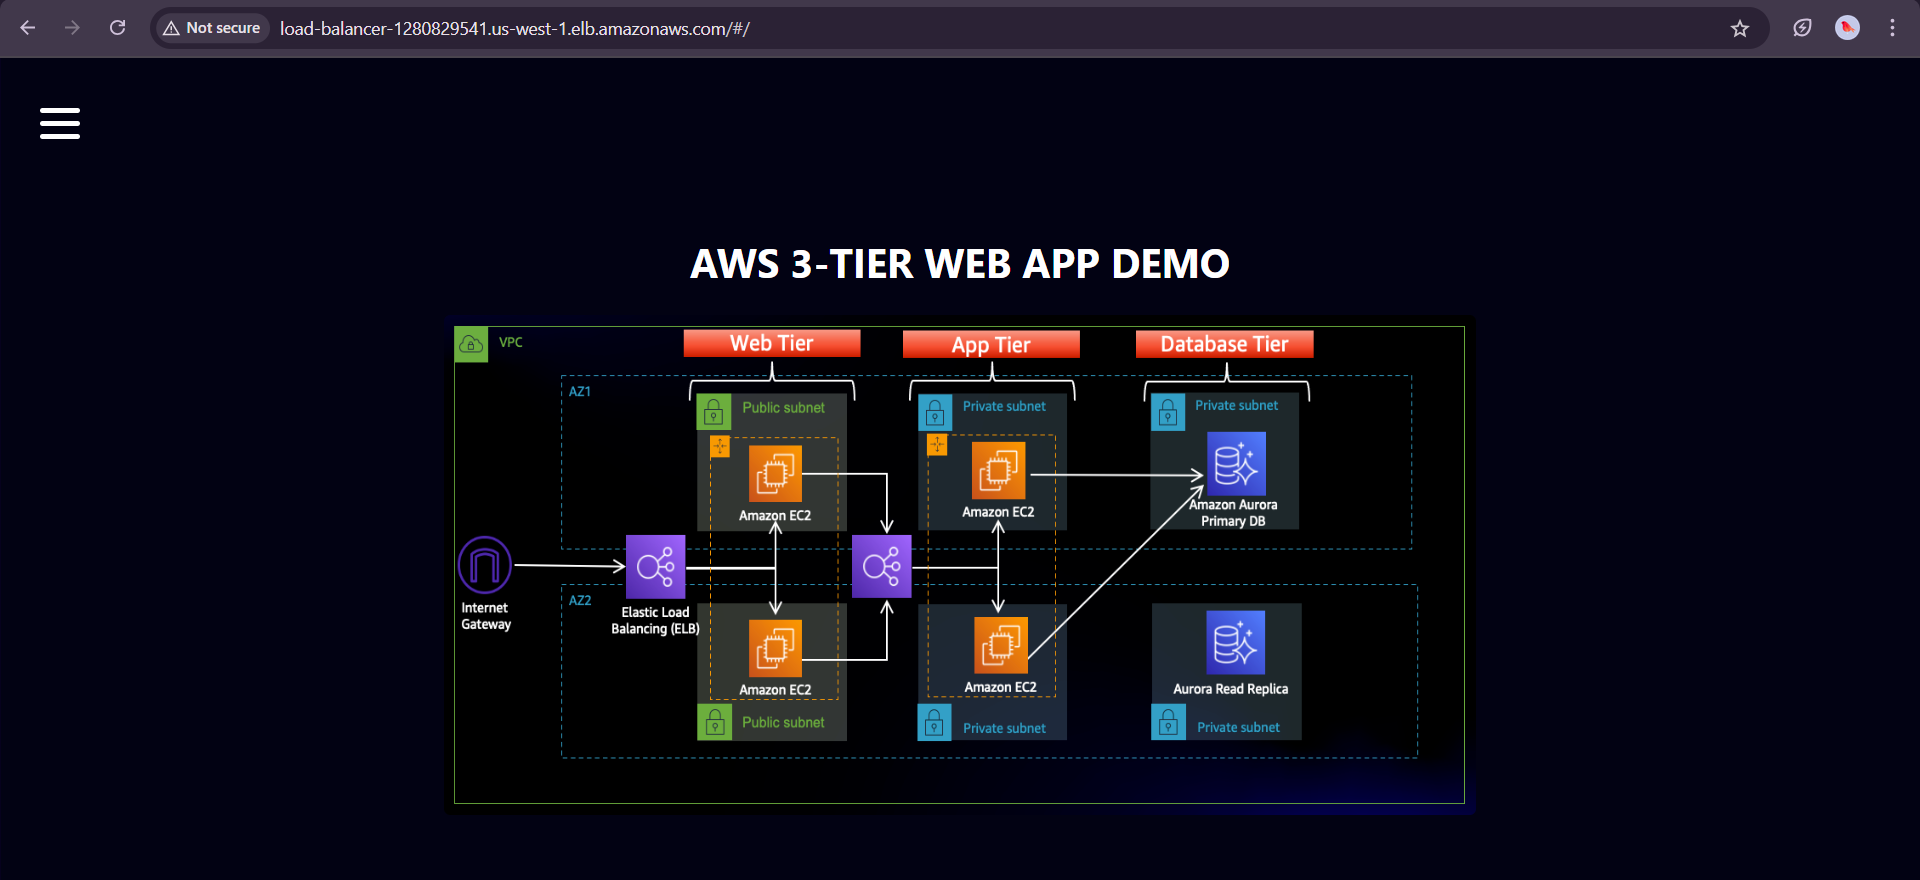
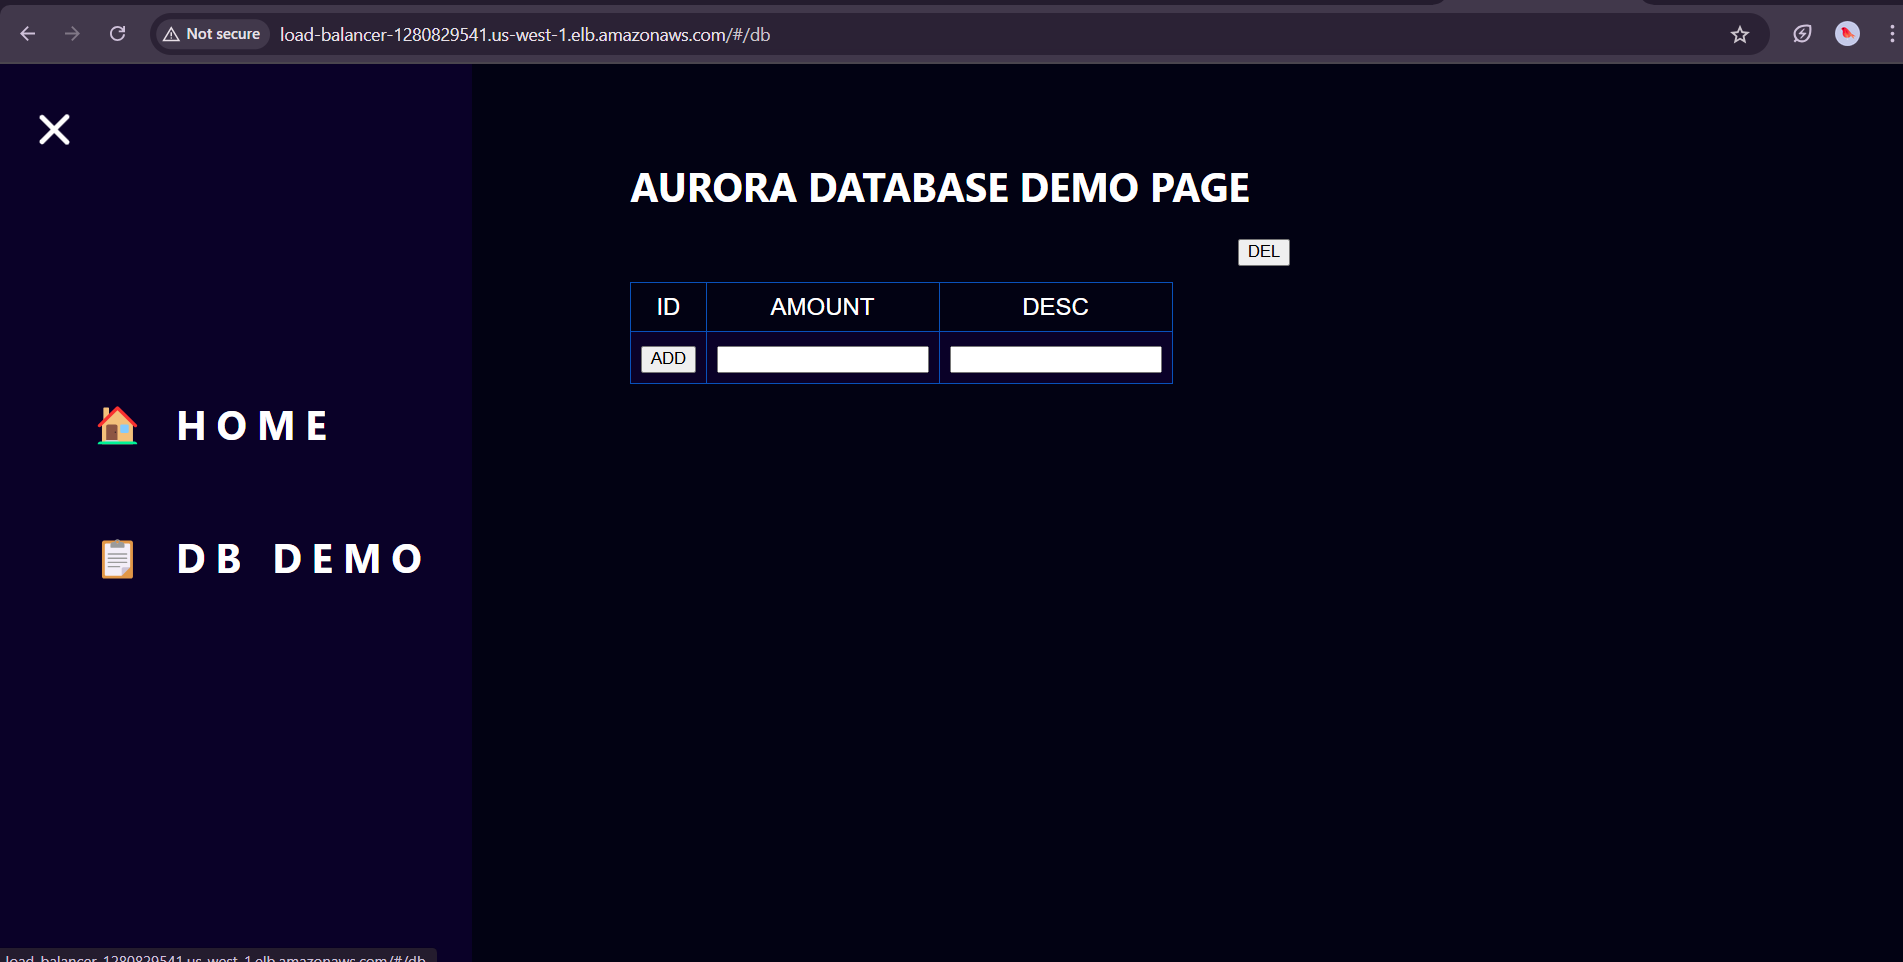
Deployment Complete!
You now have a fully working WebApp running behind an Internet-Facing Load Balancer with Auto Scaling enabled for high availability.
To see your application live, follow these steps:
- Go to the EC2 Dashboard.
- On the left sidebar, under Load Balancing, click Load Balancers.
- Find your Web Tier Load Balancer (Internet-facing).
- Copy the DNS name of the load balancer.
- Paste it in your web browser.
You should now see your deployed Web Application running successfully!
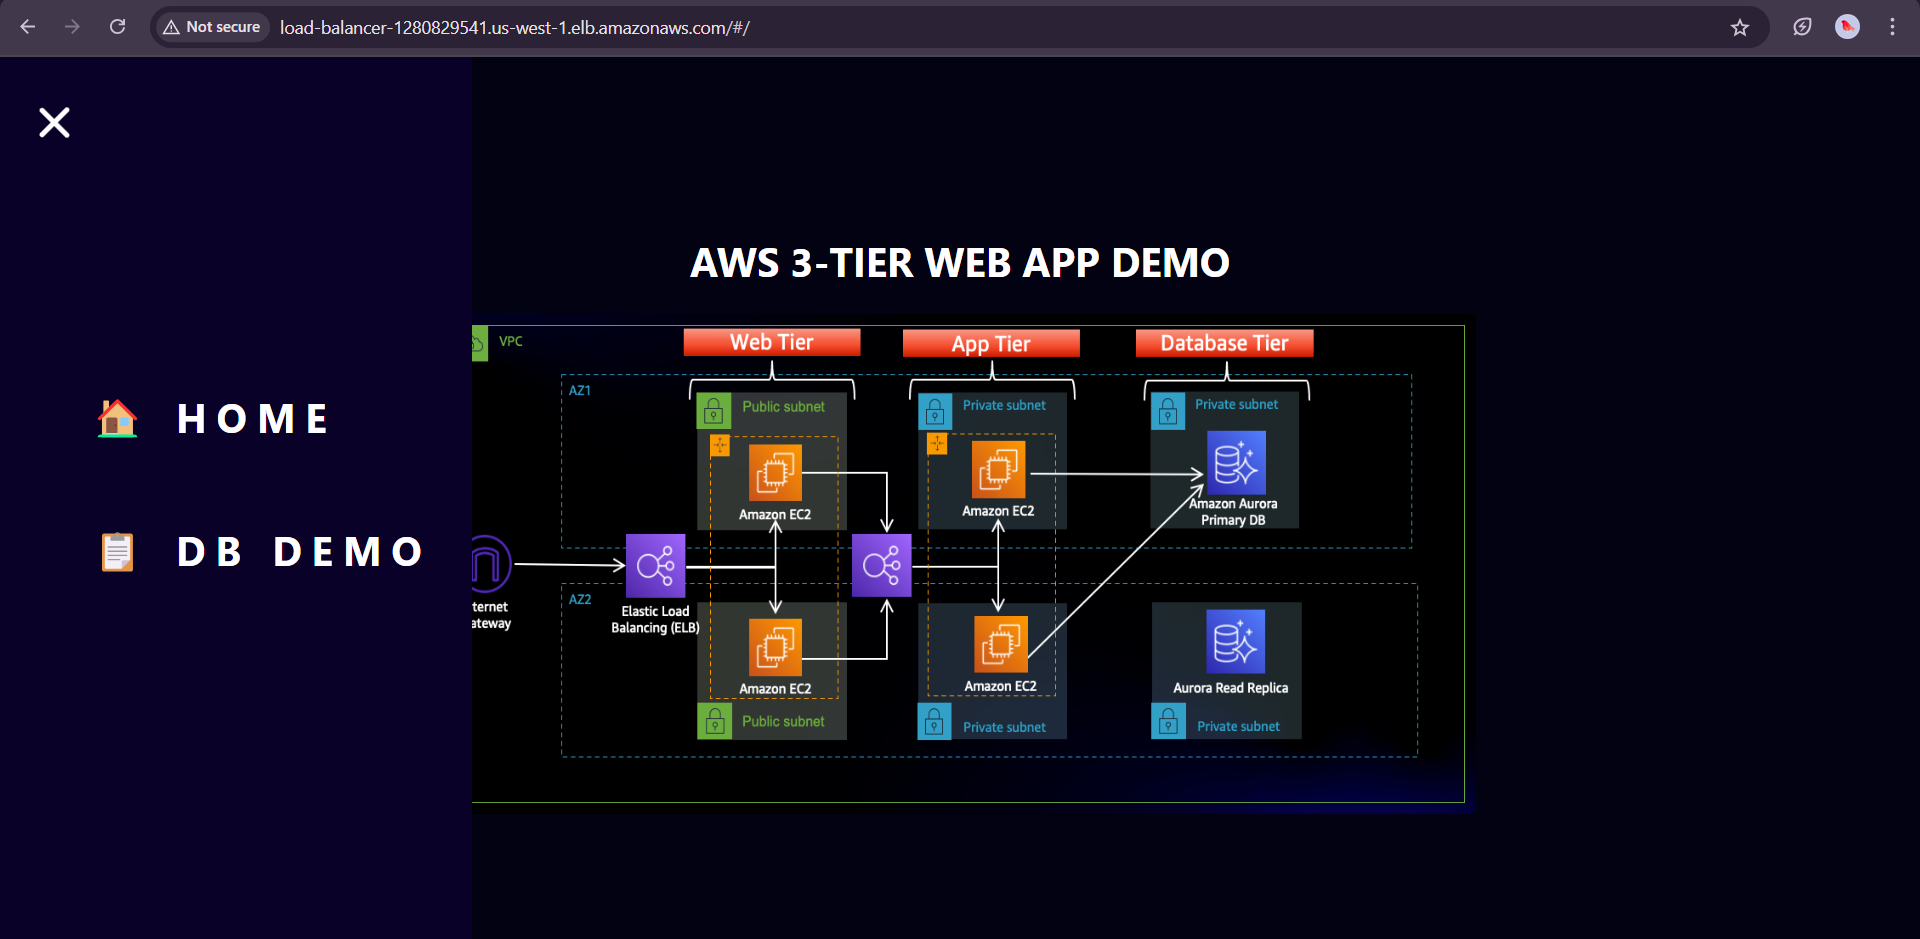
Congratulations on completing the deployment!
Conclusion
Well done on successfully completing your three-tier architecture project on AWS! 🎉
You've set up:
- A solid three-tier architecture using EC2, Load Balancers, Auto Scaling Groups, S3, and IAM.
- Both internal and external load balancers.
- Proper scaling mechanisms for your application and web tiers.
- A production-style deployment pipeline from scratch.
🧹 Clean Up Reminder
Before wrapping up, it’s important to clean up all the AWS resources you created for learning purposes to:
- Avoid any unwanted charges.
- Keep your AWS environment tidy.
Make sure to:
- Delete EC2 instances, AMIs, Snapshots.
- Delete Load Balancers, Target Groups, Launch Templates.
- Remove Auto Scaling Groups.
- Clean up your S3 buckets.
- Detach and remove IAM Roles if not needed.
Thank you for following along — and congratulations again on leveling up your cloud skills!
Happy Building!