I recently created a Pomodoro app. Check it out!
With the Pomodoro technique, you schedule out a 25 minute block to focus and then take a short break.
My app needed a way to notify you when it was time to take a break.
Eventually I settled on Local or Scheduled Notifications as the solution. However, the vast majority of information about implementing Notifications in a React Native app was about Push Notifications. So I decided to write this post!
Push Notifications vs Local Notifications
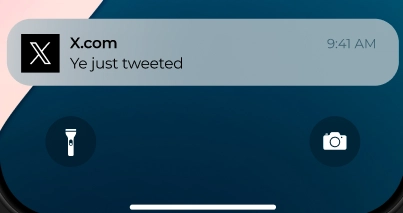
Push Notifications are sent to a user's device from a server. For example, you might get a notification on your phone when your favorite hip-hop artist posts a new micro-blog to X.com:

The notification is sent to your phone from a server, not the Twitter application itself.
This was an extra level of complication that my humble Pomodoro app did not need. I just need to notify the user 25 minutes after they press the "Start" button in the app. No server need be involved.
This is where Local or Scheduled Notifications come in. They are much simpler and allow you to schedule a notification from within the app itself.
Warning: Notifications don't work on emulators. You'll need a real device. Also, Push Notifications require a development build. That's not an issue for this tutorial though as we are only using Local Notifications.
Set up
I'm going to create a new expo app and run reset-project to remove the boilerplate:
npx create-expo-app@latest NotificationsTestnpm run reset-projectNow install the expo-notifications package:
npx expo install expo-notificationsThe next thing we need to do is request permission from the user to send notifications. This is something you need to do even if you're not sending Push Notifications and only Local Notifications.
Shut up and show me code:
index.tsx
import { useEffect } from "react";
import { Text, View } from "react-native";
import * as Notifications from "expo-notifications";

export default function Index() {
  useEffect(() => {
    const configureNotificationsAsync = async () => {
      const response = await Notifications.requestPermissionsAsync();
      console.log("🔍 Permissions response:", response);
    };
    configureNotificationsAsync();
  }, []);

  return (
    <View
      style={{
        flex: 1,
        justifyContent: "center",
        alignItems: "center",
      }}
    >
      <Text>Hello WorldText>
    View>
  );
}
requestPermissionsAsync() will attempt to ask the user for permission to send notifications. It defaults to asking for permission to show alerts, play sounds and set the App's badge, but you can get more specific by passing a NotificationPermissionRequest object.
There's also getPermissionsAsync() which just checks the permissions but doesn't prompt the user. I'm not using that in this example though.
If we log out the response object, we'll see something like this:
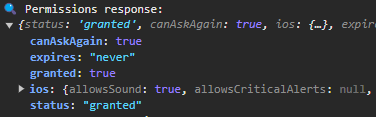
In your app you may want to do something special if permission was not granted, like ask again. For this example I'll only continue if permission was granted.
Next we set up our notification handler. Changing the useEffect above:
useEffect(() => {
    const configureNotificationsAsync = async () => {
      const { granted } = await Notifications.requestPermissionsAsync();
      if (!granted) {
        return console.warn("⚠️ Notification Permissions not granted!");
      }

      Notifications.setNotificationHandler({
        handleNotification: async () => ({
          shouldPlaySound: true,
          shouldShowAlert: true,
          shouldSetBadge: false,
        }),
      });
    };
    configureNotificationsAsync();
  }, []);
setNotificationHandler() Accepts a NotificationHandler object which must contain a handleNotification function. It may also contain handleError and handleSuccess callback functions which are called if handleNotification throws an error or succeeds. We won't be utilizing those in this example though.
handleNotification is an async function which returns a Promise. The NotificationBehavior object defines if it should play a sound, show an alert or set the App's badge.
Now with our notification handler in place, we can send our first notification:
Sending a local Notification
index.tsx
import { useEffect } from "react";
import { Text, View, Button } from "react-native";
import * as Notifications from "expo-notifications";

export default function Index() {
  useEffect(() => {
    const configureNotificationsAsync = async () => {
      const { granted } = await Notifications.requestPermissionsAsync();
      if (!granted) {
        return console.warn("⚠️ Notification Permissions not granted!");
      }

      Notifications.setNotificationHandler({
        handleNotification: async () => ({
          shouldPlaySound: true,
          shouldShowAlert: true,
          shouldSetBadge: false,
        }),
      });
    };
    configureNotificationsAsync();
  }, []);

  const sendNotification = () => {
    Notifications.scheduleNotificationAsync({
      content: {
        title: "🧪 Test Notification!",
        body: "This is a test.",
      },
      trigger: {
        type: Notifications.SchedulableTriggerInputTypes.TIME_INTERVAL,
        seconds: 1,
      },
    });
  };

  return (
    <View
      style={{
        flex: 1,
        justifyContent: "center",
        alignItems: "center",
      }}
    >
      <Text>Hello World</Text>
      <Button
        title="Send me a notification"
        onPress={sendNotification}
      ></Button>
    </View>
  );
}
The scheduleNotificationAsync() function take a NotificationRequestInput object. The NotificationRequestInput object has 3 fields:
contentwhich defines the appearance and content of the notification. This has a whole bunch of optional and platform-specific fields. Here I'm just usingtitleandbody.triggerwhich can either benullor aNotificationTriggerInputobject. In this example (and for my Pomodoro app), I used theTimeIntervalTriggerInput. Ifnullis passed in, the notification will be triggered immediately.
scheduleNotificationAsync() also returns an string identifier for the notification which can be used to cancel it if you need to. I will demonstrate that in the next section.
Note: Be careful with your logic for when notifications are triggered. Your JavaScript code isn't running if the app is backgrounded. For example, you tried to create a timeRemaining state variable in a component and then schedule a notification to fire immediately once timeRemaining === 0. That won't work because your state isn't updating and your components aren't re-rendering while the app is backgrounded. You need to schedule it through the Notifications API.
Putting it together into a custom hook
I don't really want to clutter the code for the home page of my app with all this Notification related logic. There are also probably going to be other places in my app where I would want to schedule notifications from. Let me reorganize the notification logic into a custom hook.
To keep it simple, I'm going to assume that you only have 1 scheduled notification at a time. It should be easy to expand this logic to handle more if you need to though:
useNotifications.tsx
import {
  createContext,
  FC,
  PropsWithChildren,
  useContext,
  useEffect,
  useRef,
} from "react";
import * as Notifications from "expo-notifications";

interface NotificationContextType {
  scheduleNotificationAsync: (
    request: Notifications.NotificationRequestInput
  ) => Promise<void>;
  cancelNotificationAsync: () => Promise<void>;
}

const NotificationsContext = createContext<NotificationContextType | undefined>(
  undefined
);

const NotificationsProvider: FC<PropsWithChildren> = ({ children }) => {
  useEffect(() => {
    const configureNotificationsAsync = async () => {
      const { granted } = await Notifications.requestPermissionsAsync();
      if (!granted) {
        return console.warn("⚠️ Notification Permissions not granted!");
      }

      Notifications.setNotificationHandler({
        handleNotification: async () => ({
          shouldPlaySound: true,
          shouldShowAlert: true,
          shouldSetBadge: false,
        }),
      });
    };
    configureNotificationsAsync();
  }, []);

  const scheduledNotificationRef = useRef<string>("");

  const scheduleNotificationAsync = async (
    request: Notifications.NotificationRequestInput
  ) => {
    const notification = await Notifications.scheduleNotificationAsync(request);
    scheduledNotificationRef.current = notification;
    console.log(
      "✍️ Scheduling notification: ",
      scheduledNotificationRef.current
    );
  };

  const cancelNotificationAsync = async () => {
    console.log(
      "🗑️ Canceling notification: ",
      scheduledNotificationRef.current
    );
    await Notifications.cancelScheduledNotificationAsync(
      scheduledNotificationRef.current
    );
    scheduledNotificationRef.current = "";
  };

  const value = { scheduleNotificationAsync, cancelNotificationAsync };

  return (
    <NotificationsContext.Provider value={value}>
      {children}
    </NotificationsContext.Provider>
  );
};

const useNotifications = () => {
  const context = useContext(NotificationsContext);

  if (!context) {
    throw new Error(
      "useNotifications must be called from within a NotificationProvider!"
    );
  }

  return context;
};

export { useNotifications, NotificationsProvider };
I create a NotificationsContext which is provided throughout my app with a NotificationsProvider. The NotificationsProvider contains the same useEffect we saw before as well as defining my own scheduleNotificationAsync() and cancelNotificationAsync() functions.
scheduleNotificationAsync() is just passing the request along to expo-notifications, except this time I store the Notification identifier returned by Notifications.scheduleNotificationAsync() in a ref. This allows me to use that identifier to cancel the Notification in the cancelNotificationAsync() function. I use a ref rather than state because although I need to keep hold of the identifier, its value is not used to render anything.
Now we can wrap our Root Layout with the NotificationsProvider:
_layout.tsx
import { NotificationsProvider } from "@/hooks/useNotifications";
import { Stack } from "expo-router";

export default function RootLayout() {
  return (
    <NotificationsProvider>
      <Stack />
    NotificationsProvider>
  );
}
And now reimplement our Button on the Home Page using our NotificationContext:
index.tsx
import { useEffect } from "react";
import { Text, View, Button } from "react-native";
import * as Notifications from "expo-notifications";
import { useNotifications } from "@/hooks/useNotifications";

export default function Index() {
  const { scheduleNotificationAsync, cancelNotificationAsync } =
    useNotifications();

  const sendNotification = () => {
    scheduleNotificationAsync({
      content: {
        title: "🧪 Test notification!",
      },
      trigger: {
        type: Notifications.SchedulableTriggerInputTypes.TIME_INTERVAL,
        seconds: 5,
      },
    });
  };

  return (
    <View
      style={{
        flex: 1,
        justifyContent: "center",
        alignItems: "center",
      }}
    >
      <Text>Hello WorldText>
      <Button title="Send me a notification" onPress={sendNotification} />
      <Button title="Cancel notification" onPress={cancelNotificationAsync} />
    View>
  );
}
You have 5 seconds to press the cancel button! Be quick!!
Conclusion
Notifications can be complicated, but I hope you can see how relatively simple Local Notifications are. No server required. No Firebase Cloud Messaging or Apple Push Notification Service or Expo Push Tokens.
A lot of situations are still going to require the full Push Notification implementation, but if your app doesn't (like for my Pomodoro app) Local Notifications are much easier.
Thank you for reading!
