Kubernetes is a powerful tool for managing containerized workloads, but its full distribution can be heavy and complex. k3s, a lightweight Kubernetes variant from Rancher, trims the fat while keeping the essentials, making it perfect for development, testing, or resource-limited environments. In this guide, we’ll build a multi-node k3s cluster where each node runs as a Docker container—a highly portable and efficient setup. We’ll deploy an Nginx workload, verify it with multiple methods (including BusyBox), perform health checks, and cover cluster management tasks like adding, naming, and removing nodes. This approach is an accessible entry point for anyone exploring Kubernetes without heavy infrastructure.
Prerequisites
- Docker: Installed on your system (works on Linux, macOS, or Windows with WSL2).
-
Basic Command-Line Skills: Familiarity with Docker commands and
kubectl. -
Internet Access: To download the
rancher/k3sand other container images.
Step 0: Installing kubectl
To interact with the Kubernetes cluster, you’ll need kubectl, the command-line tool for managing Kubernetes resources. It’s not included with k3s by default, so you’ll need to install it separately. You can download and set it up from the official Kubernetes documentation at https://kubernetes.io/docs/tasks/tools/#kubectl. Follow the instructions there for your operating system, and ensure kubectl is in your PATH before proceeding.
Step 1: Setting Up the k3s Server
k3s condenses Kubernetes into a single binary, combining the control plane (API server, scheduler, controller manager) and worker capabilities. Running it in a Docker container adds flexibility, letting you deploy a cluster on any Docker-compatible system.
Launch the Server Container
Start the k3s server with this command:
docker run -d --name k3s-server \
  --privileged \
  -p 6443:6443 \
  -v k3s-data:/var/lib/rancher/k3s \
rancher/k3s server-
-d: Runs the container in detached mode, keeping your terminal free. -
--name k3s-server: Assigns a clear name for referencing the container later. -
--privileged: Grants k3s the elevated permissions it needs to manage containers and networking, simulating a full Kubernetes node. -
-p 6443:6443: Maps the Kubernetes API server’s default port (6443) from the container to your host, allowingkubectlto connect. -
-v k3s-data:/var/lib/rancher/k3s: Creates a persistent Docker volume namedk3s-dataand mounts it to/var/lib/rancher/k3s, where k3s stores critical data like certificates and its embedded etcd database. -
rancher/k3s server: Pulls the official k3s image and launches it in server mode, initializing a single-node cluster.
This command spins up a fully operational Kubernetes cluster inside the container, complete with a lightweight etcd instance for storing cluster state.
Configure kubectl Access
To manage the cluster, copy the generated configuration file to your host:
docker cp k3s-server:/etc/rancher/k3s/k3s.yaml ~/k3s.yaml
export KUBECONFIG=~/k3s.yaml-
docker cp: Extracts thek3s.yamlfile, which includes the API server URL (e.g.,https://127.0.0.1:6443) and authentication credentials. -
export KUBECONFIG: Sets an environment variable sokubectlknows where to find this config.
Test the connection:
kubectl get nodesYou’ll see something like:
NAME           STATUS   ROLES                  AGE   VERSION
b928c7be67cd   Ready    control-plane,master   1m    v1.29.15+k3s1
The random name (e.g., b928c7be67cd) is the container’s hostname or ID, assigned by Docker. We’ll customize this later.
Why Persistence Is Key
Without the -v k3s-data volume, stopping and recreating the container (e.g., with docker rm and docker run) regenerates certificates and state, invalidating your k3s.yaml. The volume ensures the cluster’s identity and data persist across restarts, avoiding connectivity issues.
Step 2: Adding Worker Nodes
A single-node cluster is a good start, but Kubernetes excels with multiple nodes for workload distribution. We’ll add worker nodes as additional Docker containers to expand the cluster.
Create a Docker Network
To enable seamless communication between the server and agents, use a shared Docker network:
docker network create k3s-netThis sets up a bridge network called k3s-net. Containers on this network can resolve each other by their --name (e.g., k3s-server), eliminating the need to manually track IP addresses.
Restart the server on this network:
docker stop k3s-server
docker rm k3s-server
docker run -d --name k3s-server \
  --privileged \
  -p 6443:6443 \
  -v k3s-data:/var/lib/rancher/k3s \
  --network k3s-net \
rancher/k3s server-
--network k3s-net: Connects the server to the custom network.
Retrieve the Node Token
Agents require a token to authenticate with the server. Extract it from the server container:
docker exec k3s-server cat /var/lib/rancher/k3s/server/node-tokenThe output is a lengthy string (e.g., K10abc123...::node:xyz789...), generated when the server starts. This token ensures the secure registration of worker nodes. Copy it for the next step.
Launch a Worker Node
Add an agent container to join the cluster:
docker run -d --name k3s-agent-1 \
  --privileged \
  --network k3s-net \
  rancher/k3s agent \
  --server https://k3s-server:6443 \
--token-
--name k3s-agent-1: Names the agent container for easy identification. -
--privileged: Allows k3s to manage workloads within the container. -
--network k3s-net: Ensures it can communicate withk3s-server. -
--server https://k3s-server:6443: Points to the control plane’s API endpoint, resolvable via the network. -
--token: Authenticates the agent using the token you retrieved.
Wait a few seconds, then check the cluster:
kubectl get nodesOutput might be:
NAME           STATUS   ROLES                  AGE   VERSION
k3s-server     Ready    control-plane,master   2m    v1.29.15+k3s1
e36b344d4930   Ready                     10s   v1.29.15+k3s1
The agent joins, though it may have a random name (e.g., e36b344d4930). We’ll address naming next.
Step 3: Naming Nodes
Random node names like e36b344d4930 work but can confuse cluster management. Assigning meaningful names improves clarity and aligns with operational best practices.
Understanding Node Naming
k3s uses the container’s hostname as the node name in Kubernetes. Without explicit configuration, Docker assigns a random hostname—often the container ID prefix (e.g., e36b344d4930). By setting the hostname and instructing k3s to use a specific name, we can control how nodes appear in the cluster.
Set Names During Launch
Stop and recreate the containers with --hostname and --node-name flags for consistent naming:
Server
docker stop k3s-server
docker rm k3s-server
docker run -d --name k3s-server \
  --privileged \
  -p 6443:6443 \
  -v k3s-data:/var/lib/rancher/k3s \
  --network k3s-net \
  --hostname k3s-server \
  rancher/k3s server \
--node-name k3s-server-
--hostname k3s-server: Defines the container’s hostname. -
--node-name k3s-server: Registers this name in Kubernetes.
Agent
docker stop k3s-agent-1
docker rm k3s-agent-1
docker run -d --name k3s-agent-1 \
  --privileged \
  --network k3s-net \
  --hostname k3s-agent-1 \
  rancher/k3s agent \
  --server https://k3s-server:6443 \
  --token  \
  --node-name k3s-agent-1
Verify the result:
kubectl get nodesOutput:
NAME          STATUS   ROLES                  AGE   VERSION
k3s-server    Ready    control-plane,master   2m    v1.29.15+k3s1
k3s-agent-1   Ready                     10s   v1.29.15+k3s1
Renaming Existing Nodes
If nodes already have random names:
- Add a Label: Temporarily mark the node:
kubectl label node e36b344d4930 kubernetes.io/hostname=k3s-agent-1 --overwriteThis updates the node’s metadata but doesn’t change its core name.
- Delete and Recreate: Remove the node and restart the container:
kubectl delete node e36b344d4930
   docker stop k3s-agent-1
   docker rm k3s-agent-1
   docker run -d --name k3s-agent-1 \
     --privileged \
     --network k3s-net \
     --hostname k3s-agent-1 \
     rancher/k3s agent \
     --server https://k3s-server:6443 \
     --token  \
     --node-name k3s-agent-1
This ensures the node rejoins with the desired name permanently.
Step 4: Deploying and Verifying a Workload
Let’s deploy an Nginx pod and confirm it’s running using various methods.
Deploy the Pod
Create an Nginx pod:
kubectl run nginx --image=nginx --restart=Never-
--restart=Never: Ensures a standalone pod rather than a managed deployment.
Check its status:
kubectl get podsIt transitions from:
NAME    READY   STATUS              RESTARTS   AGE
nginx   0/1     ContainerCreating   0          0s
to:
NAME    READY   STATUS    RESTARTS   AGE
nginx   1/1     Running   0          12s
Expose the Pod
Expose it as a NodePort service:
kubectl expose pod nginx --port=80 --type=NodePort
kubectl get svc
Output:
NAME         TYPE        CLUSTER-IP    EXTERNAL-IP   PORT(S)        AGE
kubernetes   ClusterIP   10.43.0.1             443/TCP        6m
nginx NodePort 10.43.4.246 80:32116/TCP 5s-
CLUSTER-IP: The internal IP for cluster-wide access. -
PORT(S): Maps port 80 to a randomNodePort(e.g.,32116) on the nodes.
Verification Methods
1. BusyBox Test
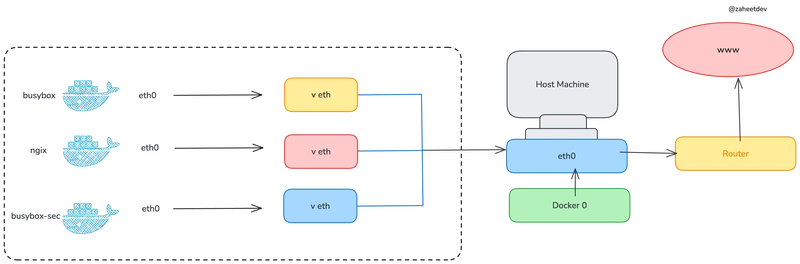
What is BusyBox? BusyBox is a lightweight, multi-tool container image that combines common Unix utilities (like wget, sh, and ping) into a single executable. It’s widely used in Kubernetes for debugging and testing because of its small size and versatility.
Launch a BusyBox pod to test the service:
kubectl run busybox --image=busybox --restart=Never --rm -it -- shInside the pod:
wget -qO- http://10.43.4.246:80This retrieves Nginx’s welcome page, confirming the service is accessible within the cluster. Exit with exit.
2. Port Forwarding
Forward the service to your local machine:
kubectl port-forward service/nginx 8080:80In another terminal:
curl http://127.0.0.1:8080You’ll see the Nginx HTML, verifying external access without modifying the cluster.
3. NodePort Access
Expose the NodePort on the server container:
docker stop k3s-server
docker rm k3s-server
docker run -d --name k3s-server \
  --privileged \
  -p 6443:6443 -p 32116:32116 \
  -v k3s-data:/var/lib/rancher/k3s \
  --network k3s-net \
  --hostname k3s-server \
  rancher/k3s server \
  --node-name k3s-server
Test:
curl http://127.0.0.1:32116This accesses the service via the node’s external port, simulating direct host access.
Step 5: Health Checks and Cluster Info
Cluster Information
Get a cluster overview:
kubectl cluster-infoOutput:
Kubernetes control plane is running at https://127.0.0.1:6443
CoreDNS is running at https://127.0.0.1:6443/api/v1/namespaces/kube-system/services/kube-dns:dns/proxy
Metrics-server is running at https://127.0.0.1:6443/api/v1/namespaces/kube-system/services/https:metrics-server:https/proxy
This confirms the control plane and essential services (CoreDNS for DNS resolution, Metrics-server for resource monitoring) are running.
Component Health
Check core components:
kubectl get componentstatusOutput:
NAME                 STATUS    MESSAGE   ERROR
etcd-0               Healthy   ok
scheduler            Healthy   ok
controller-manager   Healthy   ok
For newer Kubernetes versions (where componentstatus is deprecated), inspect system pods:
kubectl get pods -n kube-systemLook for Running statuses.
Workload Health
Verify Nginx:
kubectl logs nginxCheck for startup messages. Dive deeper with:
kubectl describe pod nginxThis shows events, conditions, and resource usage.
Step 6: Managing the Cluster
Removing a Node
To remove k3s-agent-1:
kubectl drain k3s-agent-1 --ignore-daemonsets --delete-emptydir-data
kubectl delete node k3s-agent-1
docker stop k3s-agent-1
docker rm k3s-agent-1-
drain: Gracefully evicts pods. -
delete node: Removes it from Kubernetes. -
docker stop/rm: Cleans up the container.
Resetting the Cluster
Wipe everything:
docker stop k3s-server k3s-agent-1
docker rm k3s-server k3s-agent-1
docker volume rm k3s-data
Troubleshooting
-
TLS Errors: Recopy
k3s.yamlif certificates mismatch. -
Node Not Joining: Verify token,
--serverURL, and network connectivity. -
Pod Issues: Use
kubectl describe podorkubectl logsfor clues.
Conclusion
Running k3s in Docker containers offers a lightweight, portable Kubernetes experience. You’ve installed kubectl, set up a server, added and named worker nodes, deployed and verified Nginx with tools like BusyBox, and checked cluster health. This setup is a launchpad for scaling workloads, exploring ingress, or adding storage—perfect for learning or prototyping.