This is a submission for the Permit.io Authorization Challenge: Permissions Redefined
If you want to immediately get setup. Follow the instructions at https://github.com/AnsellMaximilian/permishout
What I Built
For this challenge, I decided to recreate Twitter/X, complete with access control. It's called PermiShout. Where a Shout is like a Tweet or post. I thought this would be perfect to show off Permit.io's base capabilities.
Here's the app workflow:
Home Page
Login/Signup
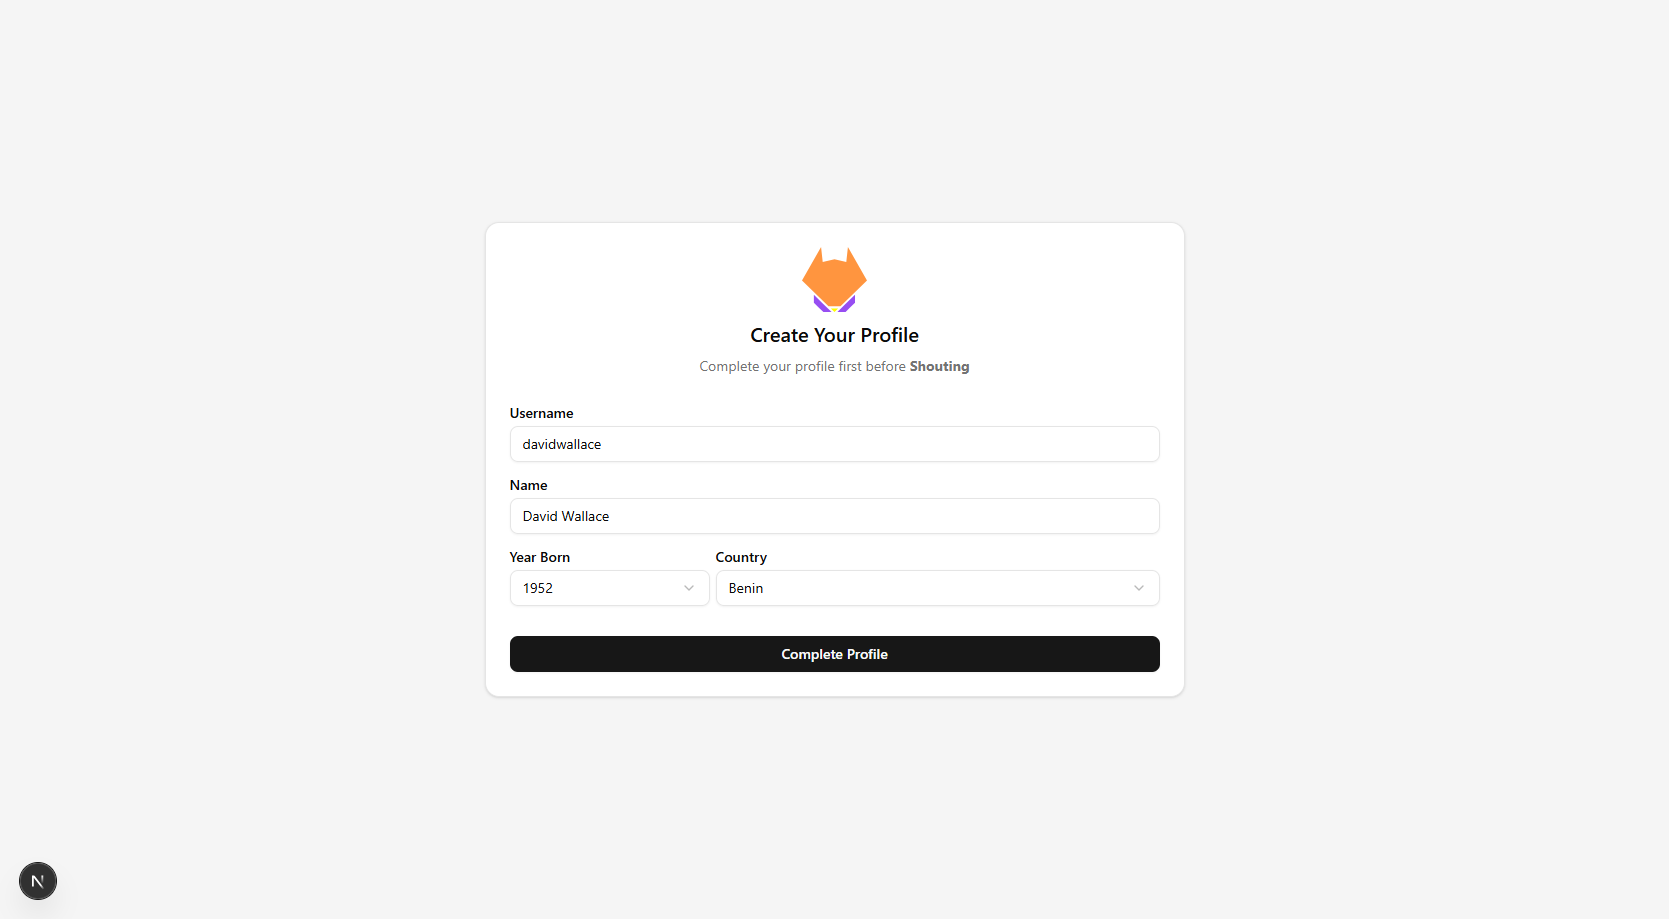
Complete Profile
Create Shout
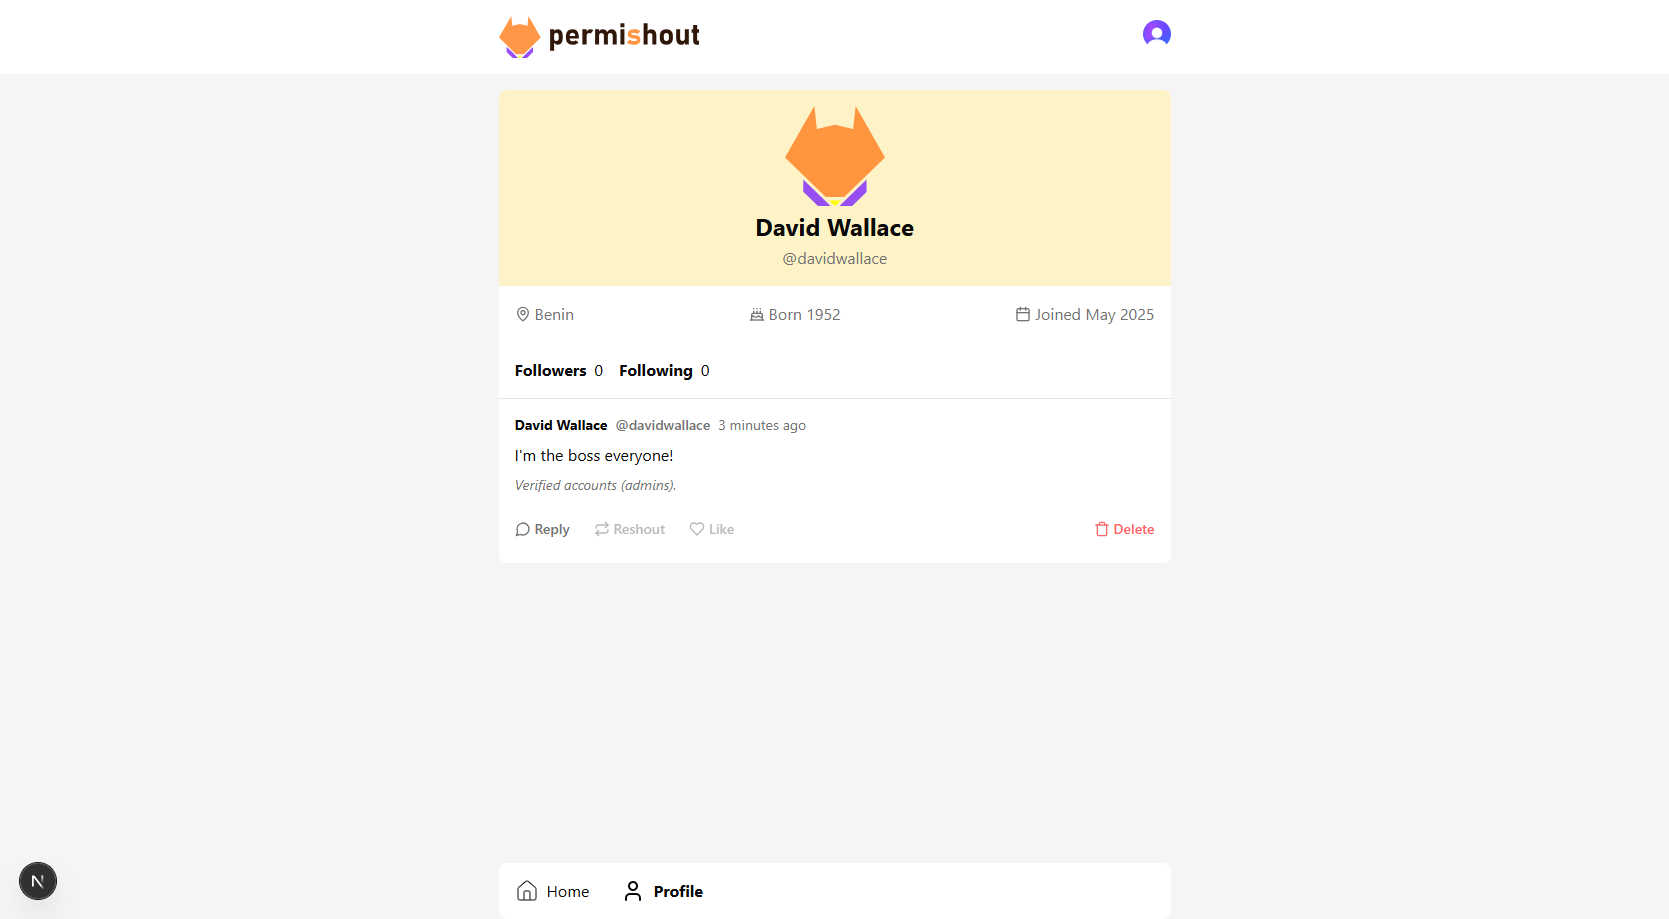
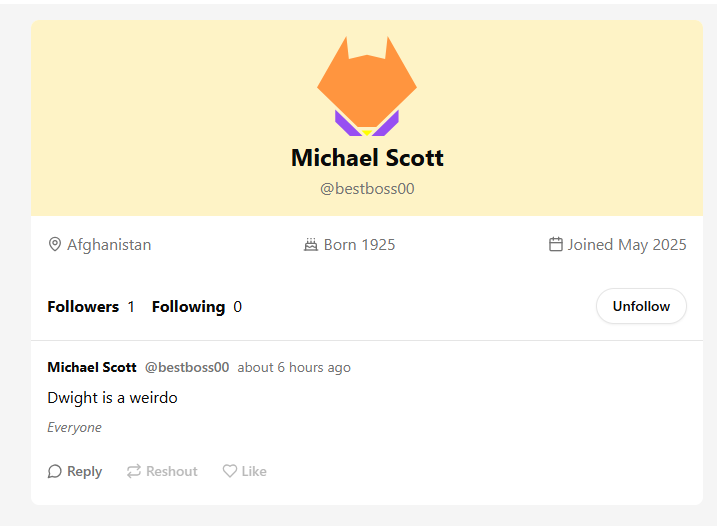
Look at Profile
Follow/Unfollow
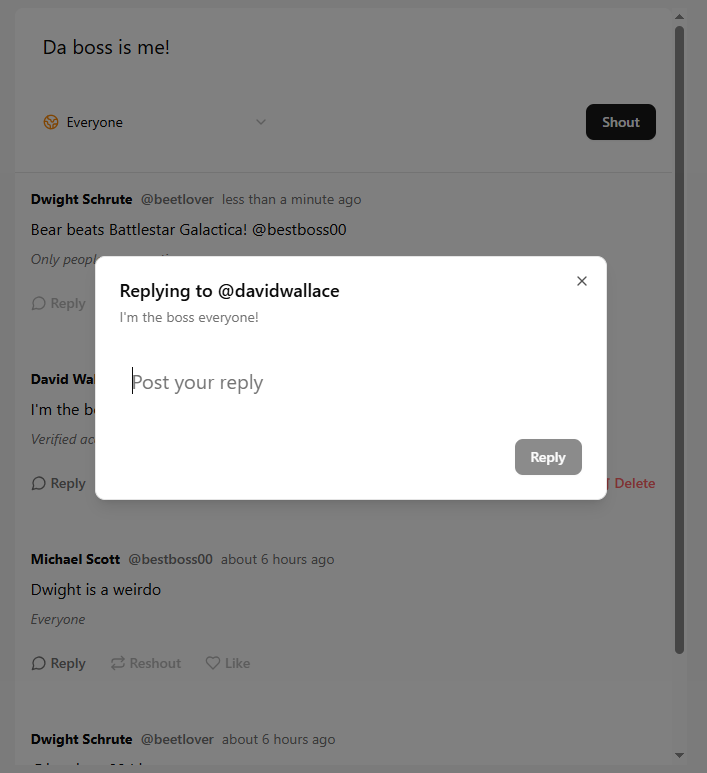
Reply to and Delete Shouts
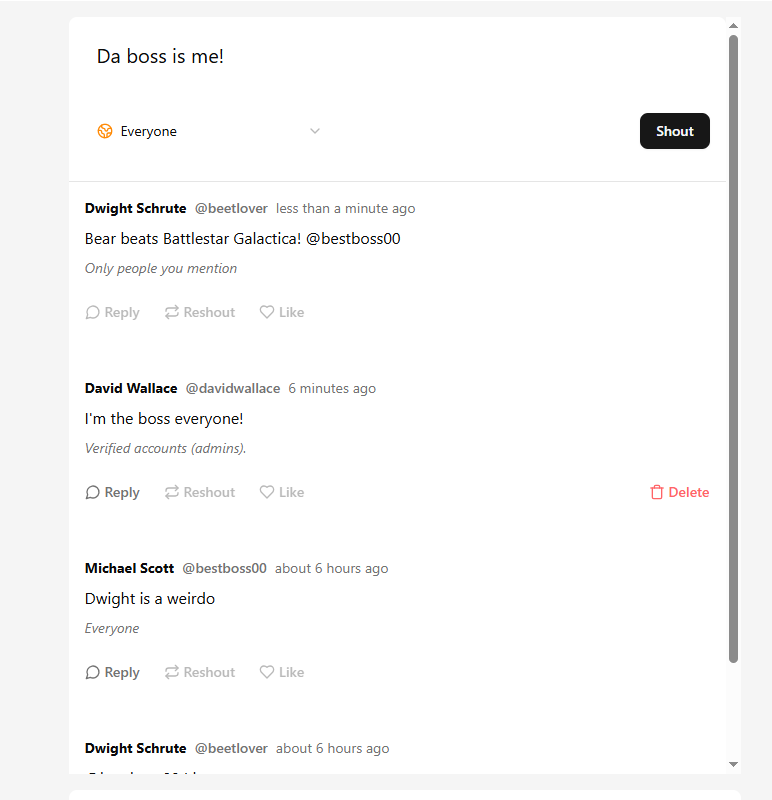
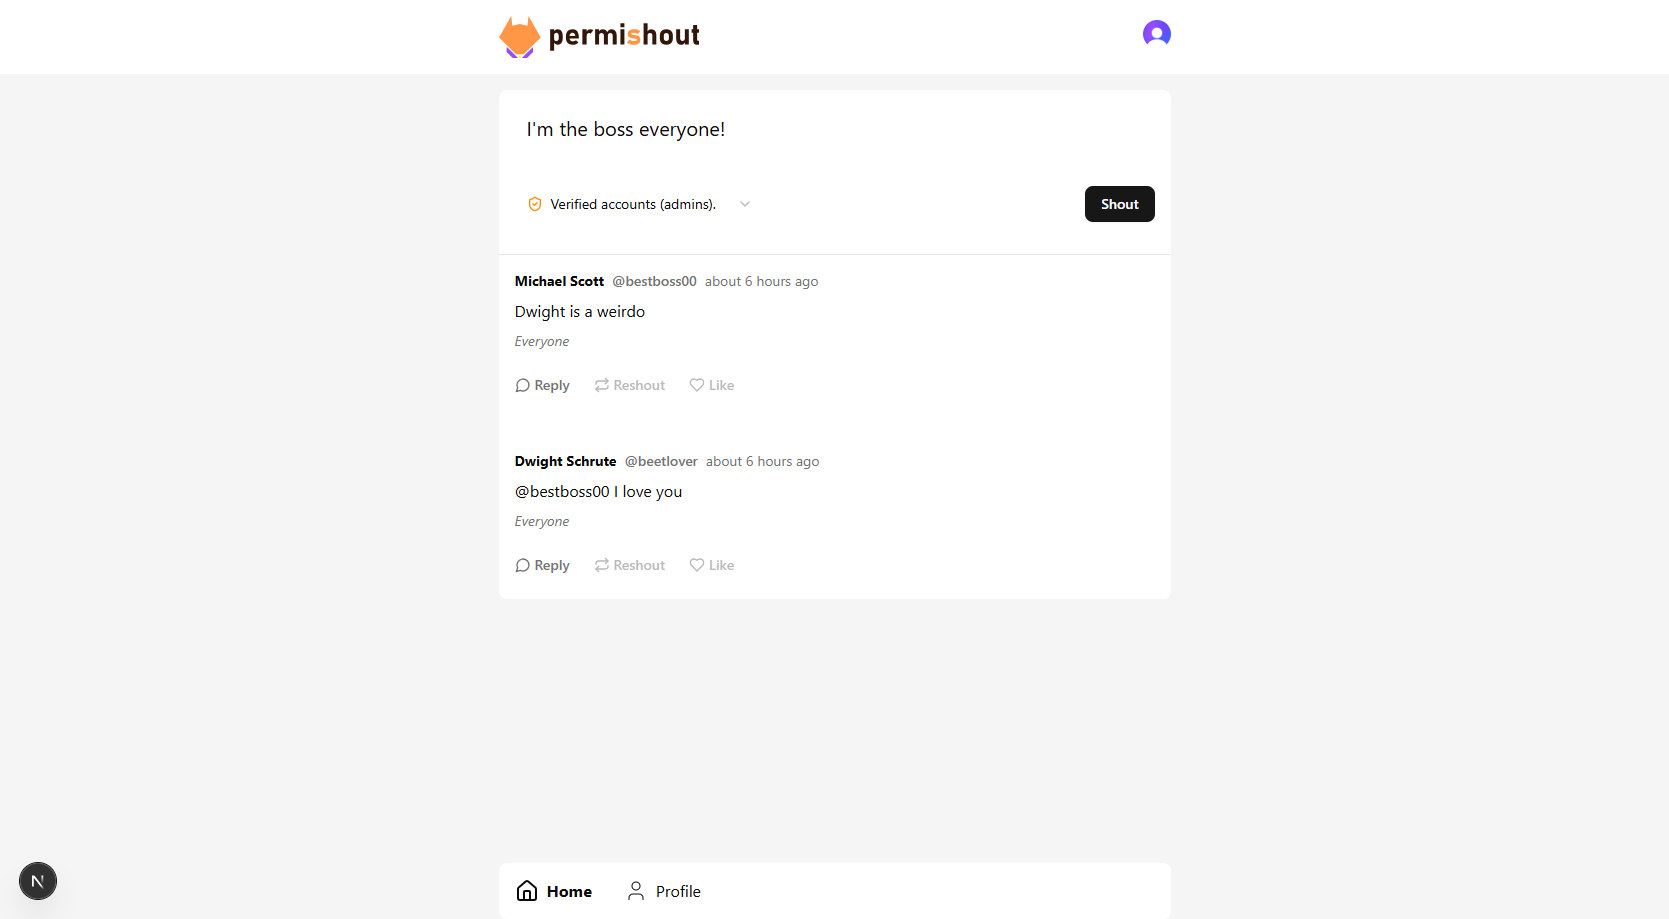
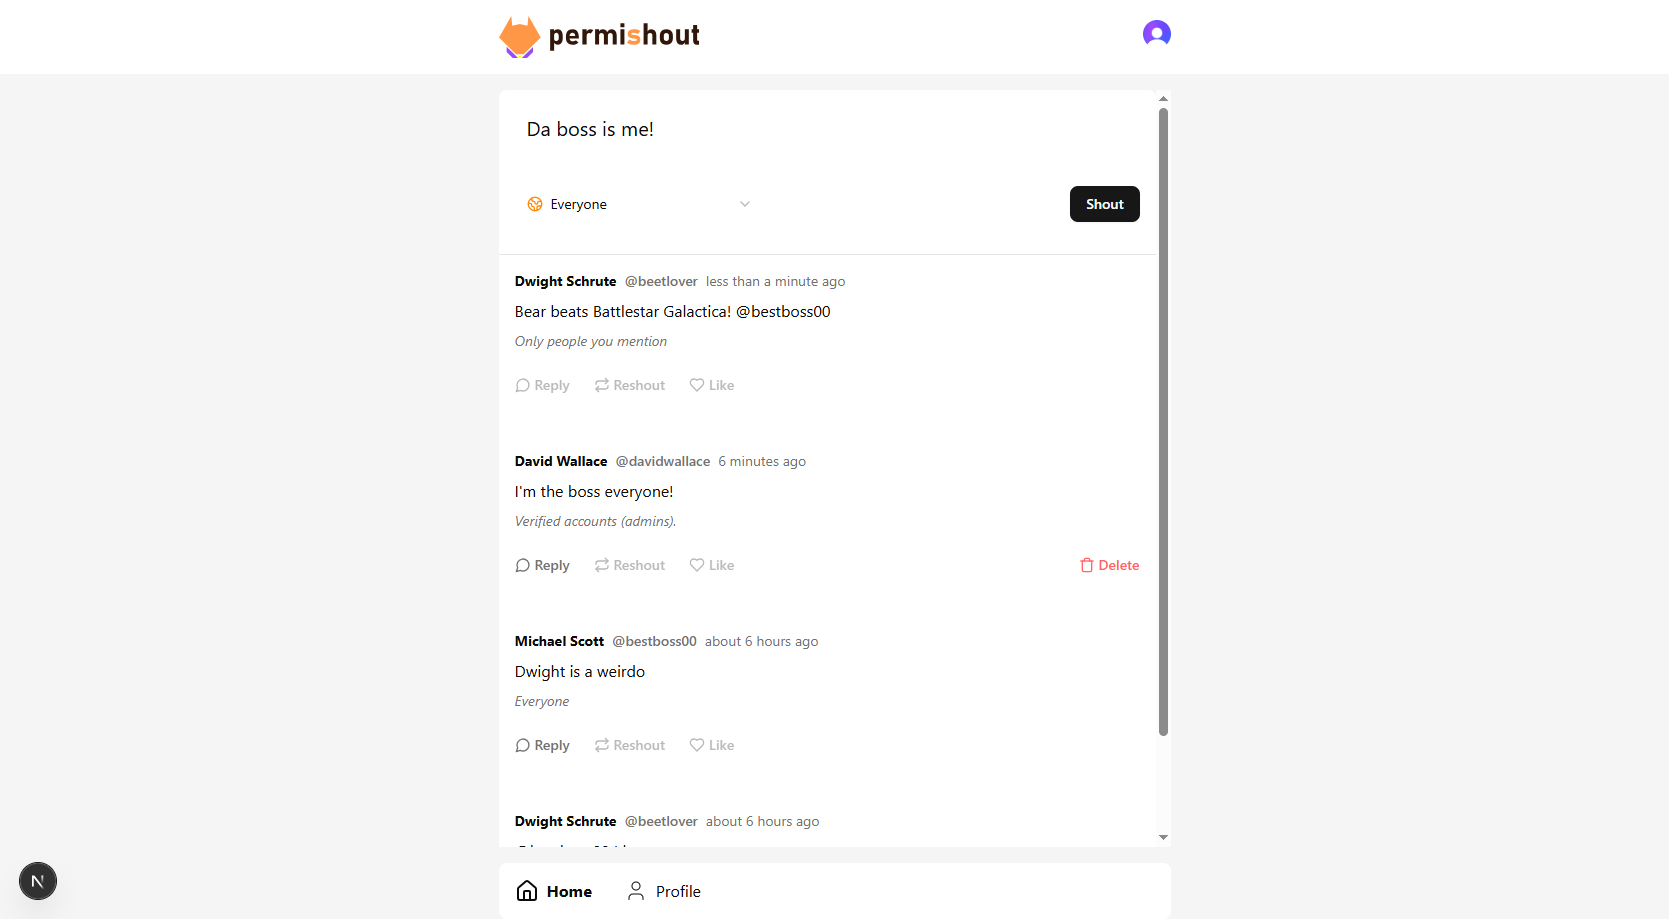
As you can see some shouts are different than others. Some have a delete button -- that's because Permit.io has determined that the current user has the authorization to do that.
Some reply buttons are disabled and some are not. That's also Permit.io doing the work. Here's some conditions that has been set up for a user to be able to reply:
- If the shout reply mode is set to "everyone" then any one can reply
- If the shout reply mode has been set to "verified accounts only" then only "admins" can reply
- If the shout reply mode has been set to "people mentioned" then only people mentioned will be able to reply
- Everyone the user is following can reply
Demo
Project Repo
Check out the repo here
My Journey
I have to say it wasn't easy learning all the necessary topics about Permit.io. It is definitely robust and full of features you would expect from an access control library.
But will say that one of the most frustrating but intriguing part was learning about integrating Permit.io on the frontend using the permit-fe-sdk.
I finally got it to work, and it's definitely one of my favorite parts of Permit.io. And I got a custom reusable context provider out of this to use for future projects using Permit.io. Custom Permission Context Provider
Overall, this was my first time using a third party access control service and from what I've seen it's very robust and complete.
In my head I keep comparing it with the ease of access control/authorization in Laravel. Which is great! It's one of the main reasons I love using Laravel even though NextJs is my favorite framework.
Using Permit.io for Authorization
The way I'm going to structure this section is by going through the development as if I'm developing Permishout from scratch. Letting you know what decisions need to be made while developing with Permit.io. This way, you'll be able to apply my journey into your own while developing your own apps with Permit.io.
Here are a bunch of things that I want to highlight:
- Planning and Setting Up
- Syncing Users
- Doing checks in the backend
- Using
permit-fe-sdkfor easily displaying things based on access control
Planning and Setting Up
User Stories
So first I want to identify user stories that I want for this app:
- User authentication.
- Authenticated users have
profile - All authenticated users will be able to
createanyshoutand also view it - The
shouter(poster/author) of ashoutwill be able todeleteandreplyto it. - Users with the role
adminwill be able todeleteanyshout - Authenticated users can follow/unfollow each other.
- In Twitter/X you can set which users will be able to reply to your Tweet/Post. I want to emulate this feature, as it will show off a lot of the capabilities in Permit.io. Here's how Twitter/X handles it:
- Everyone: everyone can reply to a
shout - People mentioned: only people
mentionedin ashoutcanreply. - People you follow: only people you follow can
reply. However to demonstrate "role derivations", I'm going to make it so people you follow can always reply to any of yourshouts. - Verified users only: For PermiShout, it's going to be people with
adminroles.
- Everyone: everyone can reply to a
Identifying Components
Now that we have our user stories, we can start identifying Permit.io components we are going to need.
Here's what I got:
- Roles:
adminResources:
profile
This resource will just be an anchor point of many of the functionalities I'm going to implement. It's not going to hold any attributes, but it will help me identify followers/following as well as role derivations. This will be explained later.shoutResource instance roles:
Just a little explanation on what instance roles are: Admin would be a Top Level Role, where authorizations on it will be applied to every instance of a resource. So if an Admin hasdeleteaccess to ashout, it will have that on every one.
An instance role, however, only applies to a single instance of a resource type. Here's how Permit.io structures it: resource:resource_key#role, meaning actions available to the role owner will only apply to resource with the key resource_key.
Here are the roles I have identified:
-
profile#ownerJust the owner of a profile. Just like Twitter having you complete some data before you can Tweet. profile#followerprofile#followed-
shout#shouter: canreplyanddeletea shout -
shout#replier: canreplyto ashoutThis will be an important role. Since I'm going to let people you follow have the ability toreply. I will derive this from the roleprofile#followed. shout#mentioned
Setting Up
There are a bunch of ways of setting this up. The README.md of my repo will explain it thoroughly, but I'll be brief here and just explain things that might be hard to grasp at first. We'll be using this permit object below. Remember to not use this on the frontend.
import { Permit } from "permitio";
const permit = new Permit({
  token: process.env.PERMIT_SDK_KEY,
  pdp: process.env.PERMIT_PDP_URL,
  apiUrl: process.env.PERMIT_API_URL || "https://api.permit.io",
});

export default permit;
Here's how you would programmatically create an admin role:
await permit.api.createRole({
    key: "admin",
    name: "Admin",
    permissions: ["shout:delete"],
  });
Just a note, here's the syntax for permissions: resource#action. This is basically saying, "Hey, create an admin role, which will be able to do delete on shouts. Since this is a top level role, it will apply to all instances of shouts.
Here's how you create a shout resource, along with its available instance roles:
await permit.api.createResource({
    key: "shout",
    name: "shout",
    actions: {
      delete: {},
      reply: {},
    },
    // Resource roles are used to define the permissions for each role on the resource
    roles: {
      shouter: {
        name: "Shouter",
        permissions: ["delete", "reply"],
      },
      replier: {
        name: "Replier",
        permissions: ["read", "reply"],
      },
      mentioned: {
        name: "Mentioned",
        permissions: ["read", "reply"],
      },
    },
As you can see I've created 3 unique roles here. Even though they have the same permissions, I've decided to separate them just in case I need to add more actions. Basically this code says "Hey, I want to create a resource called 'shout'. It can have 2 actions performed on it: delete and reply. A user can be a replier, mentioned, and a shouter. All 3 of which will be able to perform all available actions.
Here's how you would create a relationship between resources. This is very important. Role derivations are extremely powerful, and relations are needed for it.
await permit.api.resourceRelations.create("shout", {
    key: "parent",
    name: "Parent",
    subject_resource: "profile",
  });
The above snippet basically is saying, "Hey, create a relation for shout. The subject of this relationship is profile. I want profiles to be parents of shouts."
I got confused by this at first, so I'll try to explain it just in case you are too. Basically, imagine in your head what relationship between two resources do you want to have.
Here we have shout and profile. We'll I want to connect these as such that a profile will have many instances of shout. Let's go with "Profile is the parent of shouts".
subject_resourceis thenameoffirst parameter of create
Above is how it would translate to parameters.
IMPORANT: the
nameparameter can be anything. It doesn't even have to realistically describe the relationship (but it should). So I could've putownsas thenameparameter just the same.
Finally, creating resource derivations. I want EVERYONE who follows a user to be able to reply to all their shouts. So, let's derive profile#followed to shout#replier.
IMPORANT: relationships are integral to derivative relationships. The above rule I want to implement means that users will have the
shout#replierrole ONLY if he hasprofile#followedon a profile AND if that profile is a parent of theshoutin question.
Here's how I created that derivation in code:
await permit.api.resourceRoles.update("shout", "replier", {
    granted_to: {
      users_with_role: [
        {
          linked_by_relation: "parent",
          on_resource: "profile",
          role: "followed",
        },
      ],
    },
  });
Pretty simple. This is basically saying, "Hey, update this shout#replier role you created earlier and grant this role to users with the followed role on a profile. And only grant this replier role IF the profile has a parent relationship with the shout in question"
Syncing Users
Obviously permit.io doesn't manage your authentication. You will need a your own or a one from a third party. Like Clerk. However, this does not mean you can neglect managing users in permit.io.
Permit.io doesn't automatically know your users from your authentication system. Let's use Clerk for example as that's the library I'm using in my app.
After you've created your user in Clerk. You need also create them in Permit.io. You can do this in your login/signup logic, or you can create a separate process entirely. You know how in Twitter/X, after you sign up with your email or Google account, you still have to fill up things like username, name, etc? I'm going to take this opportunity to sync my users to permit.io
So, if a user has logged in using Clerk, and there isn't a matching entry in Permit.io, I'm going to force them to complete their profile.
Middleware in NextJs
export default clerkMiddleware(async (auth, req) => {
  const userId = (await auth()).userId;
  const { origin, pathname } = req.nextUrl;

  if (isProtectedRoute(req)) await auth.protect();

  // get project_id and environment_id
  const { project_id, environment_id } = await permitApi
    .get("/v2/api-key/scope")
    .then((res) => res.data);

  // check if user's profile is complete (based on their existence in Permit)
  let isProfileComplete = false;

  try {
    await permitApi.get(
      `/v2/facts/${project_id}/${environment_id}/users/${userId}`
    );
    isProfileComplete = true;
  } catch {
    isProfileComplete = false;
  }

  // if it's a public route, the user is signed in and the profile is complete, redirect to home
  if (isPublicRoute(req) && isProfileComplete)
    return NextResponse.redirect(`${origin}/home`);

  // if the user has not completed their profile and is trying to access a protected route, redirect to profile creation page
  if (
    !isProfileComplete &&
    isProtectedRoute(req) &&
    !pathname.startsWith("/profile/create")
  ) {
    return NextResponse.redirect(`${origin}/profile/create`);
  }
});
Here's a snippet of my middleware. This will run on most pages you go to on PermiShout. Basically, what it does is this:
- Get the currently logged in user's id using
(await auth()).userId - If the user has not even registered or signed in to Clerk, we can just protect our protected routes with
await auth.protect() - If the user has been authenticated (by clerk), we check if they have a matching entry in permit.io We check this by using the following code:
// note that `permitApi` is just an instance of `axios`
await permitApi.get(
      `/v2/facts/${project_id}/${environment_id}/users/${userId}`
);- If that api call succeeds, that means the user has a matching
userin Permit.io. We're good. The user can access any protected and non public-only routes. - IF the api call fails, that means the user has no matching
user. Permit.io doesn't know about this user. Now we force the user to go to the/profile/createroute. Where I will be forcing them to create an account.
Now after filling in some info, mainly username, name, country, and year born, we handle
SYNCING USERS
in the backend or a route handler as we're using NextJS.
const POST = async (request: NextRequest) => {
  const { userId } = getAuth(request) || "";
  const user = await clerkClient.users.getUser(userId || "");
  const { username, name, yearBorn, country } = await request.json();

  const { firstName, lastName } = splitName(name);
  await clerkClient.users.updateUser(userId || "", {
    firstName,
    lastName,
  });

  const { key: createdUser } = await permit.api.syncUser({
    key: userId || "",
    first_name: firstName,
    last_name: lastName,
    email: user?.emailAddresses[0].emailAddress || "",
    attributes: {
      username,
      yearBorn: parseInt(yearBorn),
      country,
    },
  });

  await permit.api.roleAssignments.assign({
    user: createdUser,
    role: "owner",
    resource_instance: `profile:profile_${createdUser}`,
    tenant: "default",
  });

  return NextResponse.json({
    success: true,
  });
};
I'll explain a little bit what's happening here:
- First, we get the currently authenticated user from Clerk (reminder that this is not a user from Permit.io -- That's what we're here for!)
- Then we get all the extra attributes we want to put in Permit.io
- Then--and Permit.io makes this REALLY easy for us-- we do
permit.api.syncUser. Remember to match the user key for Permit.io with theidof your Clerk user. You don't necessarily have to match it, but it will be infinitely HARDER if you don't. For example, if you decide to use only the first 10 characters of your Clerkid, you will need to get those first 10 every time you reference your Permit.io user.
You can also add email, first_name, and last_name. This will also be your opportunity to add any extra attributes.
Note: I said Permit.io makes this REALLY easy because you don't have to differentiate between an existing user and one that hasn't been created.
syncUserwill handle it. If it exists, it will overwrite it (sync it), and if it doesn't, it will create it.
- Now, since I have the
profileresource set up. I want to also associate each user with one. So that's where this line is for:
await permit.api.roleAssignments.assign({
    user: createdUser,
    role: "owner",
    resource_instance: `profile:profile_${createdUser}`,
    tenant: "default",
  });
What this code does two-fold. First, it creates a resource instance of profile with the key profile_${created_user_key}. Something important to remember is that resource_instance has to be a string in the format resource:instance_key.
Secondly, this code also assigns a role to user with the createdUser key and assigns a role owner to it (the profile instance).
So now, this particular user is officially the owner of their profile and all the access control that comes with that instance role on that particular profile as well as any role derivations.
I just wanted to mention this because making role assignment and instance created in one function is really neat!
Doing Checks
An important thing to note is that checks should always be done, as in you will need to query them. Permit.io doesn't know about your code and what you're doing, they just make writing the code for checking permissions way easier. Here's an example check I do whenever a user is deleting a shout.
const isUserAllowedToDelete = await permit.check(userId || "", "delete", {
      type: "shout",
      key: shout.key,
    });
Really simple isn't it? Instead of checking multiple ALL the scenarios where a user will be allowed to delete a particular shout, we just ask Permit.io! Here, it will return true if user is an admin or if user is the owner of the shout.
These two conditions are simple. But imagine if you have multiple unique ones you have to keep track of. Imagine if a user can also be a low level moderator to delete. You have to write that check and add them to ALL parts of your code who need the check.
Anyway, if isUserAllowedToDelete is true, we proceed to delete the instance using this:
await permit.api.resourceInstances.delete(`shout:${shout.key}`);Easy!
Using permit-fe-sdk
This is my favorite part. Honestly figuring out how the whole thing works felt great! Basically, this library helps you in the front end in determining whether or not a user is allowed to do something.
A similar concept exists in Laravel's blade directives:
@can('update', $post)
  Delete
@endcan
When Permit.io works with CASL, you can achieve the same function. But this time this is all happening in the frontend -- SAFELY!
Here are the steps. These were really hard for me to grasp and figure out, so hopefully I can explain it well:
- Install the necessary packages
npm install @casl/ability @casl/react permit-fe-sdk permitio- Create a POST route handler where the
permit-fe-sdkwill be calling for permission checks.
Based on my own research, you want to create POST routes if you're trying to get bulk permissions. Meaning, you check for many permissions at once.
Here's mine (I'll be focusing on bulk permissions):
export async function POST(req: NextRequest) {
  try {
    const { searchParams } = req.nextUrl;
    const userId = searchParams.get("user");

    const { resourcesAndActions } = await req.json();

    if (!userId) {
      return NextResponse.json(
        { error: "No userId provided." },
        { status: 400 }
      );
    }

    const checkPermissions = async (resourceAndAction: {
      resource: string;
      action: string;
      userAttributes?: PermishoutUserAttributes;
      resourceAttributes?: Record<string, any>;
    }) => {
      const { resource, action, userAttributes, resourceAttributes } =
        resourceAndAction;

      const [resourceType, resourceKey] = resource.split(":");

      return permit.check(
        {
          key: userId,
          attributes: userAttributes,
        },
        action,
        {
          type: resourceType,
          key: resourceKey,
          attributes: resourceAttributes,
          tenant: "default",
        }
      );
    };

    const permittedList = await Promise.all(
      resourcesAndActions.map(checkPermissions)
    );

    return NextResponse.json({ permittedList }, { status: 200 });
  } catch (error) {
    console.error("Permission check error:", error);
    return NextResponse.json(
      { error: "Internal Server Error" },
      { status: 500 }
    );
  }
}
I find it useful to mention the end goal of this route. It's basically to return an object with permittedList as an array of booleans. Now you could easily just return a list of 100 trues and you'd pass all the check. But that's not what we're here for right?
We'll get to the frontend a little later, but basically we want to map resourcesAndActions to permission results. This variable will be an array of resources and actions queried from the frontend.
Each array element will have resouce, action, userAttributes and resourceAttributes. You'll want to accurately test for these permissions.
IMPORTANT: notice that I split the resource and resource key? This is because you supply them from the frontend in this format
resource:resource_key. And you get it in this route as is, so you have to manually split it and then put the resource intypeand the key inkey. This stumped me for a while.
Okay so based on all the actions and resources we do permit.check so it will return the boolean array in the correct order.
IMPORTANT: Remember that order is very very important. You can't just be randomly doing
permitionList.reverse(). The frontend wouldn't be accurate anymore in determining permissions.
Okay so we have return that list of booleans. Now what?
- Setup the frontend to be able to use that route
const defaultActionResources: ActionResourceSchema[] = [
  {
    action: "delete",
    resource: "shout",
  },
];

export const AbilityContext = createContext<
  | {
      ability: Ability<AbilityTuple, MongoQuery>;
      setActionResources: React.Dispatch<
        React.SetStateAction<ActionResourceSchema[]>
      >;
    }
  | undefined
>(undefined);

export const useAbility = () => {
  const ability = useContext(AbilityContext);
  if (!ability) {
    throw new Error("useAbility must be used within an AbilityProvider");
  }
  return ability;
};

export const AbilityLoader = ({ children }: { children: ReactNode }) => {
  const { isSignedIn, user } = useUser();
  const [ability, setAbility] = useState<Ability<AbilityTuple, MongoQuery>>(
    new Ability()
  );
  const [actionResources, setActionResources] = useState<
    ActionResourceSchema[]
  >(defaultActionResources);

  useEffect(() => {
    (async () => {
      // reset it first
      setAbility(new Ability());

      if (isSignedIn) {
        const permit = Permit({
          loggedInUser: user.id,
          backendUrl: "/api/permit/check",
        });

        permit?.reset();

        const allActionResources = [
          ...actionResources,
          ...defaultActionResources,
        ];

        await permit.loadLocalStateBulk(allActionResources);

        const caslConfig = permitState.getCaslJson();

        const caslAbility =
          caslConfig && caslConfig.length
            ? new Ability(caslConfig)
            : new Ability();
        setAbility(caslAbility);
      }
    })();
  }, [isSignedIn, user, actionResources]);

  return (
    <AbilityContext.Provider value={{ ability, setActionResources }}>
      {children}
    </AbilityContext.Provider>
  );
};
Basically we want to provide an Ability object throughout the whole app. I'm using Context.Provider for this.
Remember actions and resources from the route? That maps directly to the ones in this context provider.
IMPORTANT: The check you will be able to do directly corresponds to what you supply to
await permit.loadLocalStateBulk(allActionResources). If you supply it with one pair of resource and action, it will not be able to accurately check for others.
I have created a local state called actionResources, which will cause the useEffect to update and load the local state with the latest permission.
I have some default permissions I will always want to check: admin permissions. That's why I have some default action resources.
IMPORTANT: Make sure to reset it also. I've found problems if I just call
loadLocalStateBulkover and over.
That's it! Just make sure you update the ability variable with the most recent permissions. Now you can use useAbility to get that ability and perform checks.
- Actually using it in the frontend
Let's focus on shout permissions. Admin will always be able to
deleteshouts so let's put that in the default array.
Now, shouts need fine-grained control as there are roles and permissions exclusive to single instances of shout.
Here's how how handled it. Remember that I exposed setActionResources in that provider and that if that array is updated, it will update local permissions. We'll that's what I'm going to do in the home page.
const { setActionResources } = useAbility();


useEffect(() => {
    const shoutActions: ActionResourceSchema[] = shouts.flatMap((shout) =>
    [
      { action: "reply", resource: `shout:${shout.key}` },
      { action: "delete", resource: `shout:${shout.key}` },
    ]);

    setActionResources(shoutActions);
  }, [shouts, setActionResources]);
That's it. This will update all our permission in the frontend so we can use them. In each shout I want to have a delete button for users who have the permission. I can use the Can component from CASL:
import { Can } from "@casl/react";

<Can I="delete" a={`shout:${shout.key}`} ability={ability}>
 <Button
  style={{ padding: 0 }}
  variant="ghost"
  className="flex items-center gap-1 text-red-400 hover:text-red-500 ml-auto"
  onClick={(e) => {
   e.stopPropagation();
   if (setShoutToDeleteKey) setShoutToDeleteKey(shout.key);
  }}
 >
   <Trash size={16} />
   <span>Delete</span>
  </Button>
</Can>
That's it. That's all I need to do. Just supply it with the action and the resource as well as the ability object I mentioned.
You can also do a standard inline check like this:
import { permitState } from "permit-fe-sdk";
const canReply =
    shout.replyMode === ShoutReplyType.EVERYONE ||
    permitState?.check("reply", `shout:${shout.key}`, {});
Conclusion
Sorry for the tangent. I was super excited getting this working on my own, especially the front end sdk. Hopefully they will keep working on it because I love Laravel blade directives. And this is exactly that in React!
